
When it comes to remotely accessing another computer, no other app works as flawlessly as TeamViewer. TeamViewer is mostly used to solve technical issues, as you can also use it to share your screen. That’s why not many people keep it installed because it is not used frequently.
There are many ways to uninstall TeamViewer on Mac, and you can use a third-party application as well. If you don’t know how to do so, then worry not because in this guide, we will walk you through step-by-step on how to uninstall TeamViewer on Mac.
Let’s get started.
How to Uninstall TeamViewer on Mac
Before you begin uninstalling TeamViewer, make sure it is closed along with all of its processes. You can quit TeamViewer by follow these steps:
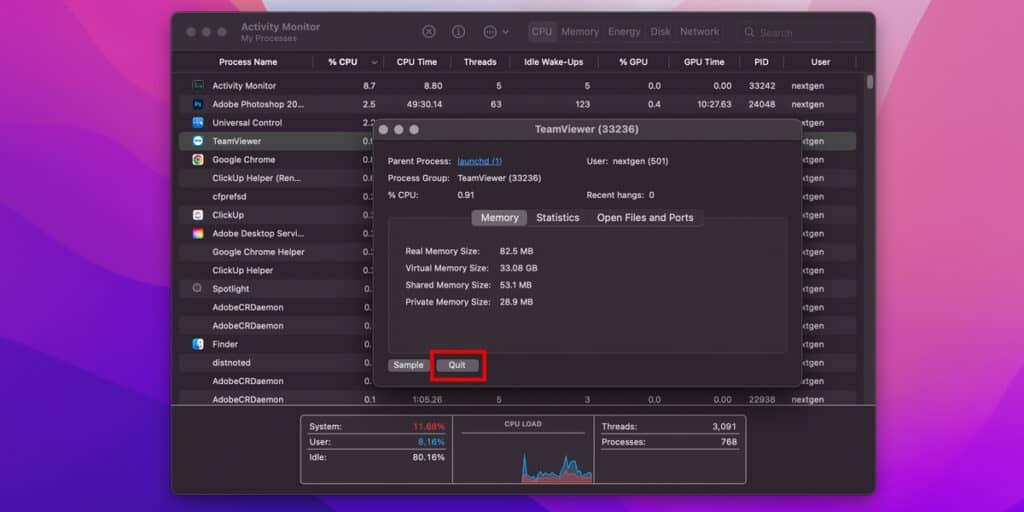
- Press Command + Spacebar to bring up Spotlight, now search and open Activity Monitor.
- At the top of the window, select All Processes from the drop-down menu.
- Now look for process(es) associated with TeamViewer. Select them and click on Quit Process.
- Click Quit in the pop-up dialog box.
You can also press Command + Option + Escape and select TeamViewer to Force Quit it in case it’s frozen.
Now that TeamViewer is not running, you can continue with the uninstallation process.
1. Using TeamViewer Uninstaller
TeamViewer has an uninstall feature that makes things really easy. The uninstall option is available in the settings, and you can use it to completely delete TeamViewer along with its files. This method is highly recommended because it works the best. Just follow these steps:
- Open TeamViewer from the Applications folder.
- Head over to the Preferences from the menu bar. You can also press the Command + ⌘ to open Preferences.
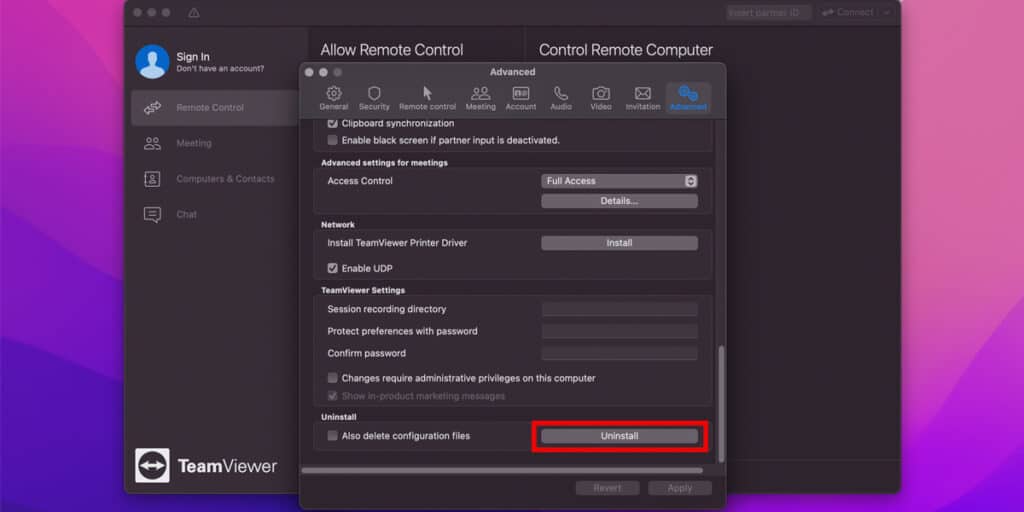
- Once you’re in the Preferences, click on the Advanced tab.
- Scroll down until you see the Uninstall button at the bottom. Mark the Also delete configuration files checkbox next to it, and click on it.
- Once you have clicked Uninstall, TeamViewer will start deleting all the files attached to it. You will see a message that says “TeamViewer uninstall in progress”.
That’s it. Now TeamViewer is completely uninstalled from your Mac. If for some reason this method does not work for you, and TeamViewer throws an error, then you can move on to the next method.
Related:
How to Uninstall TurboTax On Mac
2. Using the Terminal
Using the Terminal can look a bit complex at first. However, it is fairly simple and in fact quicker when used correctly. For instance, you only have to write a single line of code to uninstall TeamViewer on Mac.
Before we continue, keep in mind that the Terminal is quite a powerful tool. You can control your entire Mac from it, and that includes deleting everything. A simple mistake can erase your data, and once you have deleted something from the Terminal, it’s gone forever because it does not send anything to the Trash. To delete TeamViewer using the Terminal, follow these steps:
- Launch the Terminal from the dock.
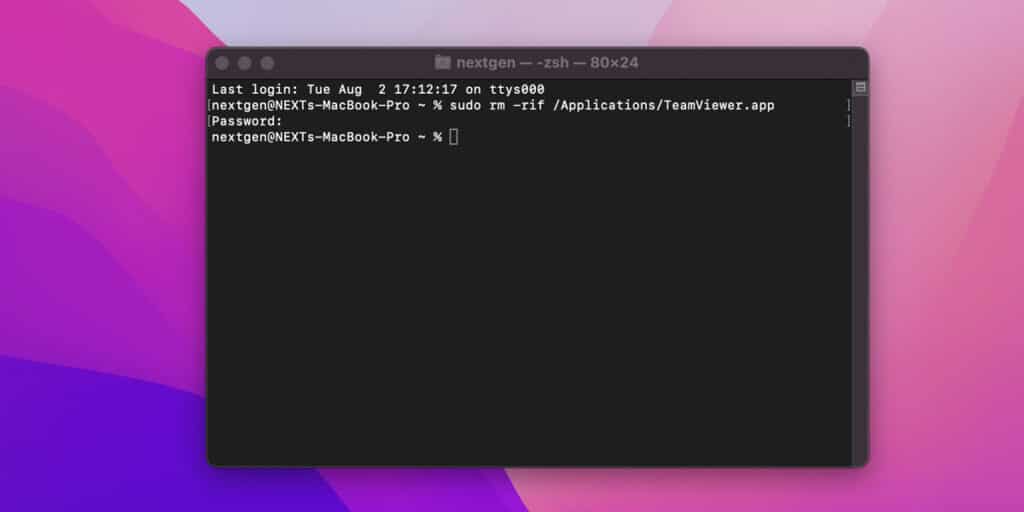
- In the Terminal window, type this command sudo rm -rif /Applications/TeamViewer.app exactly as written and hit Return.
- Now macOS will ask you to enter your administrator password. Enter the password you use to login to your Mac. The Terminal window will not show you the password as you type so don’t worry about that.
- Again make sure that the command you wrote is exactly as the one we’ve mentioned. Now finally hit Return and TeamViewer will be uninstalled from your Mac.
Head over to the Applications folder to check if TeamViewer has successfully uninstalled. If for some reason it hasn’t, then move on to the next method.
3. Using the Finder
Other than the Terminal, you can also use the Finder to uninstall TeamViewer on Mac. The Finder is great when it comes to organizing your Mac. You can use it to view your applications, photos, documents and all other files. Similarly, you can also use it to delete applications from your Mac to keep it organized.
Here’s how you can use the Finder to uninstall TeamViewer on Mac:
- Press the Command + N keys to open a new Finder window.
- Navigate to the Applications folder. You can find it under the Favorites section in the side-window.
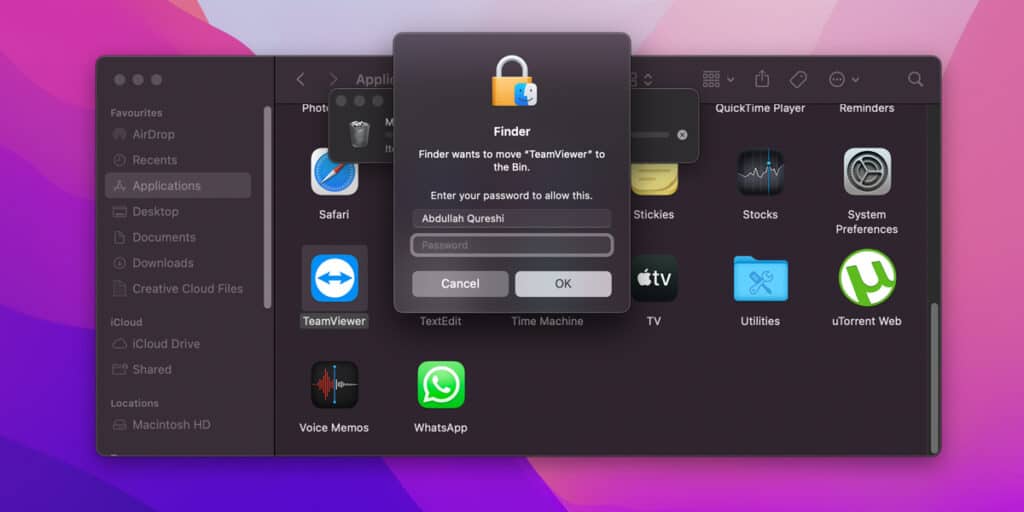
- Now look for TeamViewer in the Applications folder and right-click on it.
- Click Move to Trash from the drop-down menu. macOS might ask you to enter your administrator password. Enter your password and click OK.
- Once TeamViewer has been moved to Trash, right-click on the Trash icon on the dock and select Empty Trash.
Alternatively, you can also use the Launchpad to move TeamViewer to the Trash. Just open Launchpad by clicking the rocket icon on the dock, and right-click on TeamViewer then select Move to Trash.
That’s it, now TeamViewer has been successfully uninstalled from your Mac.
Related:
How to Uninstall Cinema 4D on Mac
Permanently Remove the Residual Files
If you have used the terminal or finder method to uninstall TeamViewer on mac, then its residual caches, logs, and configuration files are left on your Mac. To completely wipe TeamViewer, you need to remove them as well.
These files are stored on both your hard disk and your Home folder. The hard disk files will be deleted for all local users, while the files on the Home folder will only be removed from the local account you’re using.
Here’s how you can permanently remove these residual files from both folders.
1. Remove from Hard Disk
- On the Finder, click on Go and select Go to Folder from the drop-down menu.
- Type the path: /Library and hit the Return key. It’s the path of the top level library on the hard disk.
- Once you are in the top level folder, it’s time to do some searching. Look for items with the name TeamViewer in the following locations:
/Library
/Library/Caches
/Library/Preferences
/Library/Application Support
/Library/LaunchAgents
/Library/LaunchDaemons
/Library/PreferencePanes
/Library/StartupItems
You can also type TeamViewer in the Search box to look for these files.
- Once you have found the files and folders with the TeamViewer name, right-click on them and select the Move to Trash option.
2. Remove from the Home Folder
Similarly, follow these steps to remove the residual files from the Home folder.
- On the Finder, click on Go and select Go to Folder from the drop-down menu.
- Type the path: ~/Library and hit the Return key. It’s the Home folder’s path. Take note that you add the tilde, otherwise it will take you to the top level library of the hard disk.
- Once you’re in the Home folder, again look for files and folders with the TeamViewer name in the same following locations:
~/Library
~/Library/Caches
~/Library/Preferences
~/Library/Application Support
~/Library/LaunchAgents
~/Library/LaunchDaemons
~/Library/PreferencePanes
~/Library/StartupItems
Similarly, you can also type TeamViewer in the Search box to look for these files
- Select the files with the TeamViewer name, right-click on them and click on the Move to Trash option.
Once you’ve removed all the residual caches, logs, and files from both the hard disk and the Home folder, make sure to right-click on the Trash icon and select Empty Trash to permanently delete them.
Related:
How to Uninstall NetBeans on Mac
Use Osx Uninstaller to Permanently Remove TeamViewer from Mac
When it comes to third-party uninstallers, Osx uninstaller is one of the best as you can use it to completely wipe different apps from your Mac. This can save you a lot of time and effort as manually removing TeamViewer can be a bit of a stretch.
You can download the free trial of Osx Uninstaller from this site. Once it is downloaded, you can install it by double-clicking the setup file, after that, follow these steps to uninstall TeamViewer on mac.
- First of all, quit the TeamViewer app by following the steps we have discussed above.
- Open Launchpad by clicking the rocket icon on the Dock.
- In the Launchpad window, search for Osx Uninstaller.
- In the Osx Uninstaller window, look for TeamViewer and click on the Run Analysis button.
- Now Osx Uninstaller will search your entire Mac for files related to TeamViewer.
- Now click Complete Uninstall and then click Yes to permanently uninstall TeamViewer.
After following these steps, TeamViewer and its configuration files will be completely wiped from your Mac.
How to Stop TeamViewer from Launching on Startup
Maybe instead of completely uninstalling it from your Mac, you just want TeamViewer to stop launching on every startup. It is annoying to see TeamViewer pop up every time you open your Mac. So, here’s how you can stop TeamViewer from launching on startup:
- Open TeamViewer from the Applications folder.
- Head over to the Preferences from the menu bar. You can also press the Command + ⌘ to open Preferences.
- Once you’re in the Preferences, click on the General Settings tab.
- Below your display name, you will find a Start TeamViewer with System checkbox. Make sure it is unchecked.
- Finally, click on the Apply button to save changes.
Exit TeamViewer and restart your Mac to check if it launches automatically or not. Hopefully it won’t because you have turned off the settings.