
It can be difficult to maintain multiple partitions. For instance, one of your partitions might run low on space, while the other one might be completely free. In such a case, you can merge partitions on mac to get a single disk with more space.
Well, the process is easier than it sounds and it only involves a few simple steps. So, in this guide, let’s go over how to merge partitions on Mac.
How to Merge Partitions on Mac
Before you start, you need to make sure that all of your data is backed up safely because merging partitions always results in a data loss.
However, if you are not worried about losing your data, here’s how you can merge partitions on Mac:
- First of all, open Launchpad from the Dock, and type Disk Utility in the search bar.
- Double-click on the Disk Utility icon.
- Once you are in the Disk Utility, click on View then select Show All Devices from the drop-down menu to view the storage disk structure in the sidebar.
- Select the disk whose partitions you want to merge, and click on the Partition button on the toolbar.
- An Apple File System Space Sharing dialog box will appear, click on the Partition button.
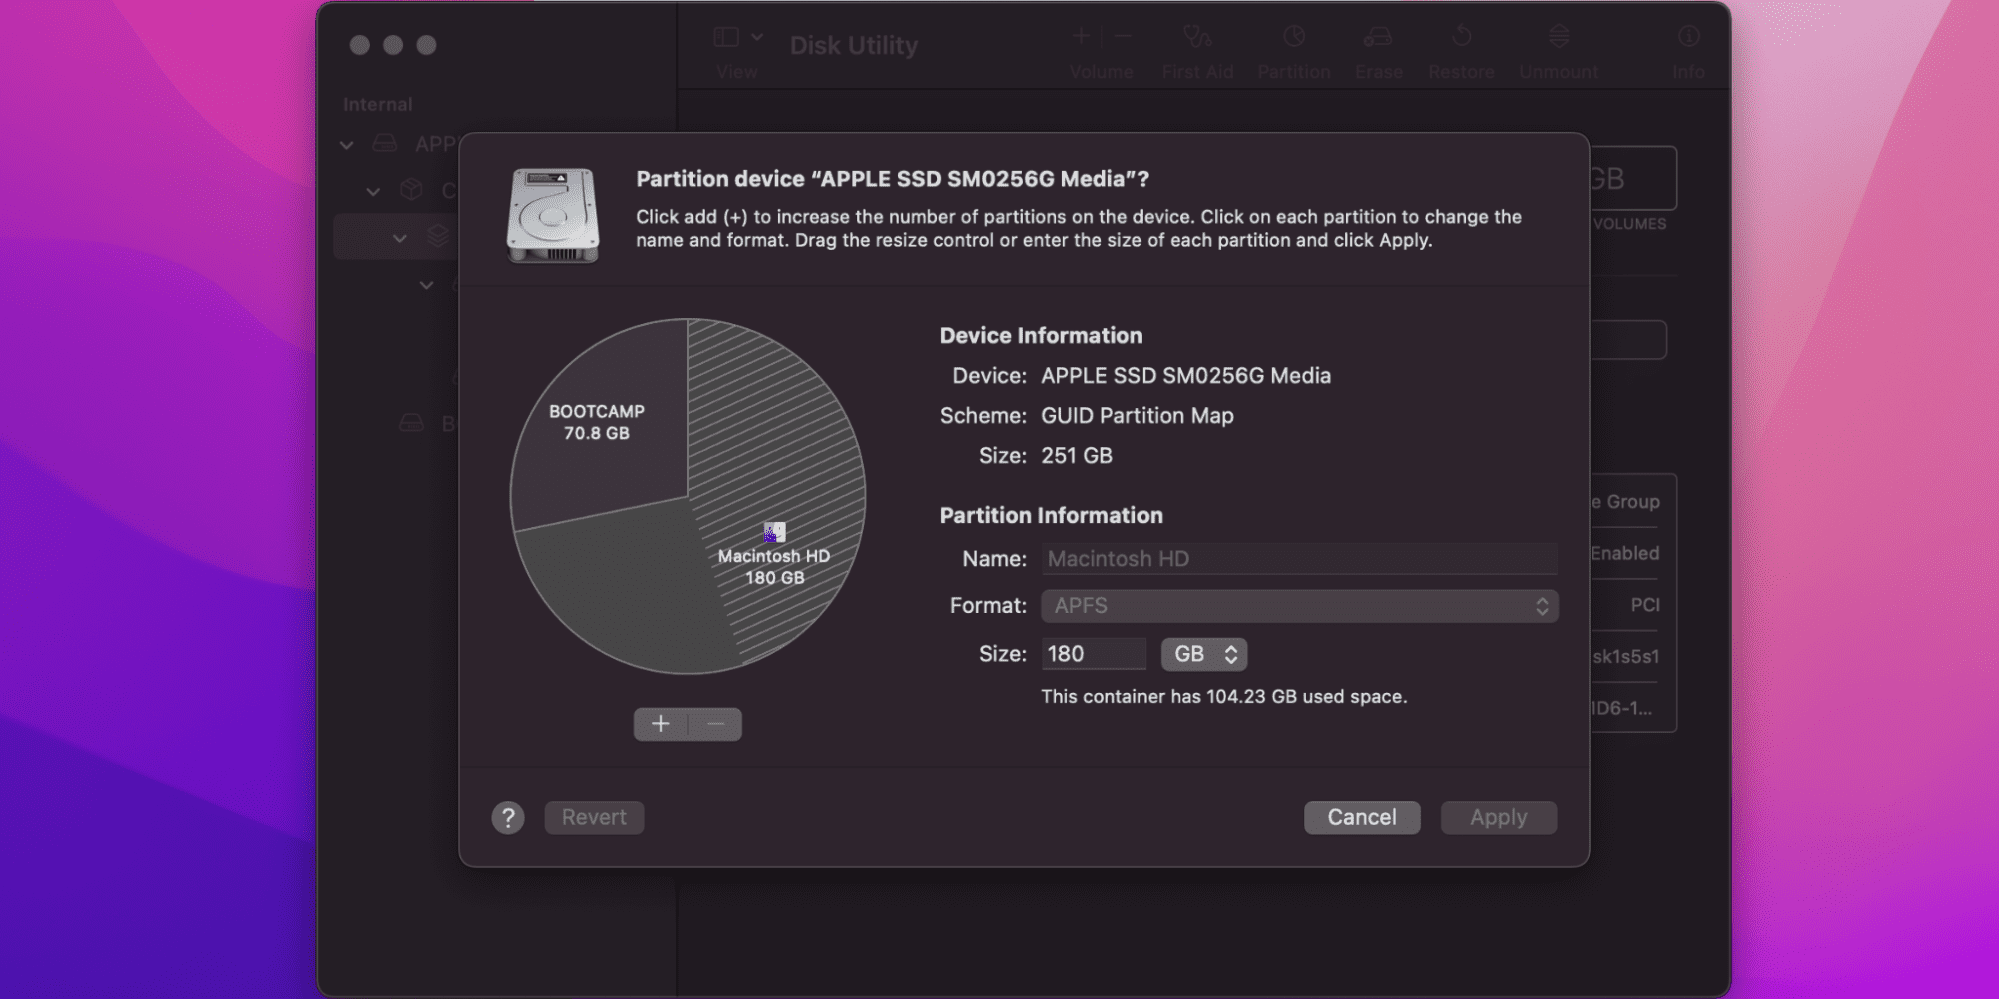
- The partition screen will open, it has a pie chart on it representing the multiple partitions of your disk.
- Select the partition that has to be merged with the other partition on the pie chart, and click on the (-) Remove button.
- The two partitions will be merged into a single disk. Click on the Apply button.
- Click on Partition in the Partition Device dialog box.
- Finally, click on Done.
That’s it, now you have successfully merged partitions on your Mac. Remember, the partition you merged will be completely wiped and its space will be allocated to the other partition.
Related:
How to Disable Mouse Acceleration on Mac
How to Backup Your Files
If your partitions have important data that you don’t want to lose, then you must back them up before merging them.
There are a couple ways to create a backup of your files on Mac. You can:
- Use Time Machine
- Manually copy-paste data to an external drive
These methods require an external drive. So, you need to prepare it first. Make sure the drive has enough space to store the backup, and it is formatted in the right way. Here’s how:
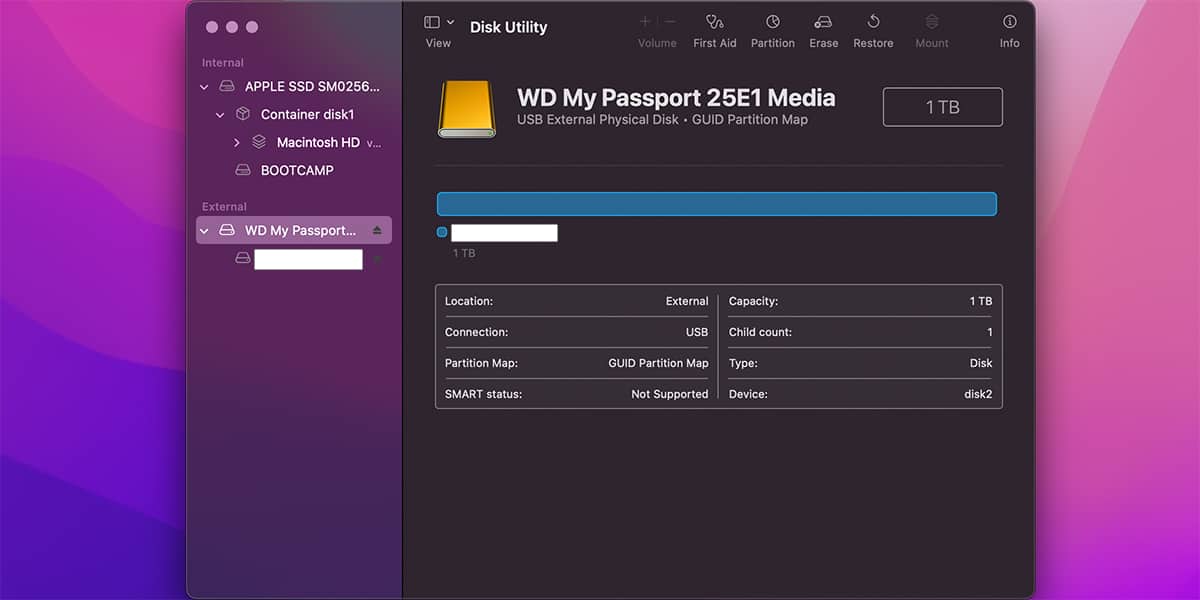
- First, connect an external hard drive like a USB or a Thunderbolt drive to your Mac.
- Launch Disk Utility by following the steps we have discussed above.
- Select your external drive from the sidebar. It will be visible under the External section.
- Click on the Erase button.
- Type the name of your backup drive, and select a format. We recommend that you select the Mac OS Extended (Journaled) format.
- Click on Erase.
- Once the drive is completely wiped, click on Done.
1. Backup Using Time Machine
Time Machine is a built-in backup application that comes with macOS. You can use it to automatically back up your files and restore them later.
Once your external drive is ready, follow these steps to back up your Mac using Time Machine.
- Make sure the external drive is connected.
- Click on the Apple menu on the top-left corner of your screen.
- Select System Preferences from the drop-down menu.
- Click on the Time Machine icon. You can also search for it in the search bar.
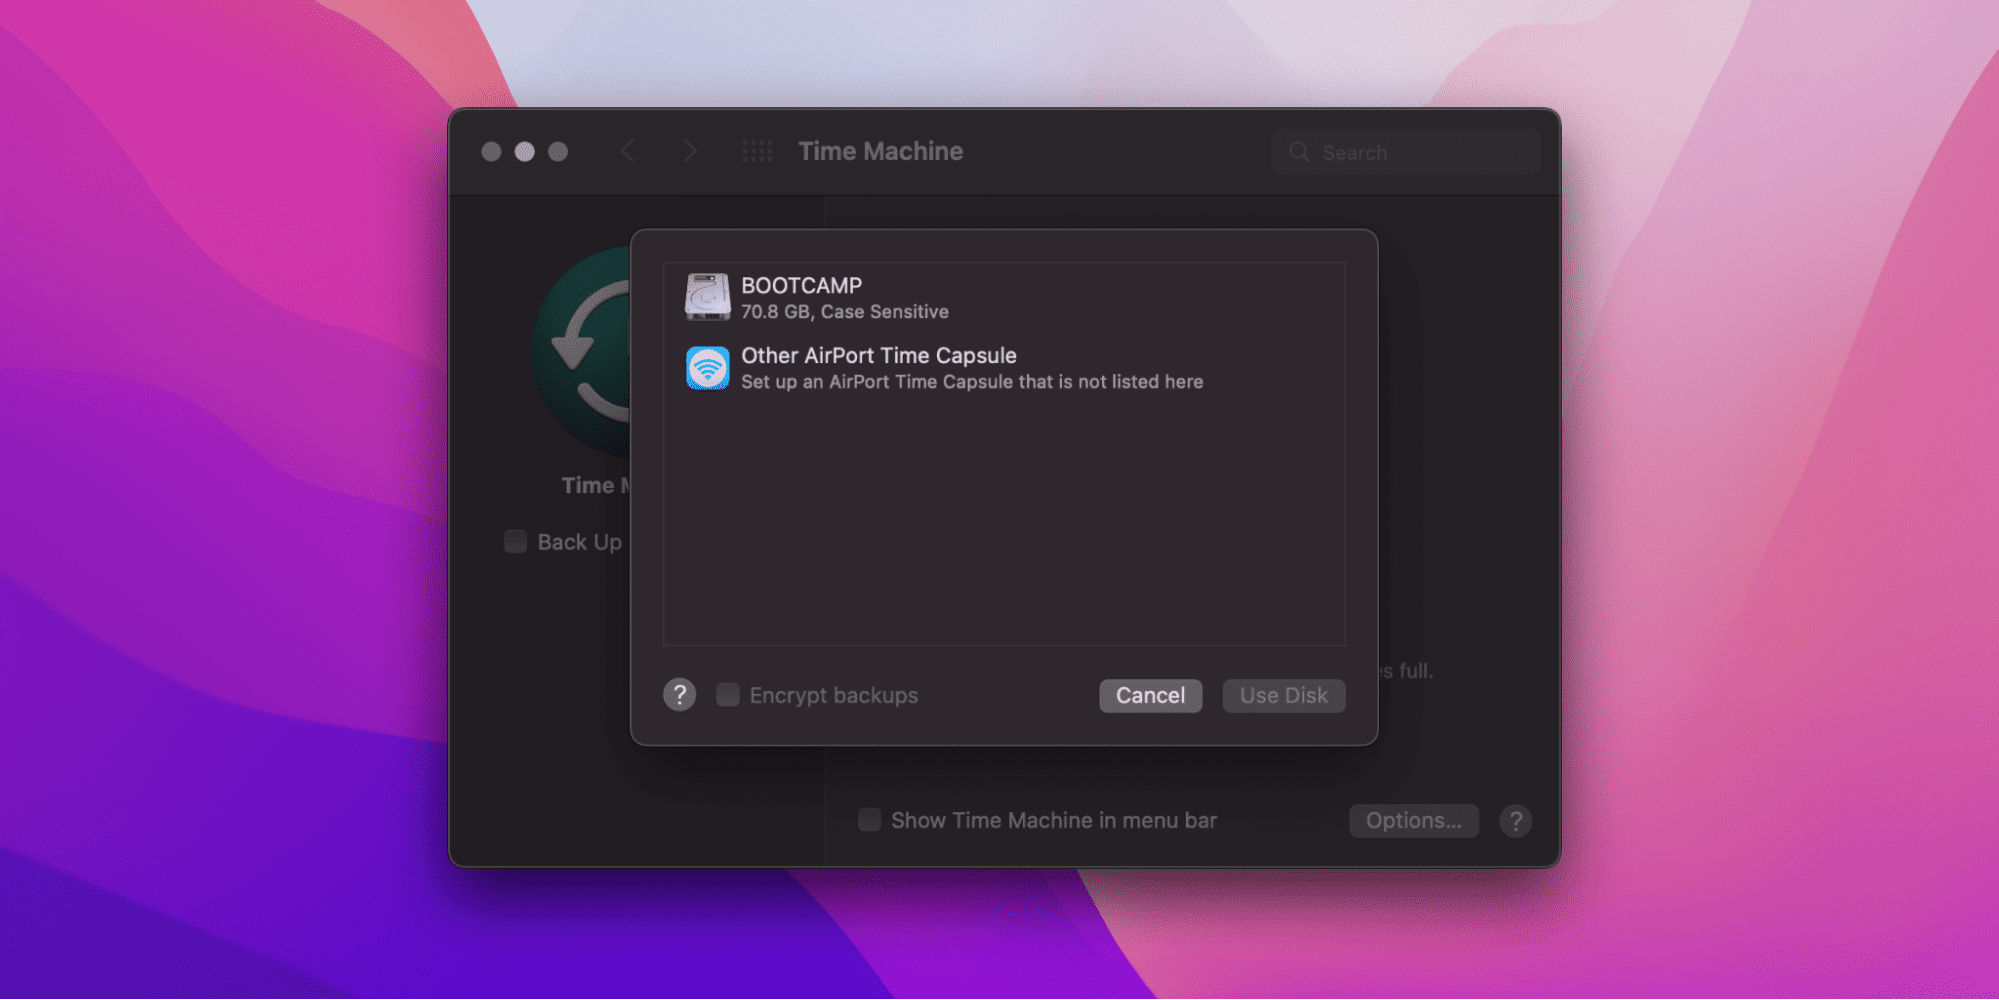
- In the Time Machine window, click on Select Backup Disk
- Select the disk you want to use as a Time Machine backup, and click on Use Disk.
- Time Machine will begin the backup automatically. Check the Back Up Automatically option so Time Machine can make period backups on its own.
- You can also select Back Up Now from the Time Machine menu if you want to start a backup manually.
If you want to exclude particular items from your backup, then follow these steps:
- Open Time Machine by following the steps we have discussed above.
- Click on Options.
- Click on the (+) Add button, and select the items you want to exclude from the backup.
- Click on Save.
That’s it, now Time Machine will back up your data and you can restore it whenever you want.
Related:
How to Turn Off Time Machine on Mac
2. Manually Copy-Paste Data to an External Drive
This method is highly recommended if you only want to create a backup of your partitions. As the name suggests, you can simply store a copy of your partition in an external drive, and restore your data from it once the partitions are merged.
Here’s how:
- Make sure the external drive is connected.
- Open Finder from the Dock or press the Command + N keys.
- Navigate to the partition you want to merge, and select all of its files and folders. You can select multiple files at once by pressing the Command key.
- Once the files and folders are selected, press the Command + C keys to copy them.
- Open another Finder window by pressing the Command + N keys.
- Head over to the external drive. It should be visible under the Devices section on the sidebar.
- Once you are in the external drive, press the Command + P keys to paste your files.
That’s it, now your data has been copied to an external drive. After successfully merging the partitions, you can use this drive to restore the lost data.
How to Restore Time Machine Backup
Similar to backing up, restoring data using Time Machine is also simple. Here’s how:
- Make sure the Time Machine backup disk is connected.
- Click on the Apple menu on the top-left corner of your screen.
- Select System Preferences from the drop-down menu.
- Click on the Time Machine icon. You can also search for it in the search bar.
- In the Time Machine window, mark the Show Time Machine in menu bar option.
- Click on the Time Machine icon in the menu bar and select Enter Time Machine.
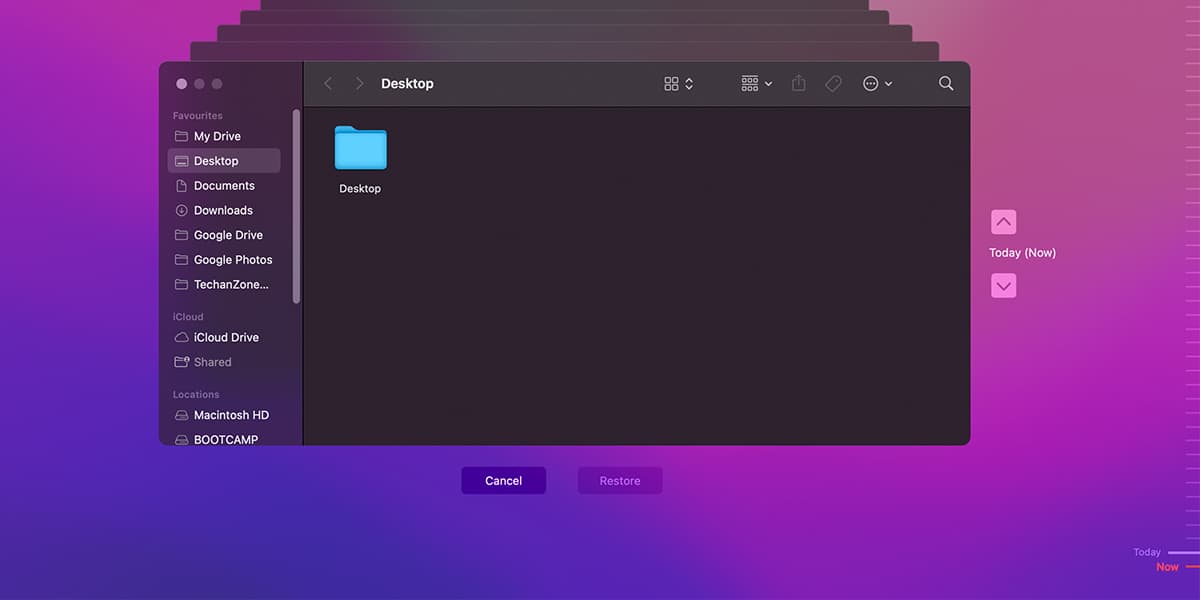
- Use the timeline and arrows to navigate through the Time Machine backups.
- Select the items you want to restore, and click Restore.
Now your deleted files will be restored without any data loss.