Time Machine is a great feature that comes built-in with macOS. It is used to automatically make backups of your data to an external drive. This way, if you ever want to reinstall your macOS, you don’t have to worry about losing your data.
Having a complete backup of your data is always the safe way. However, you may want to turn off Time Machine on mac if you don’t have an external drive, or if you backup your data manually. So, in this guide, we will walk you through a couple of methods to turn off Time Machine on Mac.
Let’s dive right in.
Turn Off Time Machine on mac Using the App
Usually, if you’re working on your own Mac, then it’s best to use this method because it does not involve working with the Terminal. This method also makes sure that your files will no longer be backed up automatically. Here’s how:

- On the top-left corner of your screen, right-click on the Apple icon and choose System Preferences from the drop-down menu.
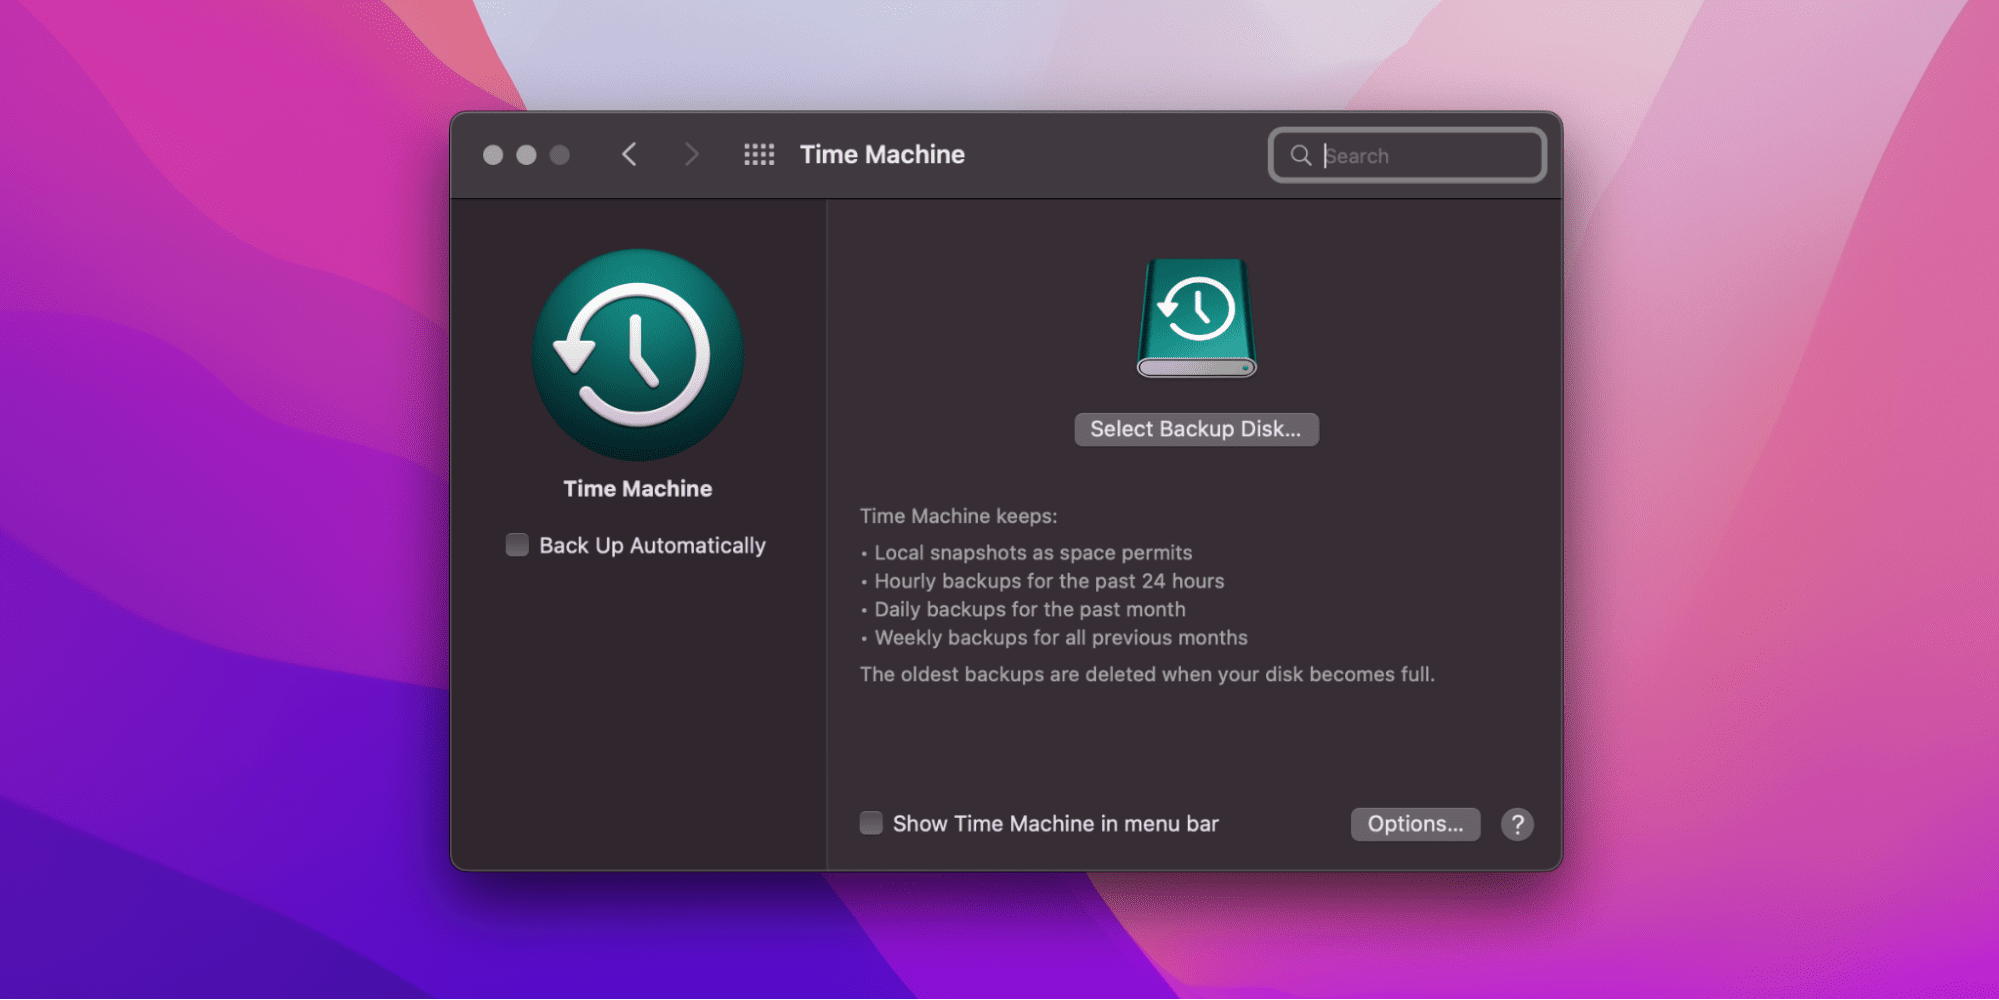
- In the System Preferences window, launch the Time Machine. It is at the bottom of the window. You can also look for it using the search bar.
- Turn off Time Machine by unchecking the Back Up Automatically option on the left-hand window.
That’s it. Now Time Machine is turned off and it will not backup your data automatically. If you want to free up your external drive and delete old backups, then you need to do it manually.
Delete Backups From the App
Here’s how you can delete your old Time Machine backups from the Time Machine app:
- Launch the Time Machine by searching it on Spotlight.
- Click on Enter Time Machine.
- Here you will find all of your backups.
- Click on the ellipsis above the folder contents.
- Click on Delete Backup.
- Enter your admin password to confirm
This method works well. However, it’s quite tedious as you need to delete each folder one-by-one.
Related:
How to Fix Mds_stores Process Consuming High CPU On Mac
Delete Backups From the Finder
The Finder is really useful when it comes to organizing your Mac. It allows you to view your applications, documents, photos, and all other files. From Finder, you can delete whatever you want to keep your Mac organized.
Here’s how you can delete your Time Machine backups from the Finder:
- Launch a Finder window by pressing the Command + N keys.
- Navigate to the folder where your Time Machine backup is stored. If it’s an external drive, then you can find it under the External section of the Finder sidebar.
- Head over to the Backups.backupdb folder to look at your backup files.
- Select all of your files by pressing the Command + A keys.
- Right-click and select Delete from the drop-down menu.
That’s it. Now all of your Time Machine backups will be deleted and you will have an empty external drive. But, you still need to delete the backups from the Trash. Right-click on the Trash icon on the dock and select Empty Trash from the menu.
Turn Off Time Machine on Mac Using the Terminal
If you’re working on a remote Mac, then you may want to use the Terminal to turn off Time Machine on mac. The Terminal may look scary to use at first. However, once you get used to it, you can use it to do pretty much everything very quickly. It is a powerful tool that gives you access to control your entire Mac from it.
You can use it to wipe everything, and once you have deleted something from the Terminal, you can never get it back because it does not move to the Trash. Similarly, you can also use the Terminal to turn off Time Machine on mac. Here’s how:

- Press the Command + Space keys to bring up Spotlight search.
- Type Terminal on the dialog box and press Return.
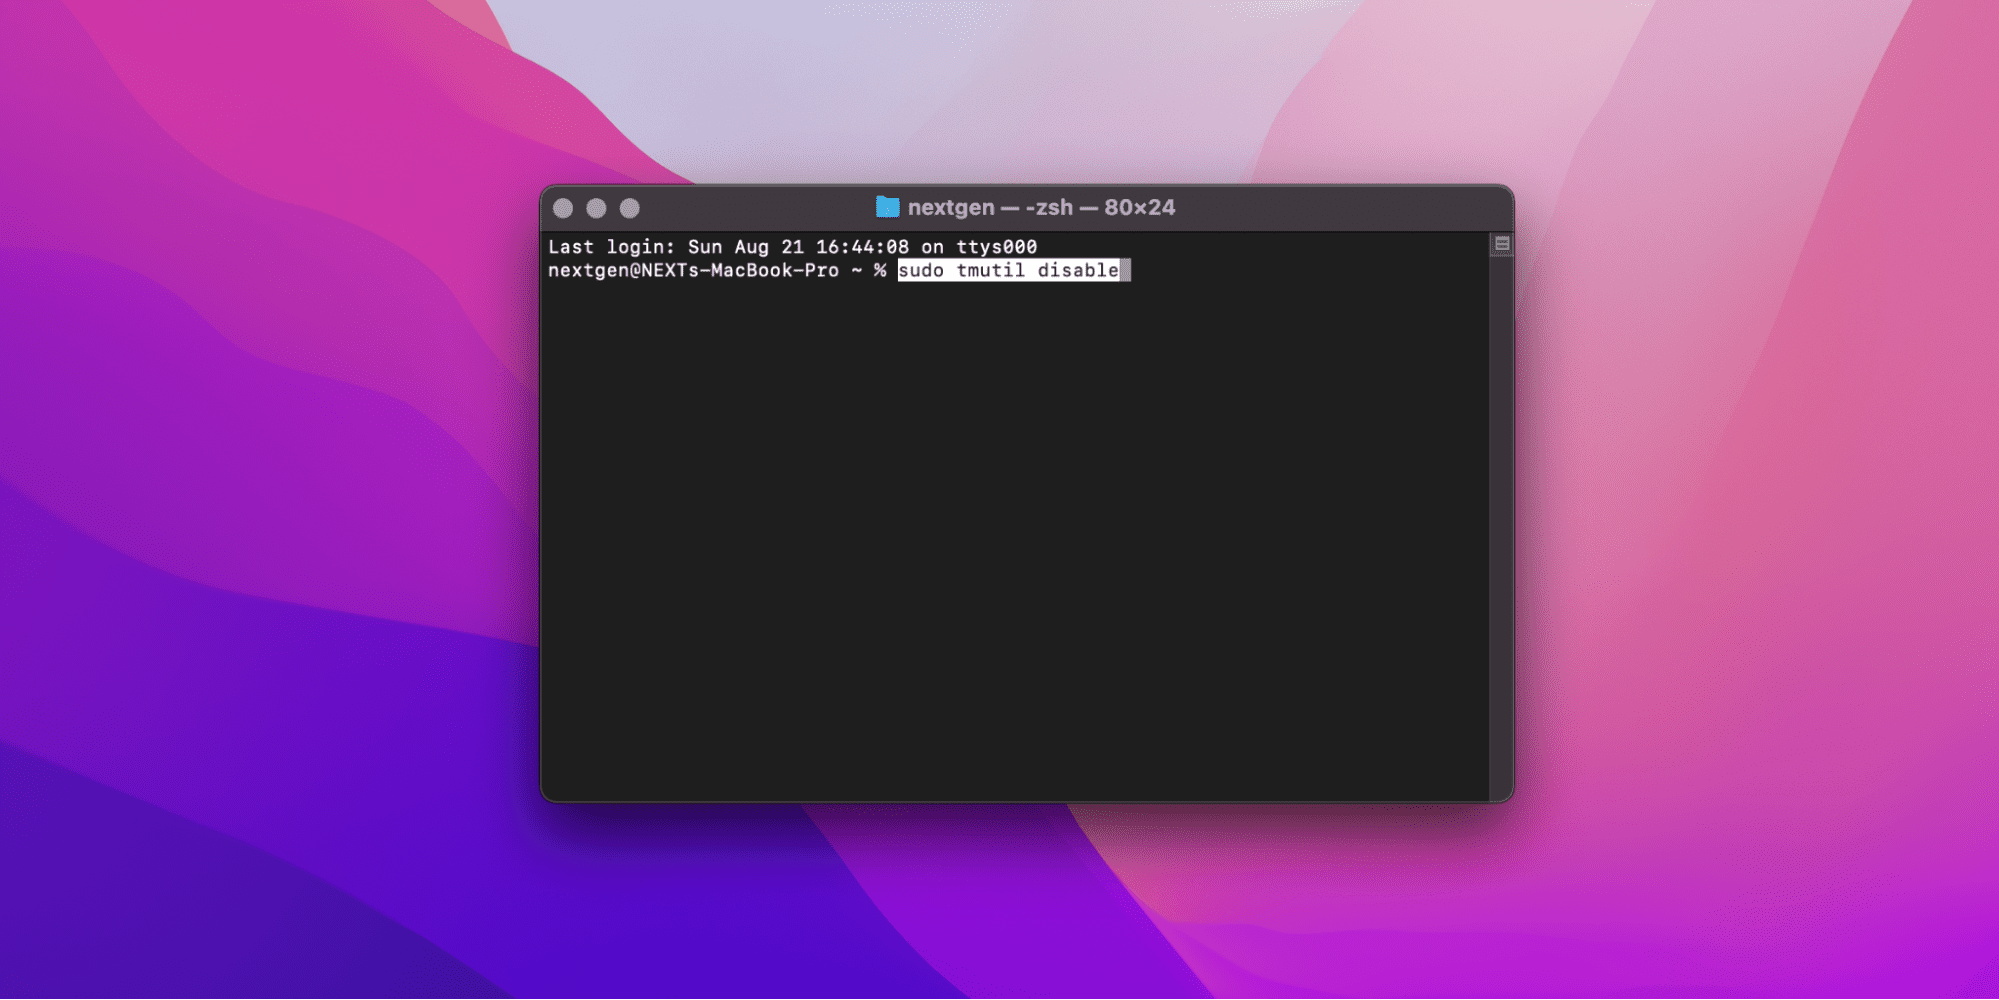
- Make sure your backup drive is plugged in before you proceed. Once you are in the Terminal window, type the sudo tmutil disable command and hit Return.
- Since it is a sudo command, you will be asked to enter your admin password. While typing the password, your key presses will not be visible. Don’t worry about that, just enter your password and press Return.
After following these steps, Time Machine will be turned off on your Mac.
Delete Backups From the Terminal
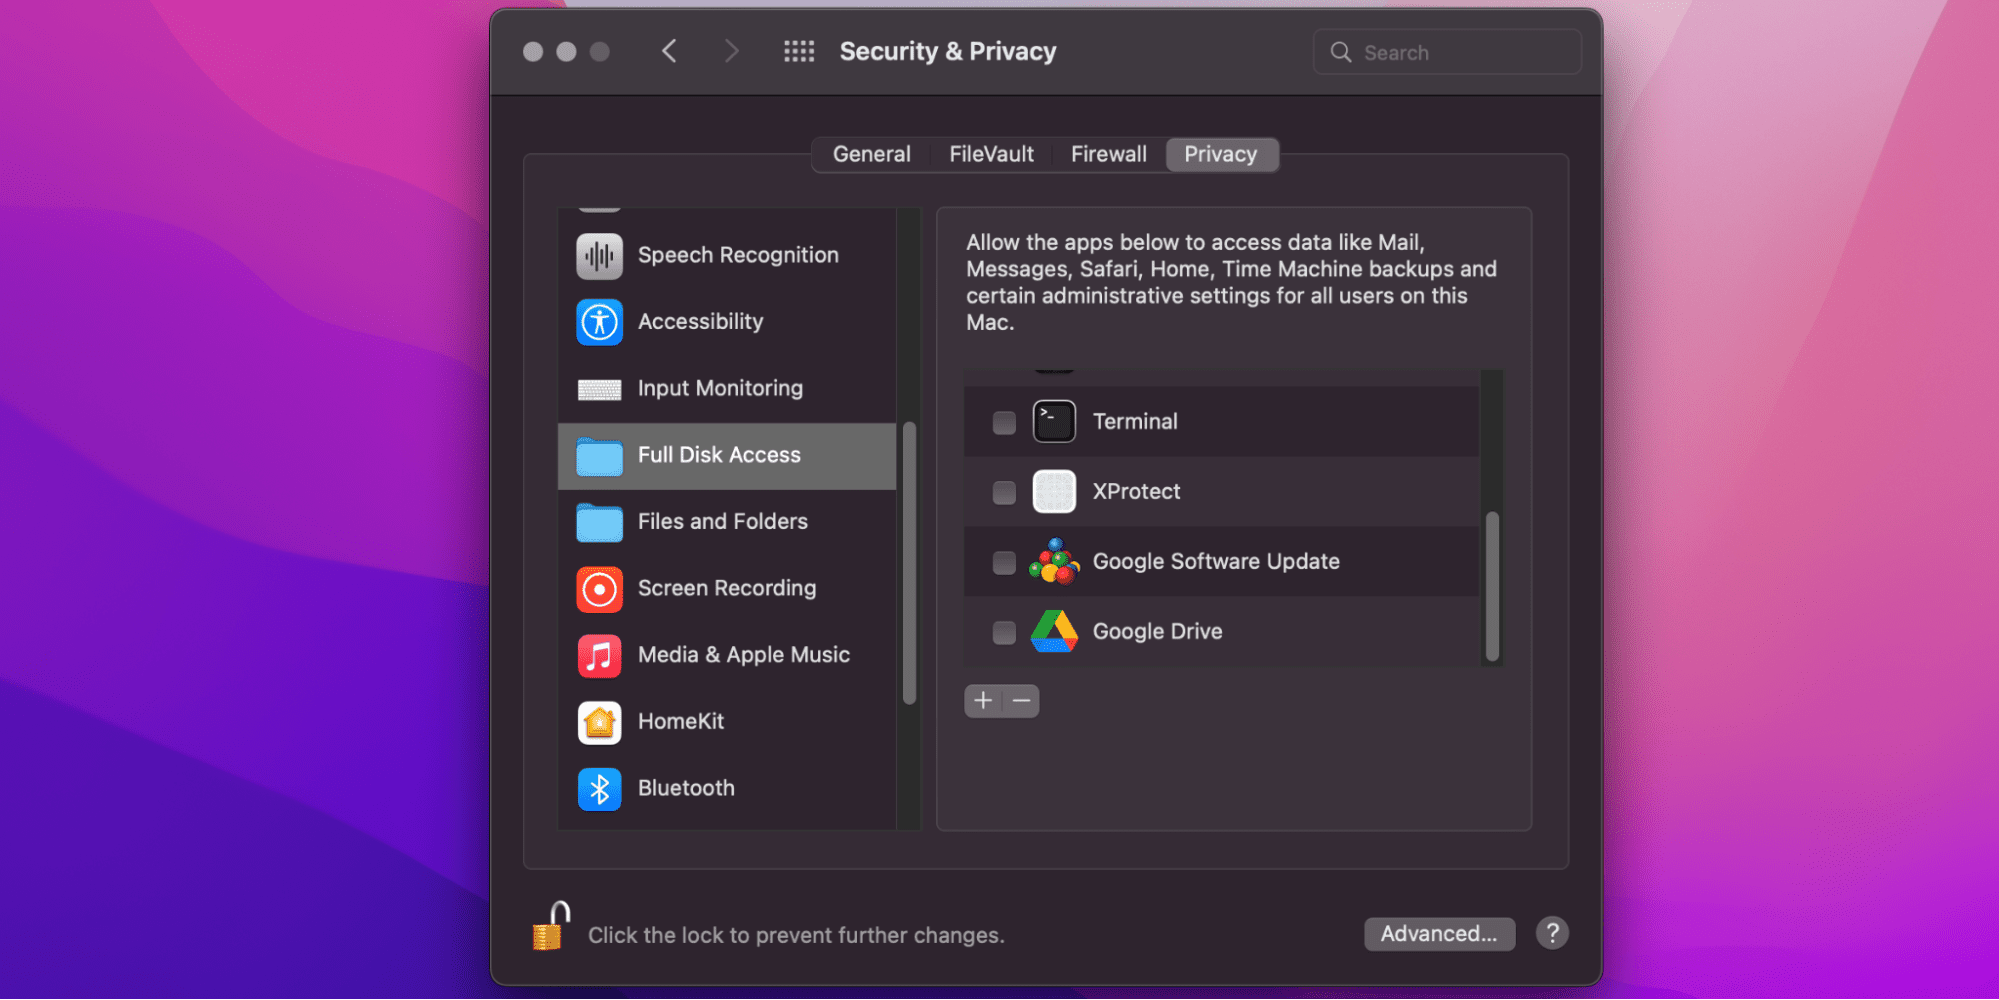
Similarly, you can use the Terminal to go through all of your Time Machine backups and delete whichever ones you want. But before you do so, you need to grant Full Disk Access to the Terminal app. Here’s how:

- On the top-left corner of your screen, right-click on the Apple icon and choose System Preferences from the drop-down menu.
- In the System Preferences window, open Security & Privacy. You can also look for it using the search bar.
- Head over to the Privacy tab.
- On the left-hand panel, select Full Disk Access.
- Click the padlock icon on the bottom-left corner of the screen to make changes. Enter your password and click Unlock.
- Click on the “+” (Add) button.
- Click on Applications, then select the Terminal.
- Click on Open.
- That’s it, now Terminal will have Full Disk Access.
- Finally, Click the padlock icon again to prevent further changes.
Now that you have granted Full Disk Access to the Terminal app, here’s how you can use it to delete Time Machine backups:

- Launch Terminal by following the steps we have discussed above.
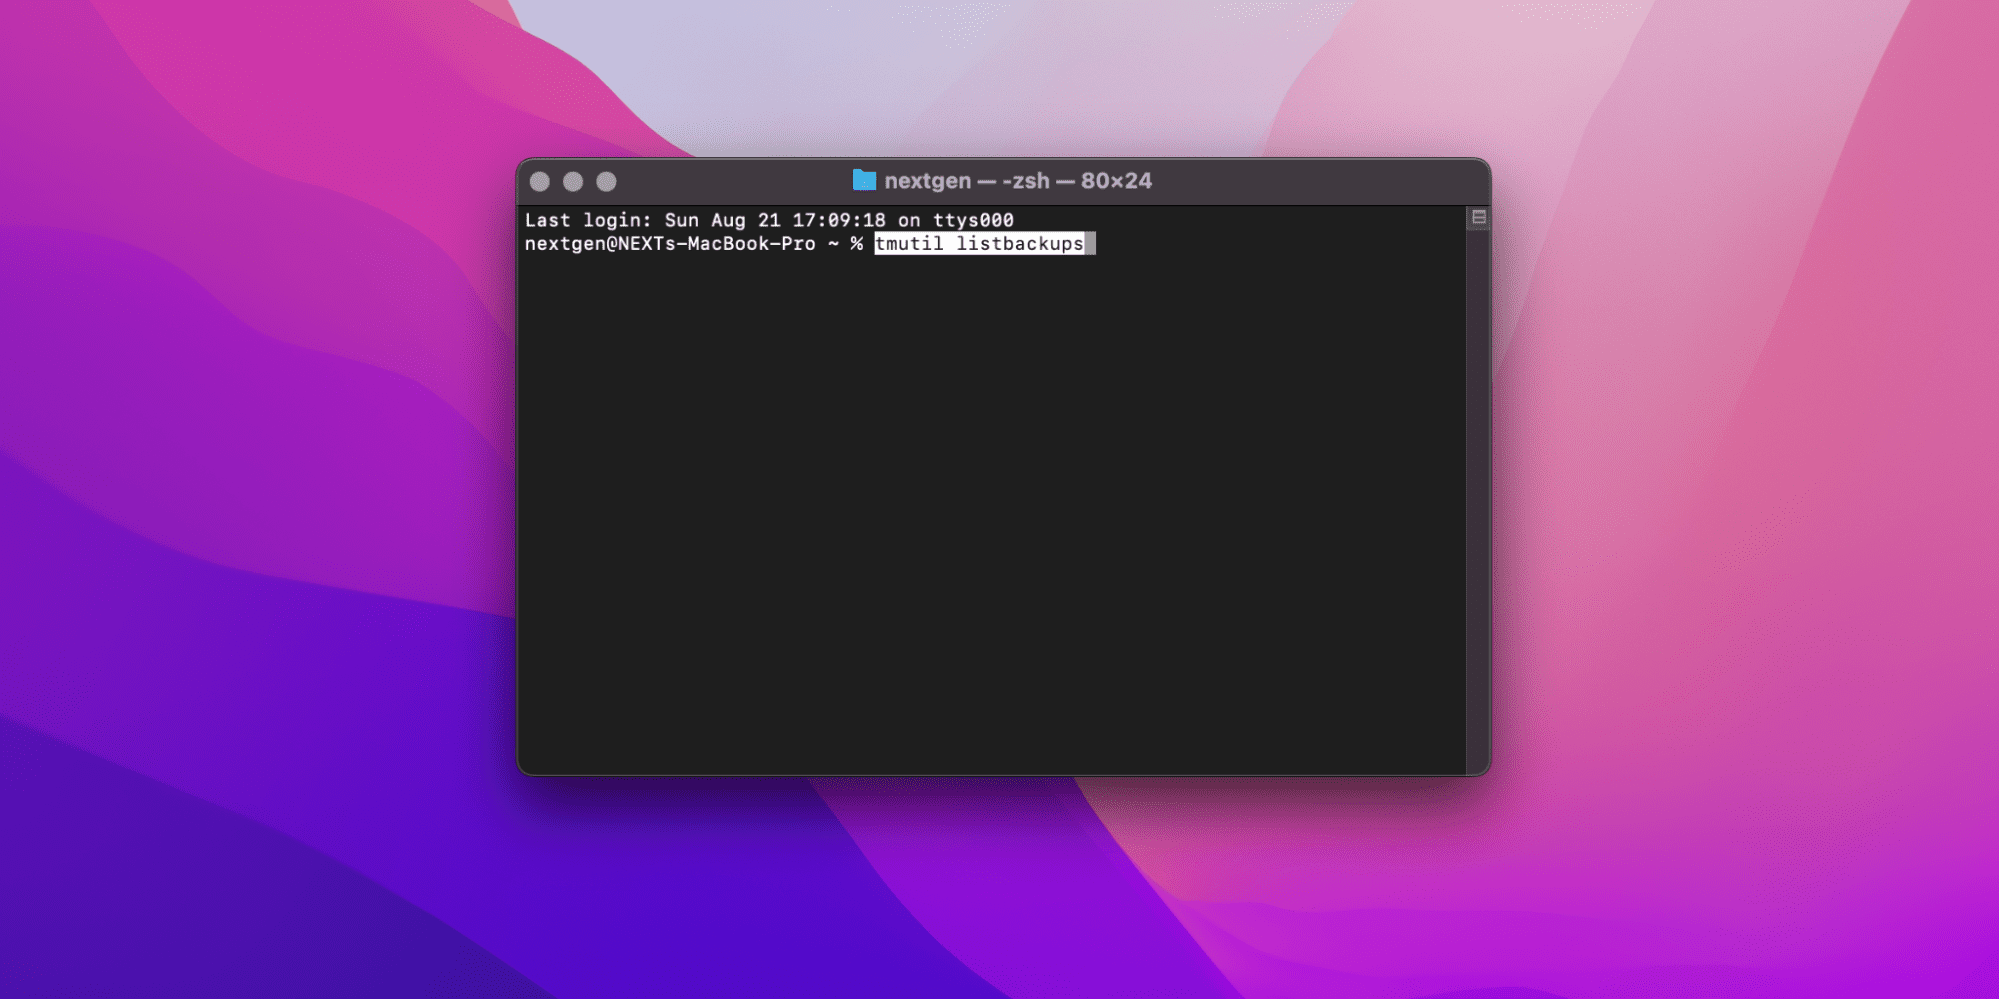
- Type the command tmutil listbackups and hit Return.
- The Terminal will show you a list of old backups. Look for the backup you want to delete by going over their date and time.
- Type the sudo tmutil delete command followed by the path of the backup
- Hit Return.
By following these steps, you can delete whichever backup you want from the Terminal.
Related:
Should I Turn On FileVault Disk Encryption on Mac
Disabling Time Machine App Icon on Menu Bar
If you are annoyed by the Time Machine icon on the menu bar, then worry not because you can easily disable it by following these steps:
- Right-click on the Time Machine icon on the menu bar and select Open Time Machine Preferences from the drop-down menu.
- Once you are in the Time Machine window, unmark the Show Time Machine in menu bar option on the bottom of the window.
That’s it, now you will not see the Time Machine app icon on the menu bar.
Backing Up Your Mac Without the Time Machine
Keeping regular backups of your important files is always recommended. This way, you can never lose them. Once you have turned off Time Machine backups on your Mac, you can still backup your data manually.
Prepare Your External Drive
This method is best if you want to backup specific files and folders. First, you need an external drive that has enough space to store your files. Next, you need to make sure it is formatted the right way. Remember, this will wipe everything on your external drive. To continue, follow these steps:
- First, connect an external hard drive like a USB or a Thunderbolt drive to your Mac.
- Launch Disk Utility by following the steps we have discussed above.
- Select your external drive from the sidebar. It will be visible under the External section.
- Click on the Erase button.
- Type the name of your backup drive, and select a format. We recommend that you select the Mac OS Extended (Journaled) format.
- Click on Erase.
- Once the drive is completely wiped, click on Done
Copy and Paste Your Files
Now that your external drive is ready to store backups, here’s how you can back up your files to it without using Time Machine:
- Make sure the external drive is connected.
- Open Finder from the Dock or press the Command + N keys.
- Navigate to the partition you want to merge, and select all of its files and folders. You can select multiple files at once by pressing the Command key.
- Once the files and folders are selected, press the Command + C keys to copy them.
- Open another Finder window by pressing the Command + N keys.
- Head over to the external drive. It should be visible under the Devices section on the sidebar.
- Once you are in the external drive, press the Command + P keys to paste your files.
How to Speed Up Time Machine Backup Time
If you are using Time Machine to back up your Mac for the first time, then expect it to take a lot of time. After that, the next backups should be fairly quicker because Time Machine will only backup the changes after the first backup.
However, if Time Machine is taking too long to back up every time, then:
- You should upgrade to macOS Big Sur or later because if your backup disk is APFS-formatted, then Time Machine performance will be improved a lot.
- Use your backup disk just for backups. Antivirus might continuously scan your backup disk and slow it down. So, make sure no other app is using your backup disk.
- Make sure your backup disk is connected directly to your Mac. If you backup over a network, then a slow Internet can significantly affect your backup speeds.
