
Struggling with date, time, or time zone settings on your Mac? Explore various methods, including using Terminal for quick adjustments. Ensure accurate timekeeping for email stamps and file management.
All of the methods give the same result. But, if you want to ditch the typical method, we have got you a solution – Mac Terminal. This blog covers how to change date and time on Mac using Terminal, changing time zones, and much more.
So, let’s dive in!
How to Change Date and Time on Mac Using Terminal
There are many ways to change the date and time on a Mac, but one of the easiest methods is by using the Mac Terminal. The best thing about using the Terminal is that it is not like the typical method and performs the task quickly and efficiently.
Here’s how you can change date and time on Mac using Terminal:
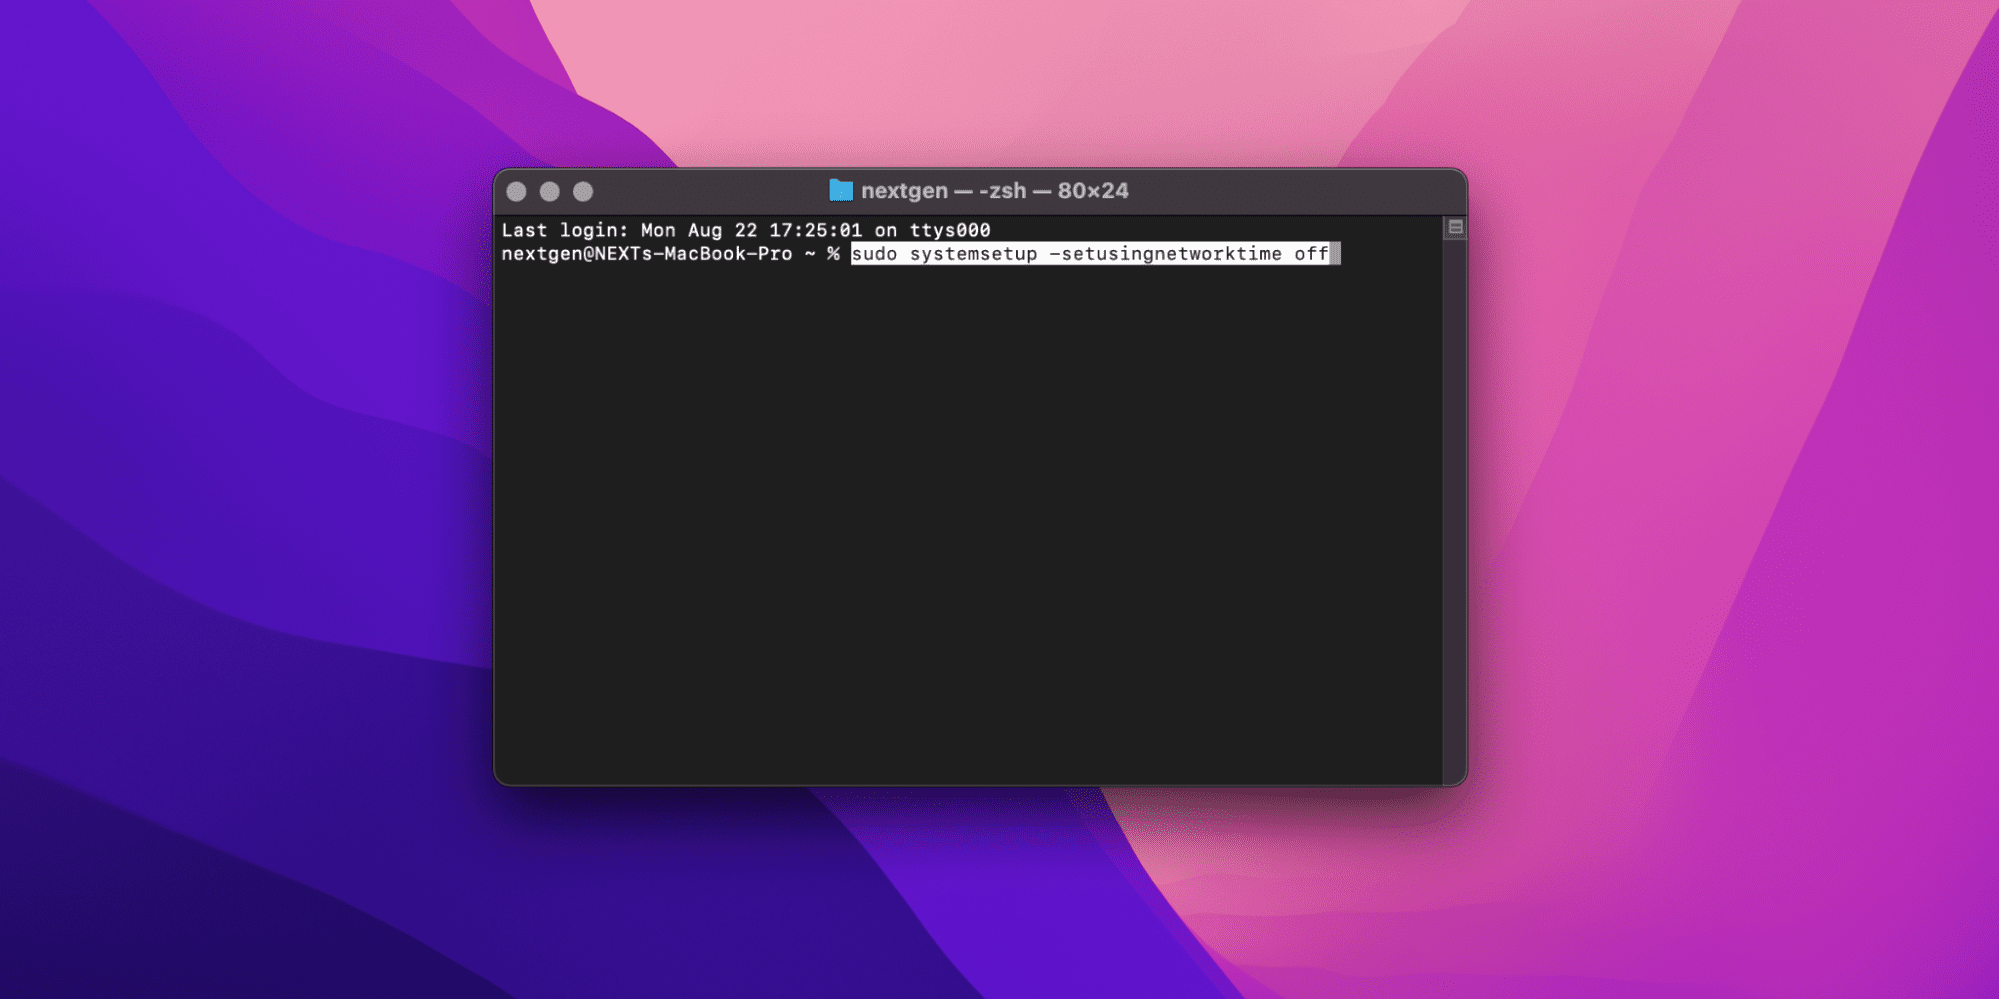
- Launch the Mac Terminal.
- Type sudo systemsetup -setusingnetworktime off to turn using network time off.
- Workout the date/time format for your computer using [MM][DD][HH][MM][YY]. This means that August 8th, 2022, 10:00 am will be written as 0808100022. Remember, it will use the 24-hour format.
- Type the command sudo date [MM][DD][HH][MM][YY] in the mac terminal using the conversion you’ve made in the step above.
- To check if you were successful in setting the date and time, type Date.
If the accurate date and time are displayed, you’ve succeeded in changing date and time using the Mac Terminal.
How to Change the Date and Time on Mac
If you don’t want to use the Mac Terminal, you can either set the date and time on your Mac automatically with a network time server or manually. To do so, follow the steps below:
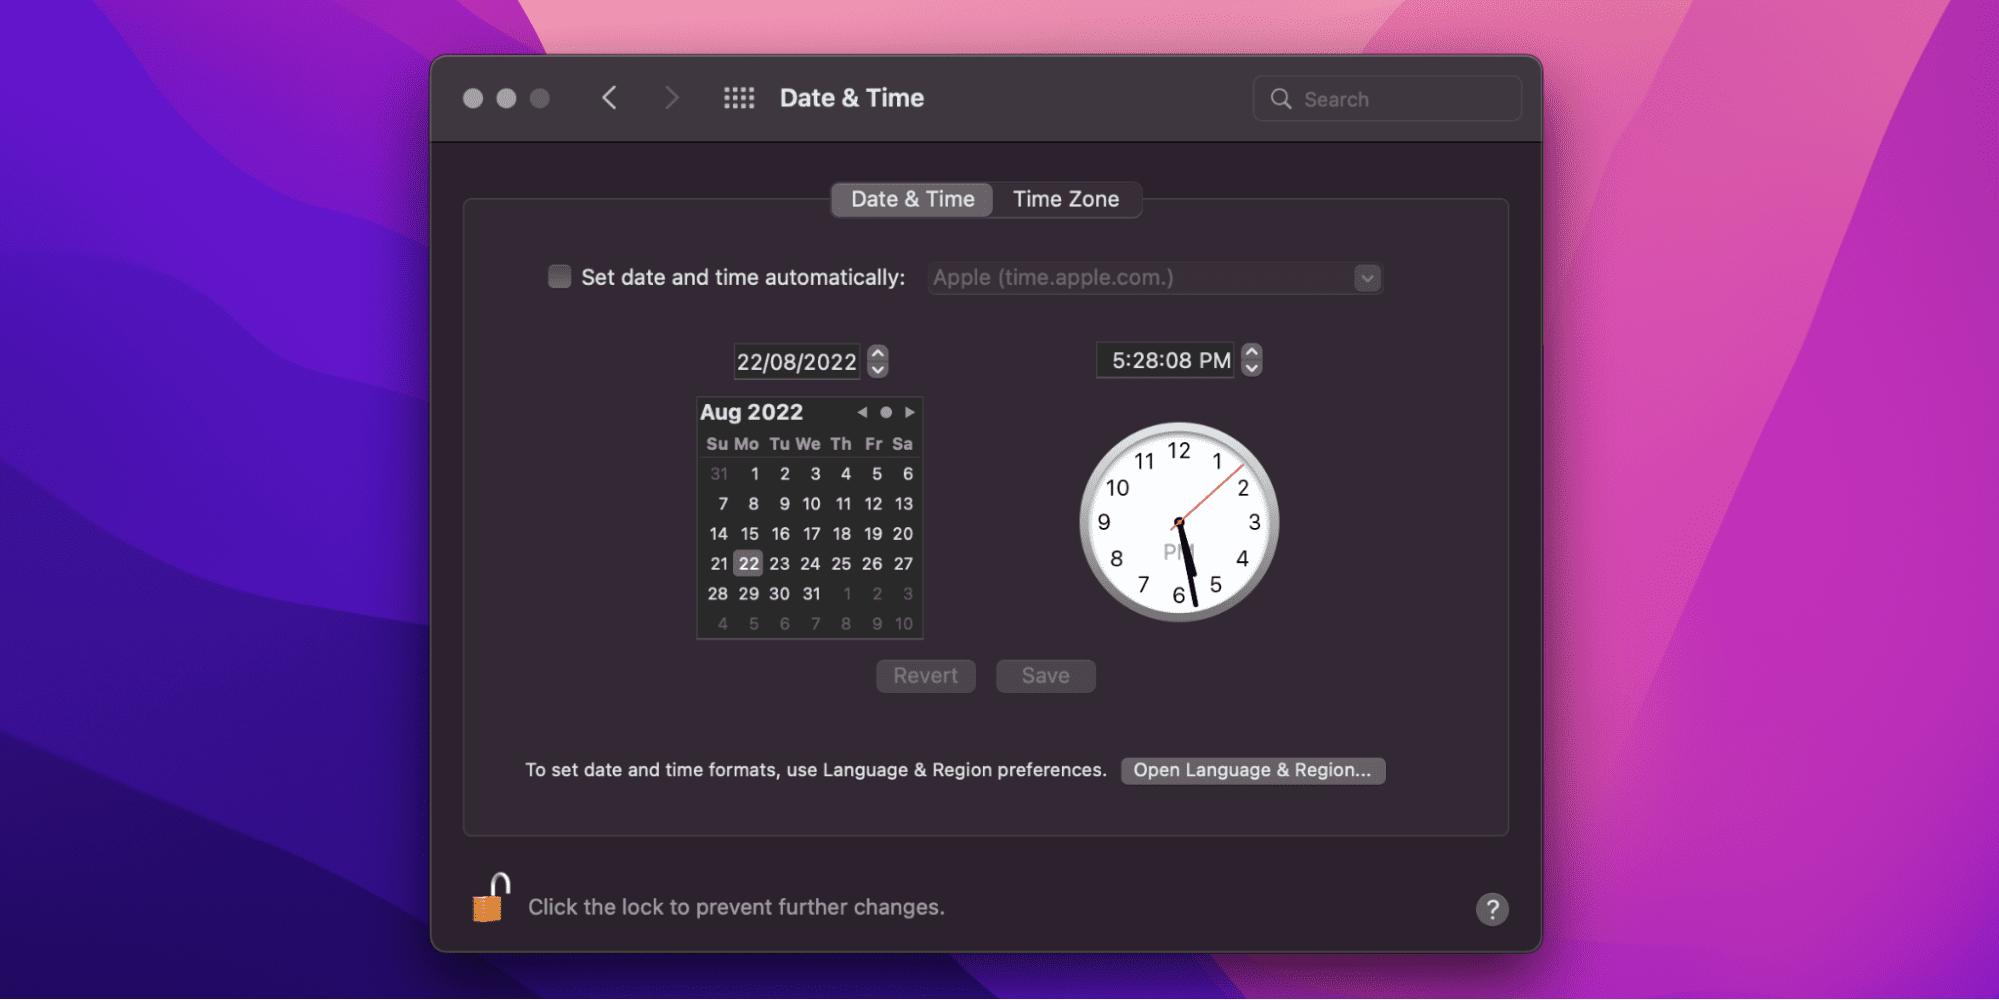
- Open the Apple menu and click on System Preferences.
- Select Date & Time. Make sure that the preference pane is unlocked before you do this step. If not, you can click on the lock on the bottom left side to unlock.
- When you click Date & Time, it gives you two options; to set it manually or automatically.
Setting automatically: Check the Set date and time automatically option and select the network time server for your location.
Setting manually: If you want to set the date and time manually, deselect the option Set date and time automatically. Click on the current date on the Calendar and set the clock using the mouse.
- Click on the Save button.
Related:
How to Reset Terminal on Mac
How to Change the Time Zone on the Mac Using Terminal
Changing and setting a new time zone on Mac using the Terminal is as easy as setting the date and time. So, let’s dive in deeper to see how you can use a single command to change the time zone:
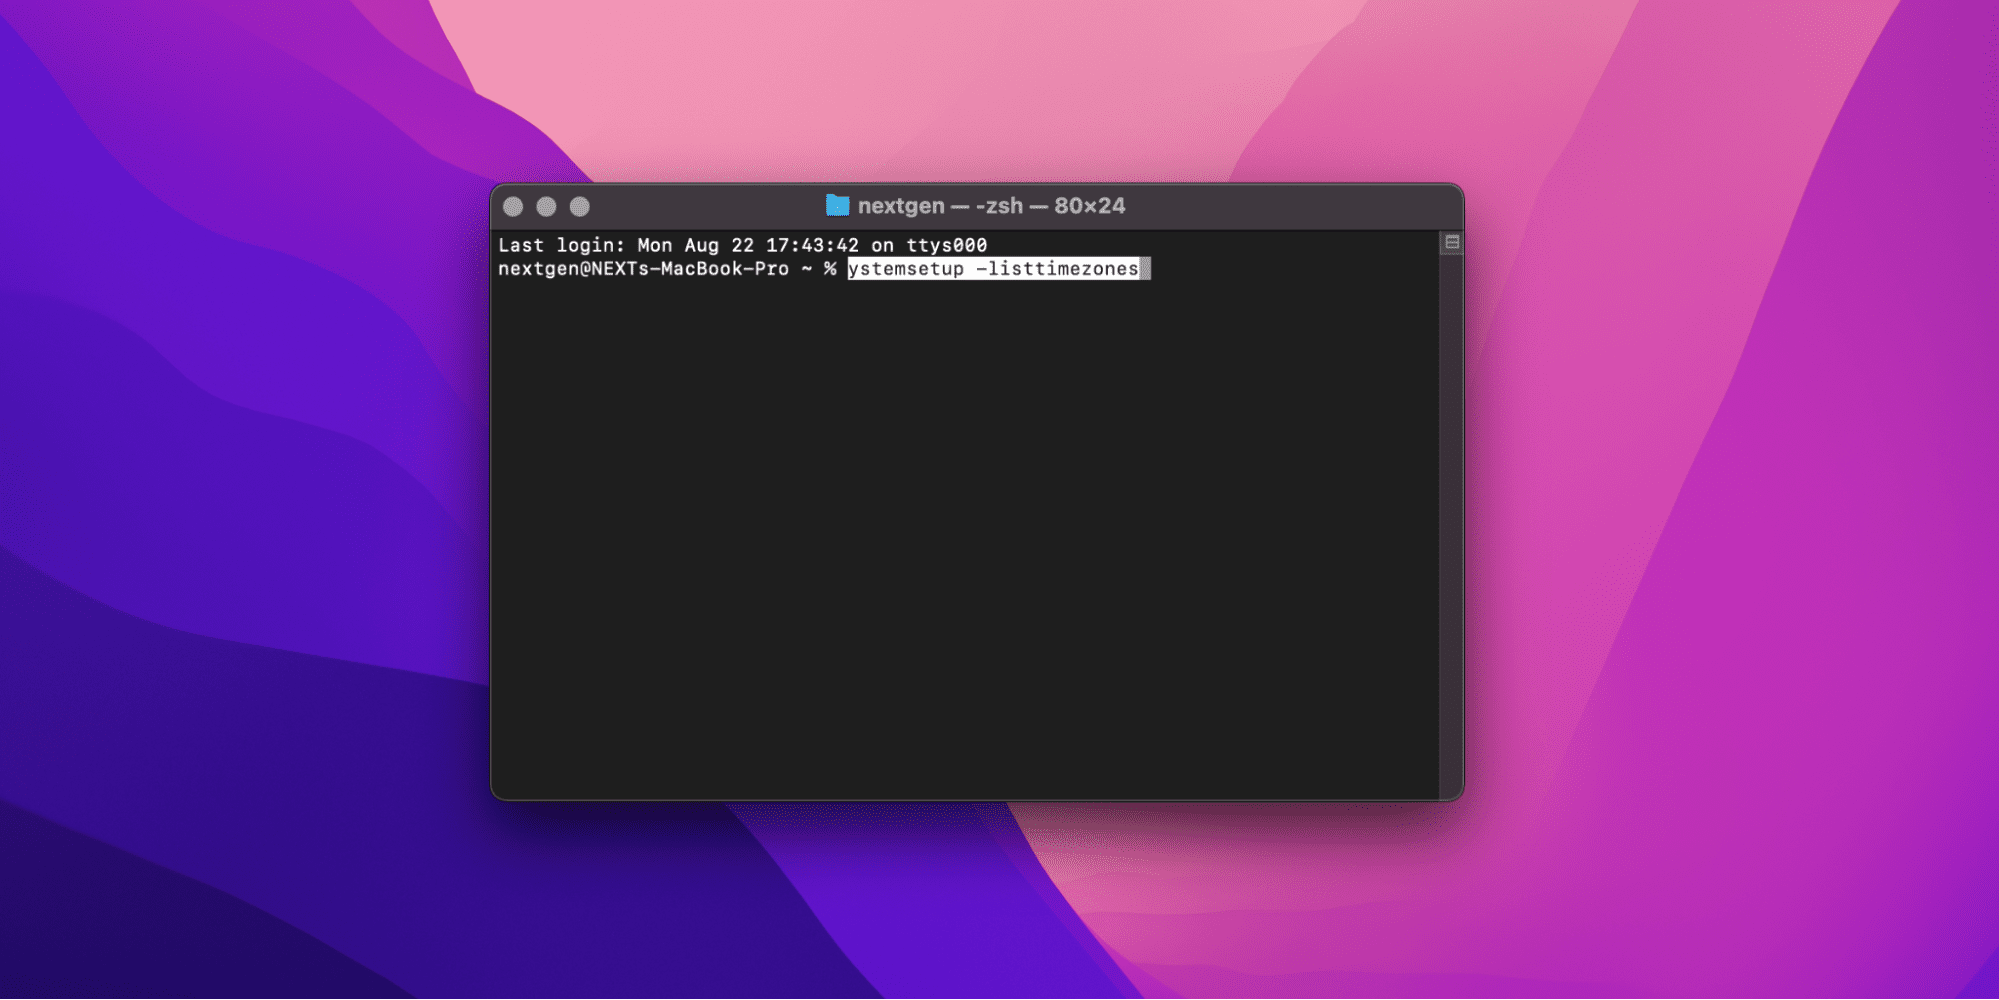
- Type systemsetup -listtimezones. Doing so will display the list of time zones you can set. You can use the Spacebar key to move to the next zone on the list.
- To set the desired time zone, type the command sudo systemsetup -settimezone [your time zone] where your time zone is the one you’ve selected from the list.
- To check if the time zone has been set properly, type sudo systemsetup -gettimezone on the Terminal and press the Return key.
You can also change the timezone on Mac using other methods.
How to change the Time Zone on the Mac
If you don’t want to use the Mac Terminal, and instead, you want to choose a typical method to change the time zone on Mac, you can do so by following the procedure below:
- Launch the Apple menu.
- Click on System Preferences.
- Click on Date & Time.
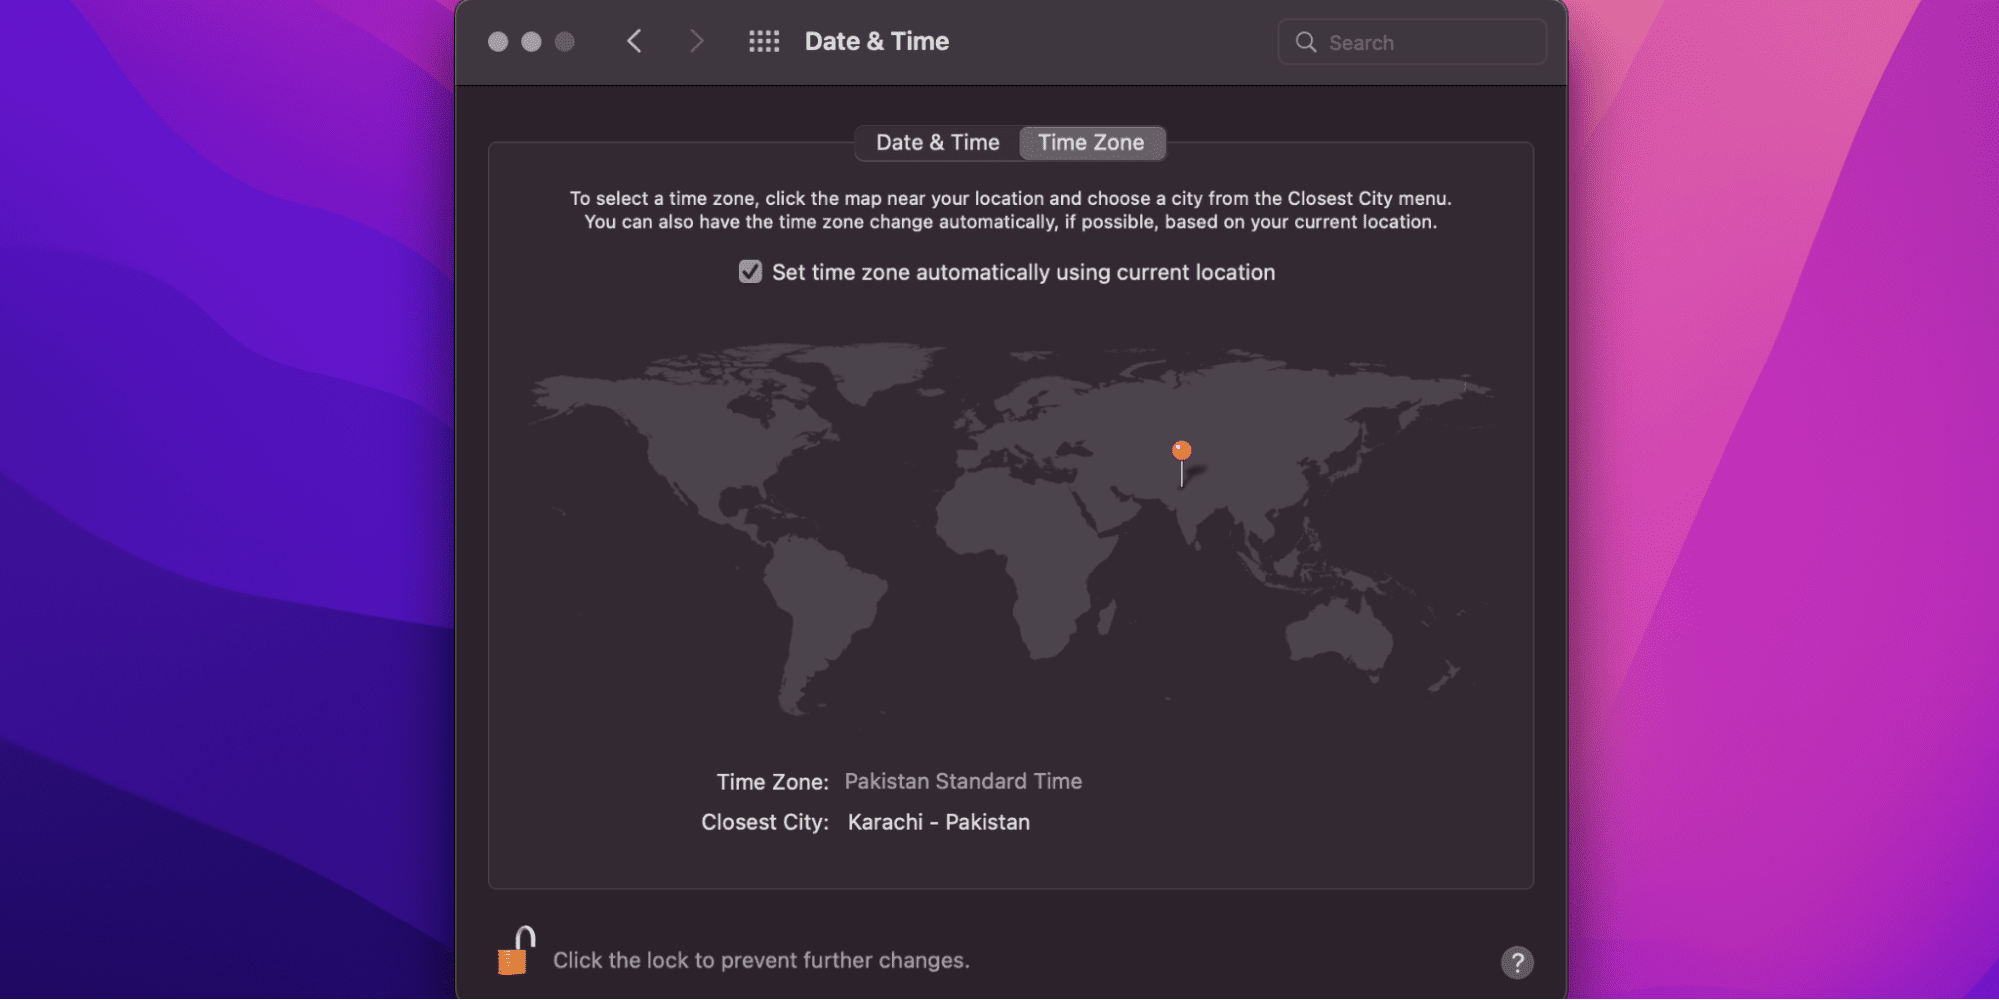
- Click on the Time Zone option, which opens a new window.
Set Automatically: If you want to set the time zone automatically, click on the Set time zone automatically option and check the current location checkbox. Doing so will set the time zone according to the location you are currently in.
Set Manually: If you want to set the timezone manually, deselect the Set time zone automatically option. Next, on the maps, select the location you want to change the time zone according to, and you are good to go.
How to Use Different Time Zones in Calendar on Mac
If you want to change the time zone on the Calendar such that it modifies the time and date of events too, follow the procedure below:
- Launch the Calendar application.
- Click on Calendar and then select Preferences.
- Click on the Advanced button.
- Choose Turn on the time zone support.
- Click the pop-up menu to the left of the Calendar search field.
- Choose your desired time zone. If you don’t find the time zone you want to change to, click on the Other button.
You can also change the time zone for a particular event on your calendar by following the steps below:

- Launch the Calendar application.
- Click on Calendar and then select Preferences.
- Click on the Advanced button.
- Choose Turn on the time zone support.
- Double click on the event you want to modify the time zone for.
- Click on the event’s date.
- Click on the pop-up menu and click on the time zone. If you fail to find the desired time zone, click on the Other button.
Related:
How to Cancel Update on Mac
Why Isn’t the Mac Allowing Me to Change the Date and Time
You cannot change the date and time on Mac if you don’t have administrative permissions. Besides, Mac also won’t allow you to change the date and time if you have turned on the setusingnetworktime feature.
To check if it is off, launch your Mac Terminal and type sudo systemsetup -getusingnetworktime. If it is on, type sudo systemsetup -setusingnetworktime, which will turn it off.
Why Is the Date on My Mac Wrong
If your system does not have internet access, then there is a good chance that the wrong date and time might be because the system isn’t connected to the Apple services.
Besides, the Mac can also show the wrong date if the automatically set time option is off. If you want to fix it, turn the automatically set time option from System Preferences and finally click the Date and Time.
How to Change Date and Time Display on Mac
Mac also allows you to change the date and time display, and that too with a few clicks only.
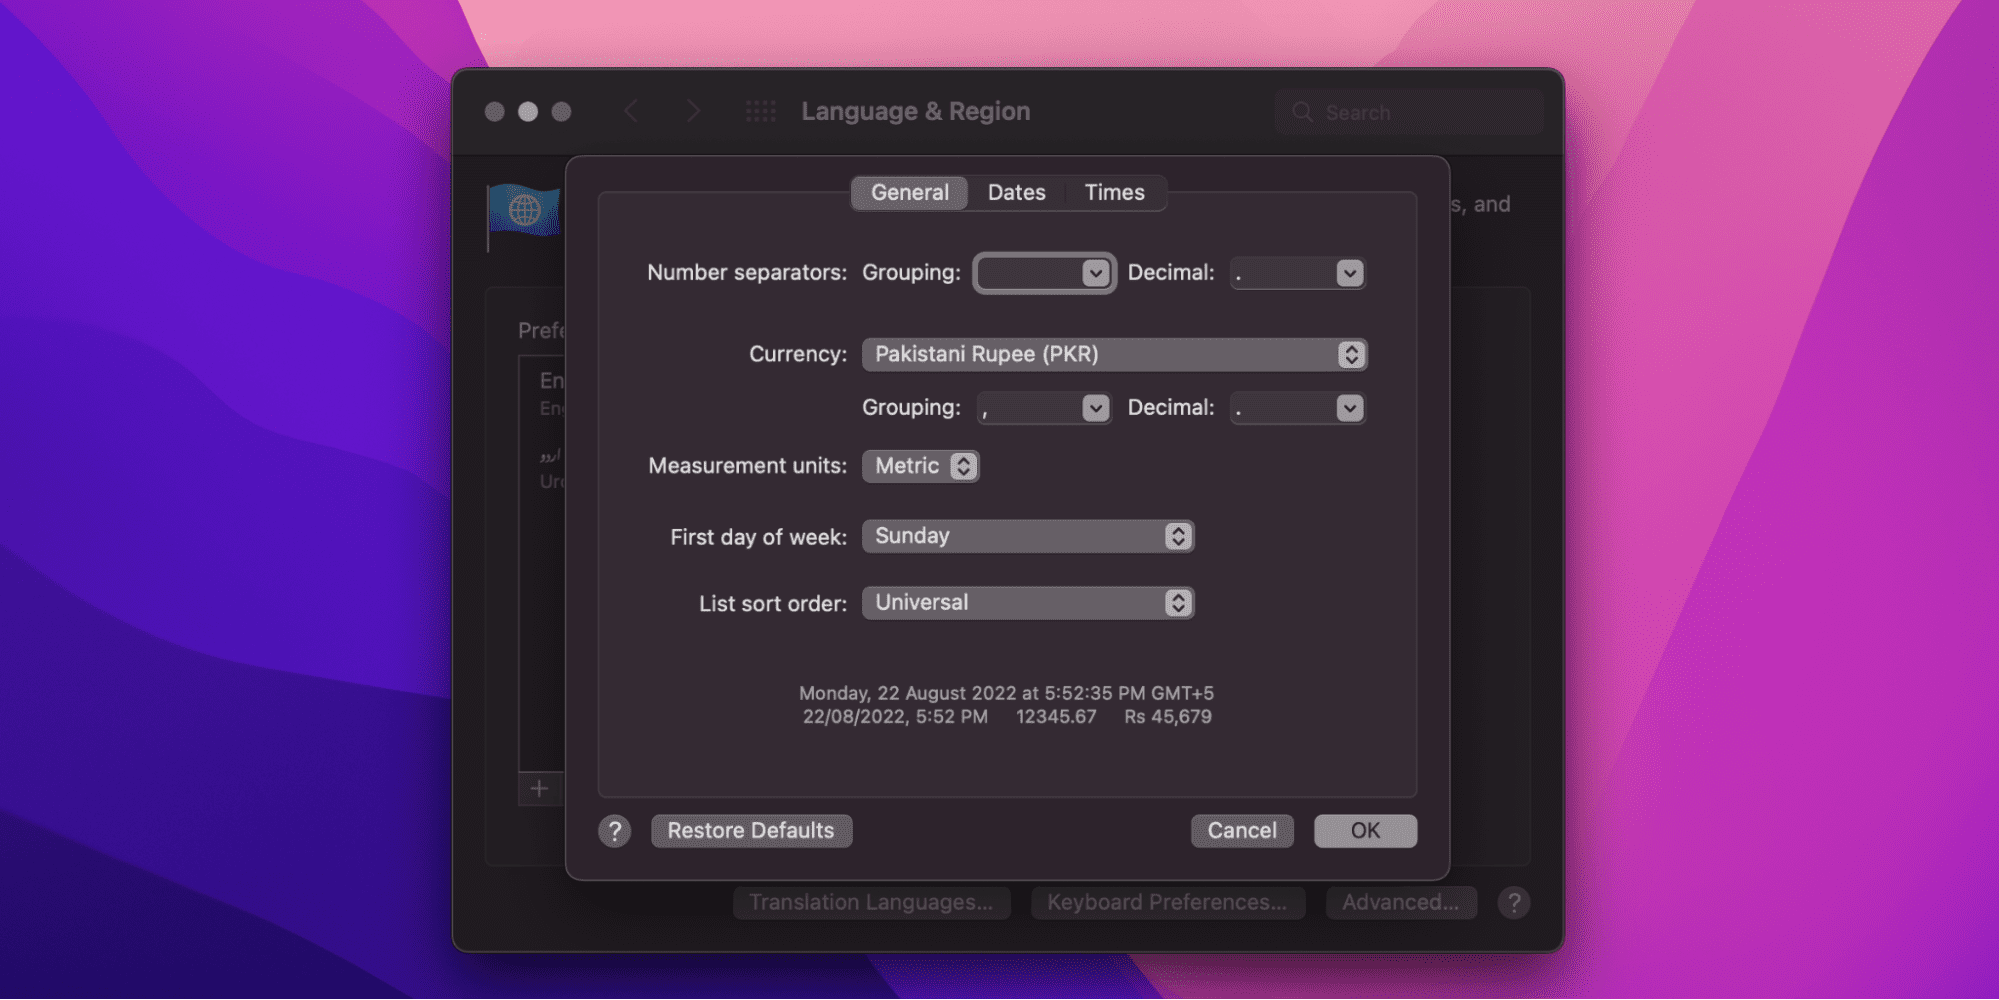
- Launch the Apple menu and select System Preferences.
- Click on Language & Region option.
- Click on the region pop-up and select the location to use its date, time, number, and currency formats.
- If you want further customization, click on the Advanced button.
From Advanced Preferences, you can set the display for numbers, currencies, and measurements on the General tab on the Window. You can also change the first day of the week from here.
You can rearrange, delete or drag elements in the Dates and Times tabs. If you want to modify the way to display elements, then select the pop-up menus.
How to Open or Close Notification Center on Mac
The notification center is one of the Mac’s best features since it helps you catch up on the latest updates, and notifies you about upcoming events, birthdays, and latest headlines all in one place, right from your desktop.
Opening the notification center on your Mac requires one step – clicking on the date and time in the menu bar. Alternatively, you can open it by swiping the right to the left edge of your trackpad using your fingers.
To close it, you can either click on the date and time on the menu bar, swipe right from left using your fingers on the trackpad, or else click anywhere on the desktop.
What Actions Can You Perform on the Notifications
You cannot only see but also learn more or take action about that notification in the notification center.
If one application, suppose Calendar, has multiple notifications stacked about important events and birthdays, you can click on the top notification, which will open a complete list. To reduce the list, click on Show Less at the end of the list.
To learn more about the notification, such as details of the event you have added to your Calendar that shows up in the notification center, click on the notification. This will open the app to show you more details. Alternatively, you can click on the arrow alongside the notifications.
If you want to turn off the notifications for a particular app, let’s assume a Calendar, so it no longer shows you the upcoming events, click on the arrow alongside the notification. Next, select the More option and choose the desired action – to mute for a specific time or completely turn off the notifications.
To take action, such as snooze a notification, click on the arrow option alongside the notification. It will open a small pop-up to show you the list of actions you can perform with the notification. Select the desired action.
To clear all notifications, simply click on the Clear All button.