
Apple has a huge user base all over the World, and most of them prefer the brand because of its premium technology and absolute security. In addition, it offers a lot of powerful applications and tools that make your everyday life easier than ever.
One of these applications is FaceTime, which allows Apple users to connect via audio and video call. Since it’s similar to other calling apps, it also keeps a history of every individual call on your device.
Although it is a useful feature, it can become annoying after some time. So let’s see how to delete FaceTime Calls on Mac.
How to Delete FaceTime Calls on Mac
Now there are two different methods that you can utilize to delete FaceTime calls on Mac. Let’s discuss them one by one:
1. Use the PowerMyMac Application
If you have been using your Mac for a while, then you must be aware of how tiresome it can be to delete stuff from your system. Most of the time, you have to navigate to different folders and files just to eliminate your junk, which takes a lot of time.
It is also similar when it comes to FaceTime because you need to navigate into the app and then do certain actions to complete the task. But on the contrary, you can use the PowerMyMac application to delete FaceTime calls on mac.
Here are the steps that you can use to execute this task:
- Head to PowerMyMac’s official website and install the Free Version.
- Once the application is installed, open it and head to the Junk Cleaner option.
- Click Scan and wait for it to complete.
- Once it finishes, check your User Logs, select relevant folders, and click Clean.
The application will automatically clear your FaceTime history and your Cache, Trash Bins, iTunes Backup, and Email Junk in a couple of minutes. Remember that you can always include or exclude any of these items.
In addition, you can also utilize PowerMyMac to uninstall any application along with its data just through a few simple steps using its powerful App Uninstaller tool.
Related:
How to Delete Desktop Pictures on Mac
2. Use the Default FaceTime Application
The second method on the list is to use the default FaceTime application, allowing users to delete their FaceTime history on Mac. It is also one of the most straightforward methods to carry out the task and requires the following steps to complete:

- Head to your Finder and search the FaceTime application.
- Once it pops up, Double-click on the application to open it.
- After you’re inside the app, click on either the All or Missed call section.
- Navigate to the respective call that you want to delete.
- Now press Control + Right-Click on the call.
- Select Remove from Recents from the context menu to delete this particular call.
- If you want to delete the whole section, repeat the same action from step five, and this time, click Remove All Recents instead.
Congrats, you have successfully deleted FaceTime calls on Mac.
Where Does Mac Store FaceTime History and Cache
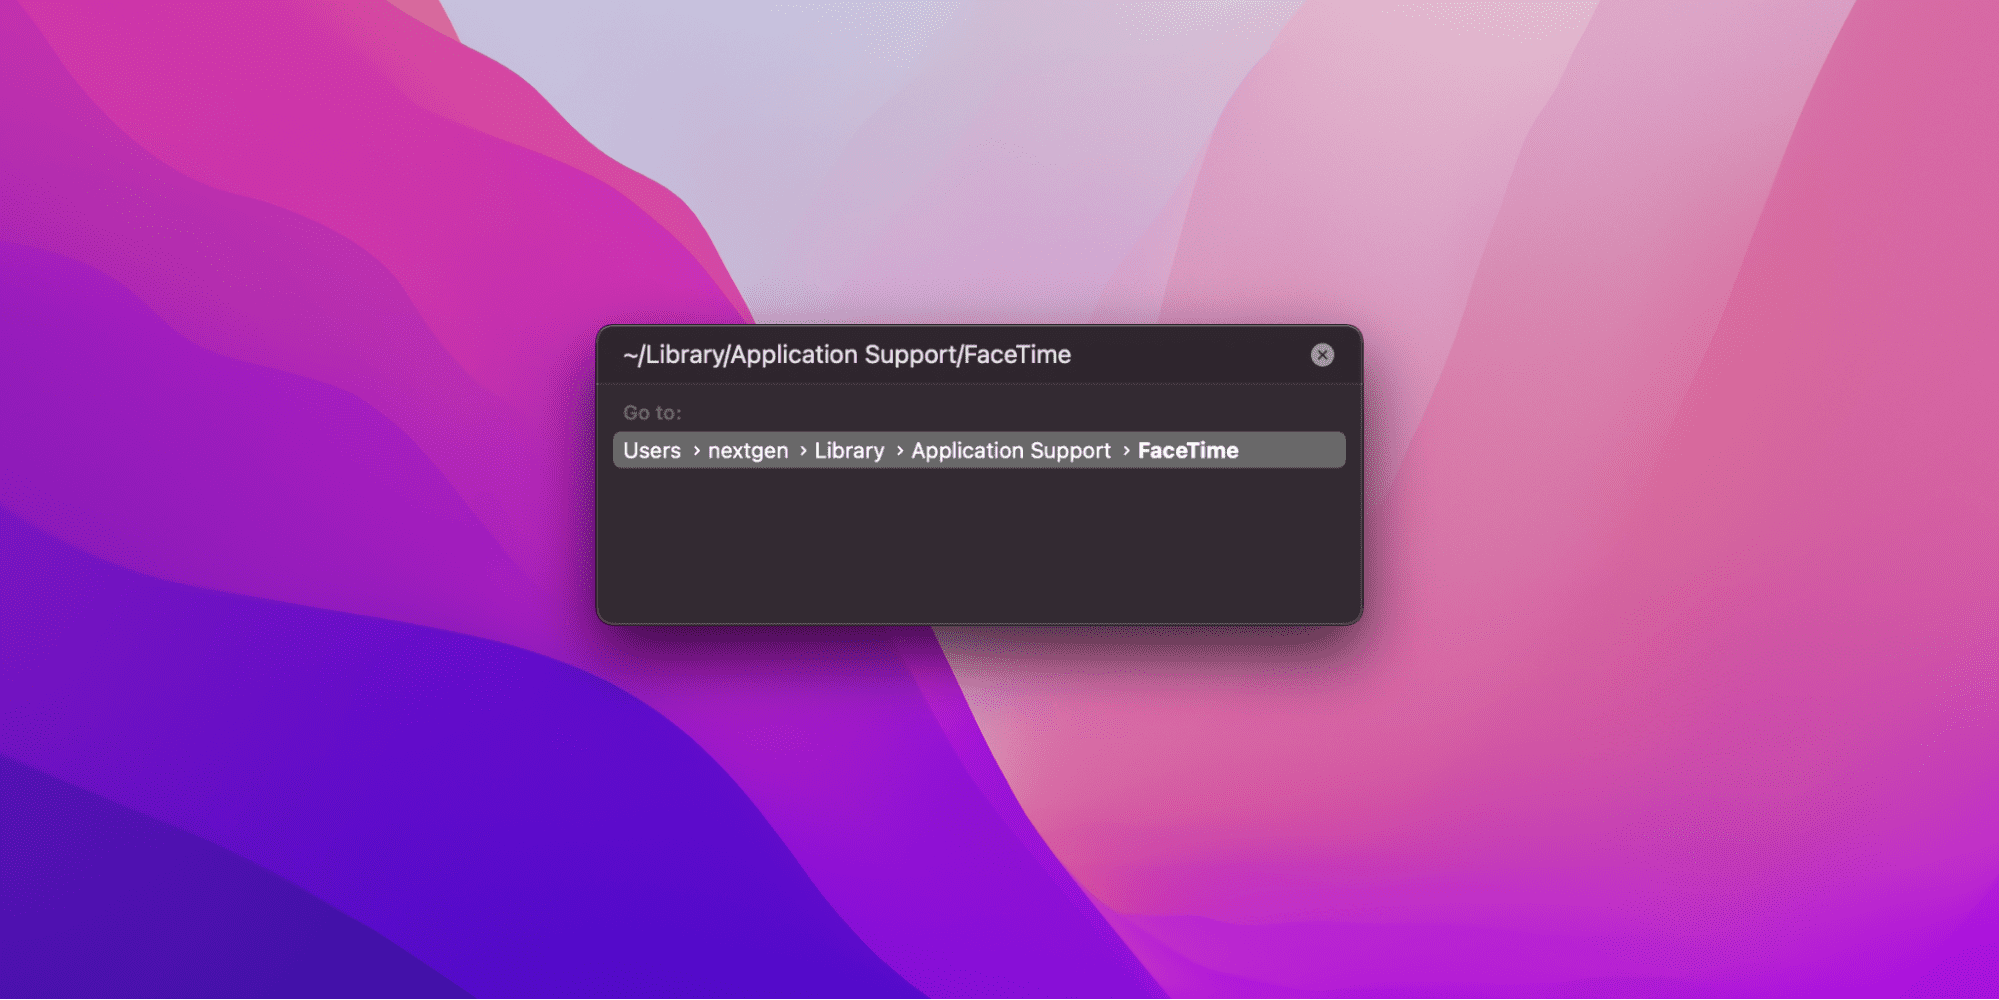
Like other applications, FaceTime also stores its history and caches in the Library, and you can find them in the following ~/Library/Application Support/FaceTime directory by using the Finder’s Go menu.
Although it seems pretty simple to head into the directory and delete the caches, it can cause you more harm than good. The reason behind this is that along with the FaceTime caches, Mac also stores a lot of crucial information and data in the Application Support Folder.
So, if you accidentally delete any necessary files, it can impact your Mac and also cause the loss of important data. This is the reason why you should always use a professional tool to get the job done.
How to Turn Off FaceTime on Your Mac
Although FaceTime is among the most powerful utility applications provided by Apple, sometimes it can be nerve-racking to receive audio and video calls continuously. Luckily, Mac provides a solution for such users.
It prevents users from receiving notifications or calls while staying signed into their FaceTime account. To execute this, simply head into your FaceTime app on Mac and click Turn FaceTime Off. You can also turn it back on by repeating the same action.
If you don’t want to follow this method, you can also turn on Do Not Disturb or Focus mode to stop FaceTime from sending notifications and call alerts.
Related:
How to Make Excel Default on Mac
How Do I Change FaceTime Settings on Mac
Apple provides a huge array of settings specially dedicated to FaceTime that can be accessed via the Settings Preferences menu. To access it, simply log in to your FaceTime application using your Apple ID, click Preferences, and then click Settings.
Here are the options and their functions that you will find in the Settings menu:
- Sign Out: to stop receiving any audio or video call notifications.
- You can be reached for FaceTime at: select the email and phone number that others can use to call your Mac.
- Enable this account: to turn on your FaceTime account to place and receive calls.
- Calls from iPhone: allow the Mac to use your iPhone to place and receive calls.
- Update Emergency Address: allows you to update the emergency address that can be used to contact relevant authorities in case of an accident or mishap.
- Automatic Prominence: Speaking: enlarges the speaker’s tile during the conversation.
- About Wi-Fi Calling & Privacy: shows what and how your data is shared during calls.
- Allow Live Photos to be captured during video calls: allows the other party to capture a live photo of the call during FaceTime.
- Ringtone: allows you to select the ringtone for your calls.
- Start new calls from: allows you to choose the email address or phone number that will be visible to others before picking up the call.
- Default for calls: lets you choose the default app for calling.
- Location: allows you to change your region or country.
- About FaceTime & Privacy: shows how the privacy policy is implemented for FaceTime.
How to Enable Portrait Mode in FaceTime
After the recent success of Portrait Mode on iPhones, Apple has started to roll out this feature for FaceTime as well. The only thing that you require is to have the latest version of iOS 15 on your iPhone.
Once you have that, you can use the following steps to enable Portrait Mode in FaceTime:
- Place a video call on your iPhone via the FaceTime application.
- Once the call is connected, press on your Camera Preview.
- Now, you should see a small icon on the top left corner of your Camera Preview. Click it.
Congrats, you have successfully enabled Portrait Mode on FaceTime. You should be able to see your background being blurred out while the camera is focusing on your face.
How to Enable Grid View on FaceTime
As we all know, FaceTime allows four or more users to be on the video call simultaneously, but sometimes, moving between screens can confuse you as to who is talking. FaceTime has recently released a feature called Grid View to fix this issue.
It allows the users to arrange and view different participants in the same-sized tiles that are arranged in the form of a grid. In addition, it also highlights the speaker’s screen, making it easier for other participants to know who is talking.
To enable this feature, simply place a FaceTime call with four or more participants and tap the Grid icon at the bottom left corner of the screen. You can tap it again to turn off Grid View as well.
How to Create FaceTime Links on Mac
Besides placing a call directly, you can use the app to create FaceTime links that anyone can use to join the call after getting the host’s approval. In addition, these links can be used by any platform, including Apple, Android, and Windows.
Now let’s discuss each of these aspects down below:
How to Create and Share a FaceTime Link
Let’s see how you can create and share your FaceTime link:

- Head to your FaceTime application and log in with your Apple ID.
- Once you are in the app, click Create Link.
- Finally, choose the method you want to share your FaceTime link with.
In addition, you can also use the calendar app to create calendar events regarding your FaceTime video calls. You can also delete any FaceTime link by clicking the Info button and pressing Delete Link.
How to Start a Call via a FaceTime Link
Once you have created a FaceTime link, you can either join it via the FaceTime application or by clicking the respective link and tapping Join. Here are the steps to execute the first method:
- Head to your FaceTime Application, hover your mouse on the Call Window, find the respective FaceTime link, and press the Video button.
- Finally, press Join.
How to Allow a Caller to Join via FaceTime Link
Here are the steps to do it:
- Head to your FaceTime application and press the Sidebar button.
- Finally, select Approve/Decline Join Request to allow or reject someone from joining the call.