Xbox is a gaming console brand introduced by Microsoft. People play different games on Xbox to relax their minds in their free time. When two users play XBOX at one time, they need to know that how they can change XBOX Controller to player 1.
It is connected easily with all computers. Many Xbox users claim that they have an issue while changing the Xbox controller to Player 1 in Windows 10. In this article, we will guide on “How to change Xbox controller to Player 1 on Windows 10”.
The Xbox is the game controller for the game console. However, When the Xbox is connected to the PC, it sometimes works as a player 2. It annoys the users most. Let’s get into it…
How to Connect Xbox Controller to Windows 10
Firstly, you have to install the Xbox pc emulator on your PC/laptop. Then there are two ways to connect the Xbox to your PC.
- Wireless: Turn on the Bluetooth from your PC and pair on the other side hold the connect button of your Xbox controller
- Wired: Plug the cable into the USB 3.0 port of your laptop or PC
Related:
How to Connect Xbox 360 to Internet Through Laptop in Windows 10
How to Change Xbox Controller to Player 1 on Windows 10
There are multiple ways to change Xbox controller to player 1 in Windows 10. Follow the below methods to fix the issue. Try all the methods one by one. Any method will surely work for you.
Method 1: Restart the PC
Simply Restart your PC/Laptop and make sure your controller stays connected(using a wired connection) to the PC.
If you are not using the wired connection then you have to connect the controller immediately after your computer turns on.
After rebooting the system, the controller will move to player 1.
Method 2: Delete Specific Controller driver
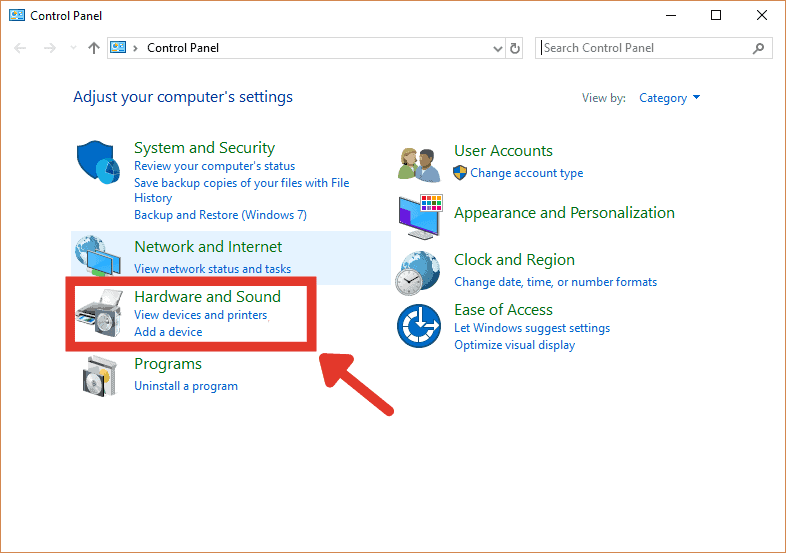
Open the Control Panel on your computer and click on the View devices and printers under the Hardware and Sound option.

You will find the two Xbox controllers labeled as Xbox controllers for Windows and Xbox 360 wireless controllers. You have to delete the Xbox controller for windows and disconnect the controller labeled as player 2.
Now connect the controller back and check if it solves the issue. If your issue is resolved now then no need to read the further article, if not then you need to try the next method.
Method 3: Run the Troubleshooter
Open the Control Panel. Click on View devices and printers under the view devices and printers.
Right-click on the Xbox 360 Controller for Windows and select Troubleshoot.
Wait for the process to finish and check the issue is resolved or not.
Method 4: Update the Windows
Click on the start button and open the settings. Go to Update and Security.
Select the Windows Update and click on check for updates.
If there will be any update available, let it complete the process and restart your PC.
After restarting, your controller moves to player 1.
We hope that this guide on How to change Xbox Controller to player 1 on Windows 10 must help you to solve your issue. The easiest way to solve the issue is to restart your computer and if it does not work then try all the methods one by one.
