
When working on multiple operating systems, you will come across many files that you cannot open natively on your Mac.
For instance, you might run into specific operating system executables like .exe files, which can be difficult to run on Mac. However, files like. RTF doesn’t require much technical knowledge, so worry not and follow along as we walk you through the steps to open RTF file on Mac.
Let’s get started.
What is an RTF File
RTF was first released and created in the 1980s by the Microsoft team. Its primary purpose was to provide a universal file format that any word processor could read. It also allowed users to share Word documents with people who didn’t own or use Word.
In addition, since it was considered a universal file format, it allowed users to share it with other platforms such as Mac, Chromebook, and even Linux without any problems.
Even though Microsoft discontinued the file format in 2008, it is still one of the most widely supported file extensions supported by many applications across different operating systems.
How to Open RTF File on Mac
Opening an RTF file on Mac is pretty simple, as it comes with its built-in TextEdit app capable of opening any RTF file without issues. The only drawback to this is that since TextEdit doesn’t have the same format as the original file, you might face slight formatting issues.
Although the issue isn’t that big, and if it affects you a lot, then you can always use a third-party word processor to access the file and keep your format safe. Many applications like Microsoft Word and NeoOffice can be used to open RTF file on mac.
3 Ways to Convert an RTF File to PDF on Mac
Even though an RTF file format is easily readable across different operating systems, it is better to convert your RTF file into another format. As it not only makes reading and keeping your formatting intact but also provides an easy-to-use user interface.
Use Adobe Acrobat Reader
The first method on the list is to use the Adobe Acrobat Reader. It allows users to easily read RTF files and convert them to PDF format according to their needs. To do this, you will have to download the application from their official website, install it and then simply follow these steps:

- Head over to Adobe Acrobat Reader and open the respective RTF file.
- Now click File, and select Export as PDF.
- Finally, assign a name to the respective PDF and save it on your Mac.
Some of the features that come with the Adobe Acrobat Reader include:
- Compatibility with multiple file formats.
- Converting documents into PDF format.
- Convert PDF files into Microsoft Excel and Word documents.
- Add passwords to your documents.
- Add digital signatures to your documents.
Related:
How to Open SIT File on Mac
Use the Save as Function
The second method to convert an RTF file to PDF requires a little more effort as you will have to install software similar to Microsoft Word. Once you have the software on your system, follow these steps:
- Click on the File tab at the top right corner of the screen and press on Save As from the left panel.
- Now Double-click on This Pc, and select the directory where you want to save your file.
- Now, enter the File name and select Save as type PDF, respectively.
- Finally, click Save to finish the process.
Congrats, you have successfully converted your RTF file into PDF format.
Use Print to PDF
Another method to convert your RTF files into PDF requires Microsoft Word’s Print to PDF function. Here are the steps to do it:
- Navigate to the File tab on the top left corner of the window.
- Click on Print from the list of options.
- Now select Microsoft Print to PDF, available on the Printer option.
- After this, assign the page size and orientation options and click Print.
- On the new window, select the save location and click Save.
That’s it. Your RTF file has been converted into PDF format.
How to Convert an RTF File to Other Formats
Besides the PDF format, you can also convert RTF files into various other formats. We will explain each one in detail below.
Convert RTF to HTML
Unlike PDF conversion, converting an RTF file to HTML is relatively more straightforward. It can be quickly done through an online tool and requires only a few steps to execute the task, and we are about to list them down below:
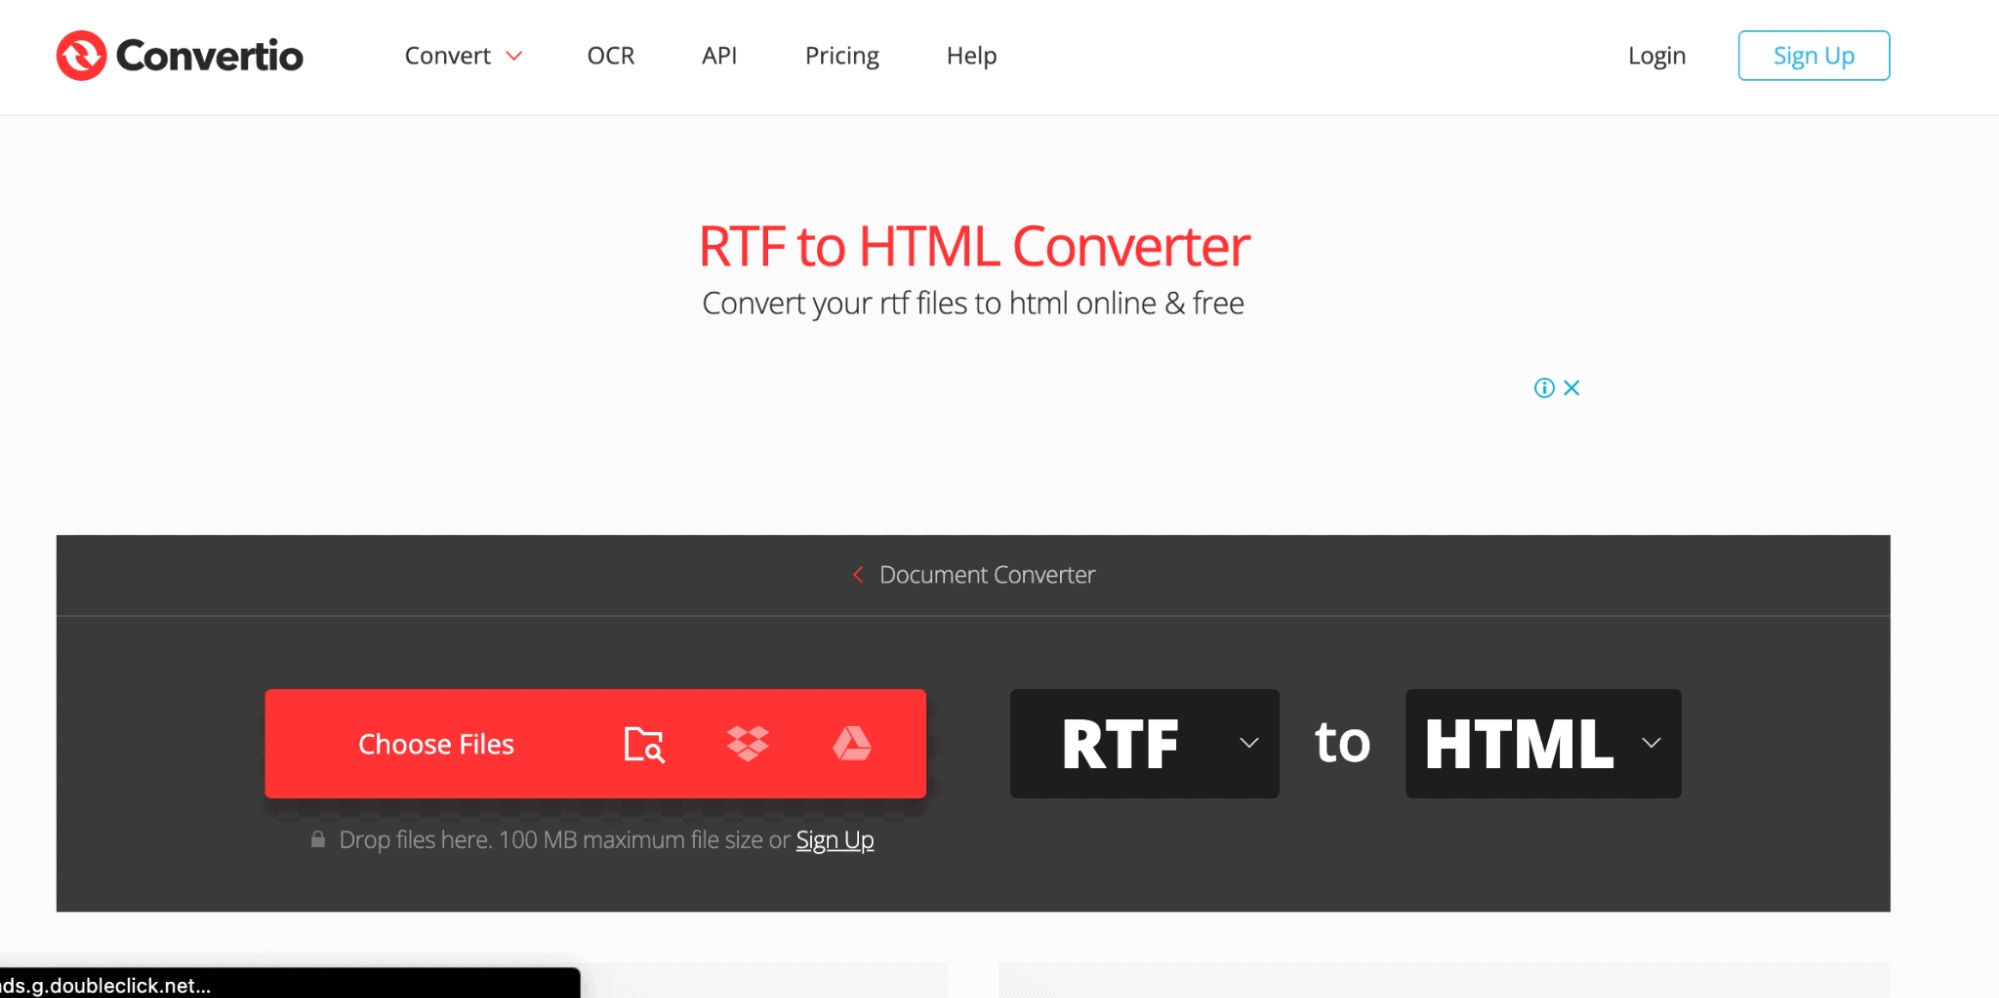
- Visit an online RTF to HTML converter like Convertio.
- Select the respective RTF files from your Computer, Dropbox, Google Drive, or any URL.
- Choose HTML from the list of options and click Convert.
- Finally, download the respective file.
You have successfully converted your RTF files into HTML format.
Convert RTF to DOCX
Like the HTML conversion, changing your RTF file format to DOCX is also a simple process. Here are the steps that you can use to execute it:
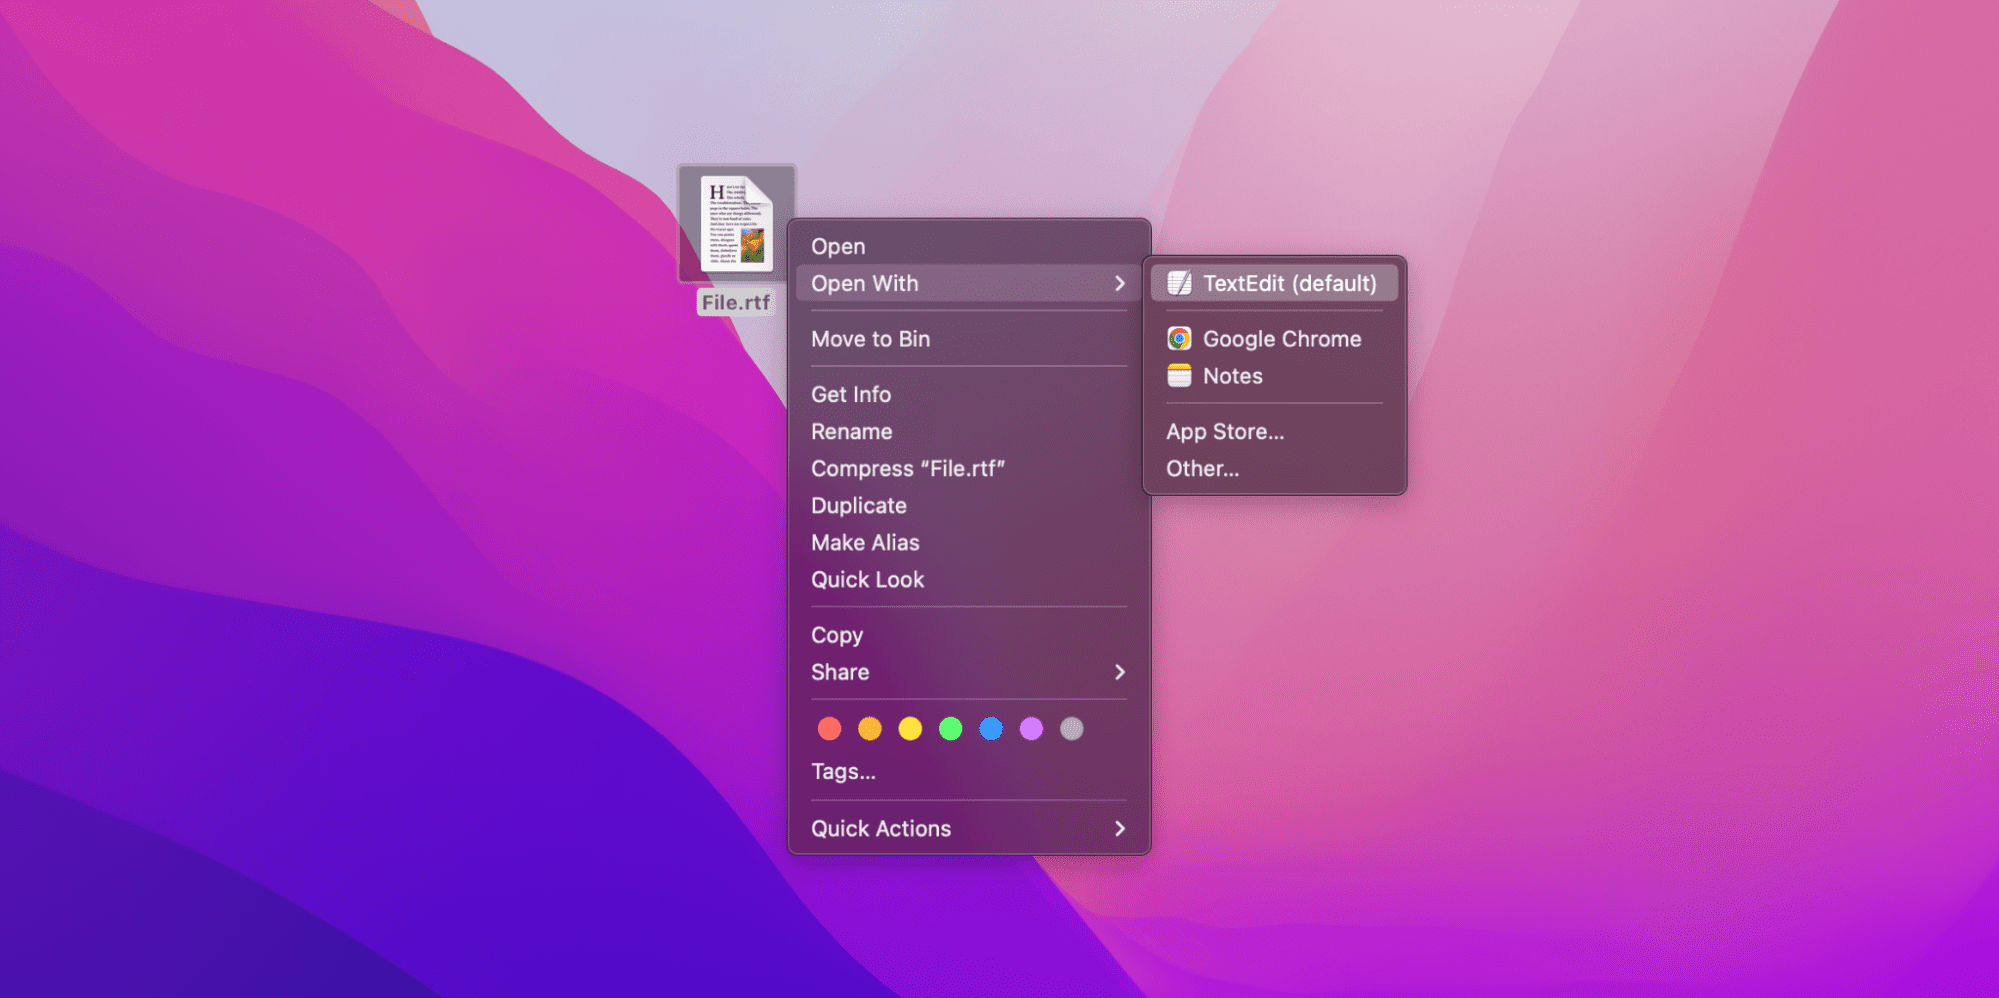
- Open the respective file via the TextEdit application on Mac.
- Once it is opened, click on File present on the top left corner of the window.
- After this, select Save As from the list of options.
- Once the new window pops up, select your save directory and the name of your file.
- After this, click on Save type as and select DOCX from the context menu.
- Finally, hit Save.
Congratulations, your RTF file has been successfully converted into PDF format.
Related:
How to Open PST File on Mac
Convert RTF to Google Docs
Unlike other conversions, you can’t technically convert an RTF to a Google Docs file, but you can copy the contents from one file format to another. Here are the steps to do it:
- Open your RTF file and copy all its content using Command + C.
- Now head to your Google Docs and create a new file.
- Once the new file opens, paste the content within it using Command + V.
- Adjust any visible formatting errors.
- Finally, assign a name to your file and save it.
Effective immediately, your RTF file has been converted to Google Docs.
How to Open RAR Files on Mac
Here are the steps to open a RAR file on your Mac:

- Install the Unarchiver application from the App Store.
- During installation, tick all the file extensions you want the app to open.
- Once the installation finishes, open your respective RAR file.
- Provide a directory for extraction and click Extract.
- Finally, let the extraction process finish.
Congrats, you have successfully opened and extracted a RAR file on your Mac.
How to Open Files via Terminal
Like the Finder, users can also use the Terminal applications to open their files and folders. Although it’s not the most convenient method, it is still used by many people who love command lines. It also helps you familiarize yourself with the Terminal app, which could be beneficial in the future.
Now coming back to the question, here are the steps that you can follow to execute the task:
- Navigate to your Application and open the Utilities folder.
- Now open the Terminal Application.
Once you are in the Terminal application, you can use the following commands to access files and folders.
- To open a folder: open /path/to/Directory/ (for example open /Users/<username>/Pictures).
- To open the Root directory: open /
- To open a folder at your Home: open ~
- To open the current working folder inside the Finder: open
- To open an application: open/directory/Applicationname.app (for example open /Applications/Safari.app).
How to Show Hidden Files on Mac
Every system has some crucial backend directories and files that are used to run the operating system smoothly without running into problems. Most of the time, these files are kept hidden from users so that they don’t accidentally delete anything and put the system at risk.
Even though most of the hidden files are related to the system, sometimes users have to do certain tweaks that can fix some specific problems. Luckily for such users, there are two ways that you can utilize to access the hidden files on their Mac.
Let’s check them out one by one.
Using the Finder
The first method revolves around the Finder, and here are the steps that you can use to execute it:
- Navigate to your Finder and click the Hard Drive on the Locations option.
- After this, open the Macintosh HD folder from the list.
- Once in the folder, Press the following Command + Shift + . command.
Your hidden Mac files should be visible and accessible now.
Using the Terminal
The second method to show hidden files on Mac requires using the Terminal application. Here are the steps to do it:
- Open your Launchpad and navigate to the Other section.
- Click on the Terminal app and run the application.
- Once inside, paste the following defaults write com.apple.Finder AppleShowAllFiles true and hit Enter.
- After this paste, killall Finder and hit Enter again.
Once you have executed both the codes, you should be able to access and see all the hidden files on your Mac.