
Screenshots are really useful to save something important and interesting. It allows capturing anything on the screen as an image. The method to take screenshot on a Toshiba Laptop is not directly available. On the Windows Operating system, you can take a screenshot by pressing the Print Screen key and Windows Logo Key.
The screenshot will be taken and saved in your Clipboard. If you want to save it as an image, just open paint, press Ctrl + V, and save the file as a JPEG. In this article, we will guide you on “How to Take Screenshot on a Toshiba Laptop”.
Here’s the quickest method to take a Screenshot on Toshiba Laptop
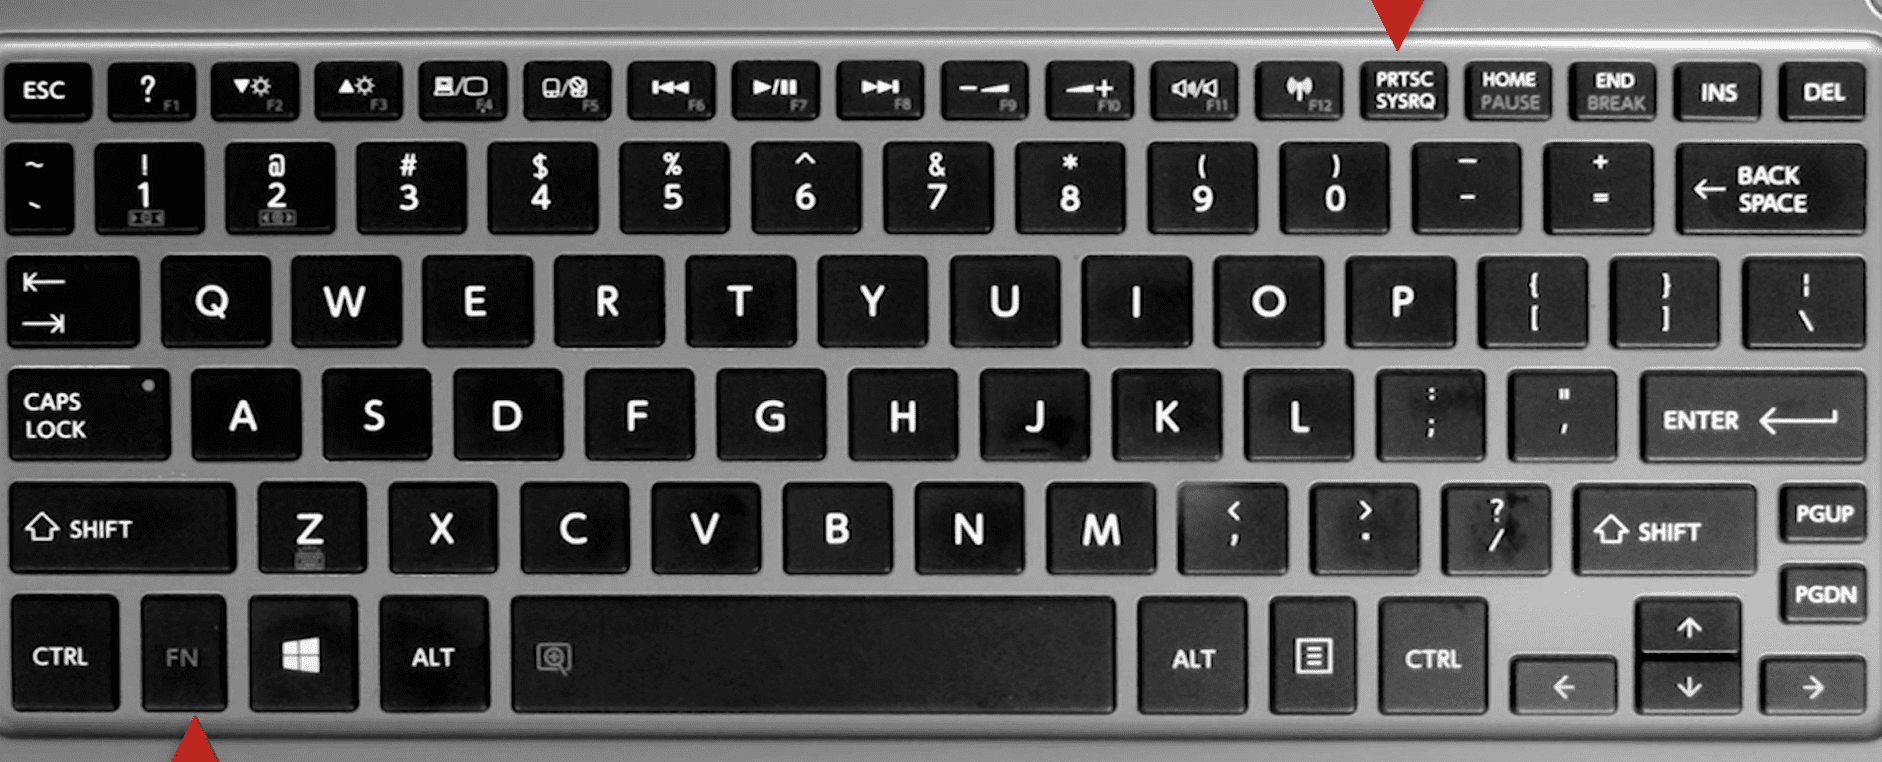
- Press FN + Print Screen(PrtSc) simultaneously.
- Go to Paint and press CTRL + V.
- Save the file as a JPEG at your desired location.
How to Take Screenshot on a Toshiba Laptop
There are multiple methods to take screenshot on a Toshiba laptop. Try the methods one by one and check which one works best for you.
Method 1: Take Screenshot using Keyboard Keys
This method will take screenshot of your whole screen. Follow the below steps.
- Open the screen that you want to capture as a screenshot.
- Now press the Print Screen Button (PrtSc) with the combination of the Fn key. Your Screenshot will be captured and copied into the Clipboard automatically.
- Now go to the Paint and press CTRL + V to paste the screenshot in the Paint.
- Save your File as a JPEG at your desired location.
That’s it. You have taken the screenshot of your whole screen and have successfully saved it at your desired location.
Method 2: Take a Screenshot of active Window
The second method involves the guidelines to take a screenshot of the window that is active, not the whole screen as in the previous method.
- Click on the Window that you want to capture.
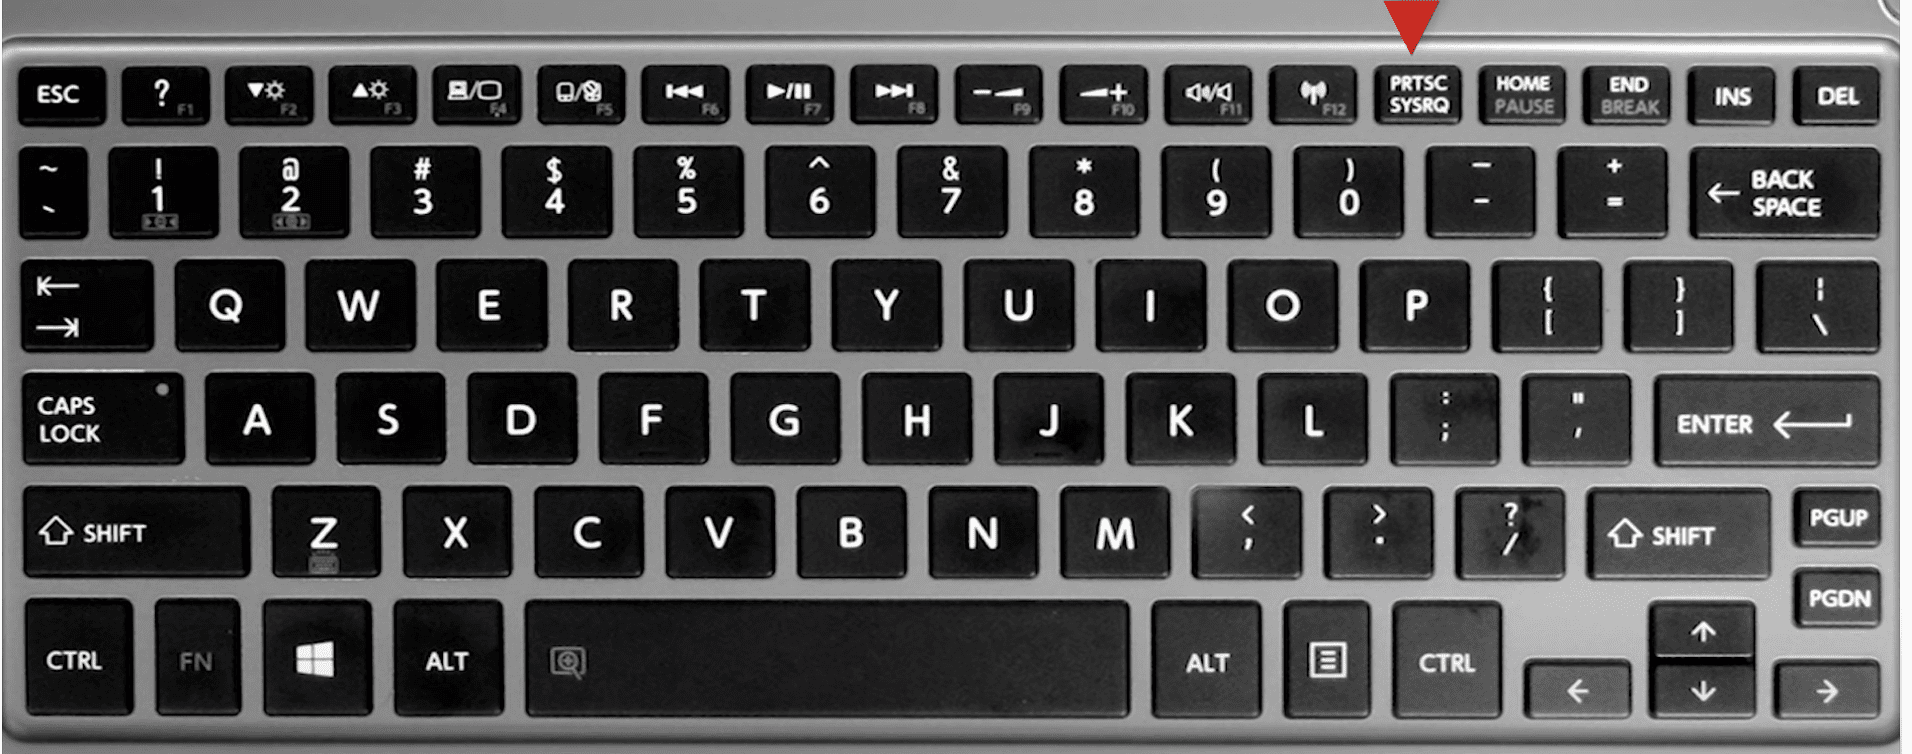
- Press the Print Screen button (PRTSC). It will take the screenshot of the current window
- Now go to the Paint and press CTRL + V to paste the screenshot.
- Save the file as a JPEG file.
It’s done. You have saved the screenshot of your desired windows.
Method 3: Use Snipping Tool
You can use the windows default program to capture the screenshot.
- Open search from the taskbar and search or Snipping Tool
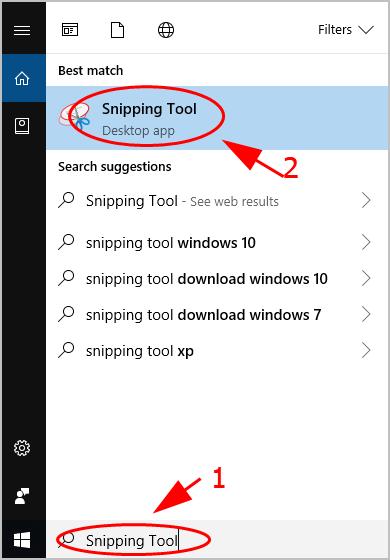
- Click on New on Snipping Tool. This will allow you to drag and capture the screenshot. Drag the area which you want to capture.
- After Dragging Click on the Save icon to Save Snap.

Your screenshot will be saved successfully using the Snipping Tool.