If you have had a Mac for a while now and use it for typing, you must be familiar with the Dictionary app pop-up. Although it can be helpful, we can’t deny that it sometimes causes a lot of annoyance.
This is because even though having a translating option is quite convenient, it is not something you always need. Luckily, just like most Mac features, it allows you to disable this feature.
In this article, we will see a step-by-step guide that you can use to stop Dictionary from popping up on Mac. But before we do that, let’s learn a little about the Dictionary app. Let’s get started.
What Is the Dictionary App on Mac
The Dictionary app is Mac’s all-in-one solution for all the users that want the convenience of a translation tool that can work within your document without requiring you to open an external application to do the task.
It saves users time by providing real-time lookups for words and allows them to accurately translate to and from English to any other language without requiring two different dictionaries. In addition, it can be used with any app that supports macOS text processing.
Besides allowing users to translate words directly from Spotlight, the app supports more than 80 different languages, making it one of the best in the market.
How to Stop Dictionary From Popping Up on Mac
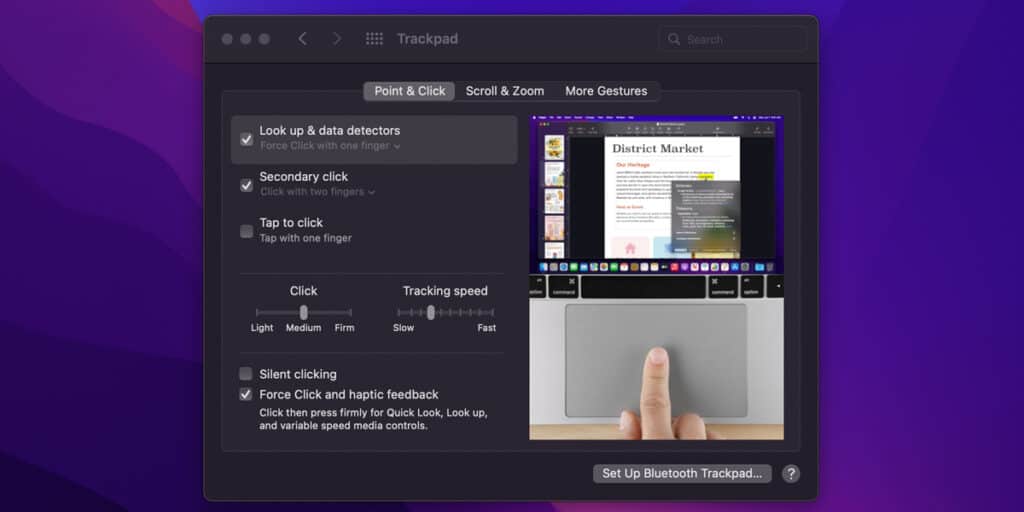
Since Dictionary is a built-in app available on the macOS Monterey, Ventura, and other older versions, you can’t technically turn off or disable the application altogether. But you can turn off the “Look up and data detectors” feature, which will stop all the annoying Dictionary Pop ups.
Here’s how you can do it:

- Navigate to your Menu Bar and click the Apple icon on the top left corner.
- Select System Preferences from the context menu.
- Now click Trackpad.
- Once in the Trackpad settings, click the Point & Click tab.
- Finally, uncheck the Look up & data detectors box.
Congratulations, you have successfully stop Dictionary from popping up on Mac.
Related:
How to Hide the Cursor On Mac
How Do I Turn Off Spell-Check in Chrome Mac
If you have been using Chrome on your Mac, you must’ve noticed that it auto-checks your spelling in specific text fields, which can sometimes be annoying. Here’s how you can turn it off:

- Go to your Applications and open Google Chrome from the list.
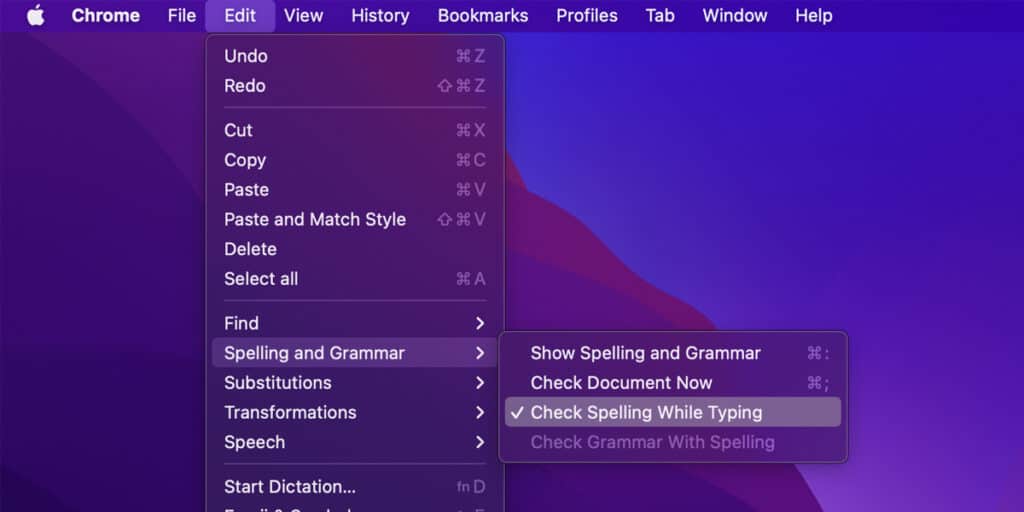
- Click Edit on the top menu bar and navigate to Spelling and Grammar (ensure you are currently in a field where writing is possible to make it work).
- Simply untick the option with Check Spelling While Typing.
Effective immediately, you have turned off spell-check in Google Chrome on your Mac.
How Do I Turn On a Dictionary on Mac
If you are having issues while typing, you can always turn your Dictionary back on whenever you want. Here are the steps that you need to follow:

- Head to your Menu Bar and tap the Apple icon at the top left corner.
- Now click System Preferences present on the context menu.
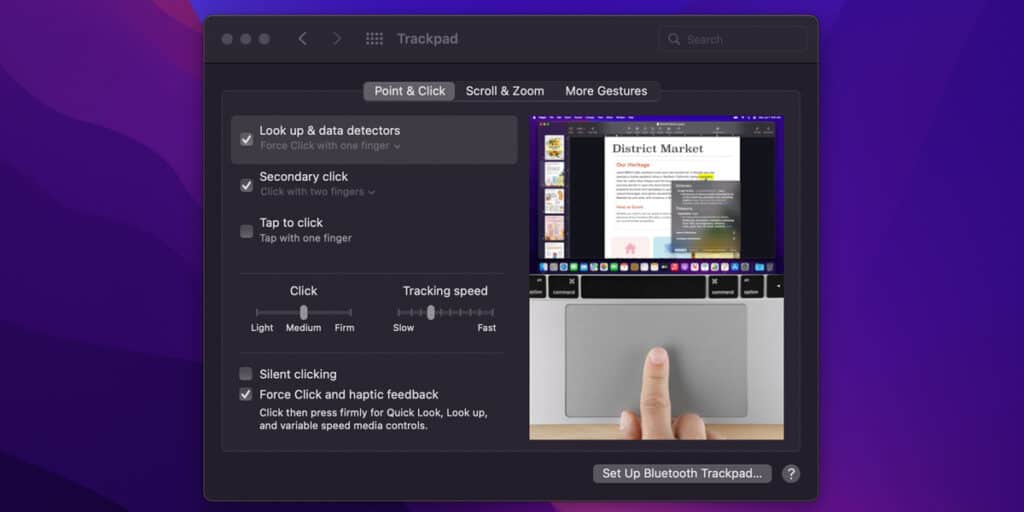
- After this, select Trackpad.
- Now once you’re in the Trackpad settings, head to the Point & Click tab.
- Finally, check the Look up & data detectors box.
Congratulations, you have successfully turned on the Dictionary on your Mac.
How Do You Pull Up the Dictionary on a Mac
Using a Mac for writing, the Dictionary can be a highly beneficial tool for daily activities. Not only does it allow users to look up any word, but it also provides translations in more than 80 different languages.
So if you are looking for ways to pull up this tool quickly, we have composed two different methods to execute this task flawlessly. Let’s check each of them individually.
1. Setting Shortcut Keys
The first method allows users to create custom shortcuts to pull up a Dictionary on a Mac. Here’s how you can do it:
- Navigate to your System Preferences and click Keyboard.
- Once there, tap on the Shortcuts tab.
- Now click Services present on the left column of options.
- After this, tap Searching present on the right column and select Look Up in the Dictionary.
- Finally, insert your desired shortcut key.
Viola, you have set up a custom shortcut key to pull up Dictionary on a Mac.
2. Using the Built-In Command
The second method on the list is a little more straightforward than the first one and requires you to use the pre-existing command to pull up a Dictionary on a Mac. Simply press Ctrl + Cmd + D to show all the definitions for your desired word.
Related:
How to Get Rid of Sidebar On Mac
Where is the Dictionary Stored on Mac and How Can You Edit It
If you want to add new words to your Dictionary or edit the existing words according to your needs, there is a way to do it. But since Mac hides the Dictionary file, you will have to make a little effort to access it.
To access the Dictionary file on Mac, follow these steps:

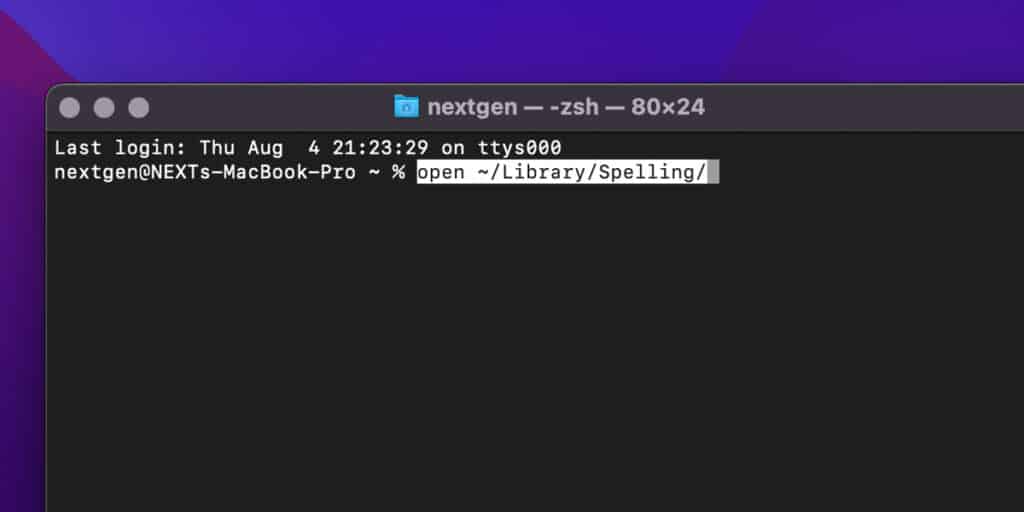
- Head to Applications and open the Terminal App.
- Once opened, paste the following command “open ~/Library/Spelling/” and hit Enter.
- Now it will open the Finder window and show a file named LocalDictionary.
- Simply drag this file on your Desktop to create a backup.
- Finally, Double-click on the file to open the LocalDictionary file in TextEdit.
Once this file is opened, you will see the list of all the dictionary words in alphabetical order. Now, if you try to add new words to this file, it will not work. So here is the solution for that.
- Create a list of all the words you want to add to the Dictionary in a text file.
- After this, copy and paste your existing Dictionary word list into a text file.
- Now simply merge these two text files and place the words in alphabetical order. You can do it manually or use a third-party service like The Alphabetizer.
- If you choose the website, copy and paste the list of words into the website.
- Now select Newline and click Alphabetize to sort the list of words.
- After this, paste this new list into your LocalDictionary file and save it.
- Finally, open the Terminal app, paste the following command “killall AppleSpell”, and tap Enter.
Congratulations, you have successfully edited your Mac Dictionary.
