
Spaces is a great feature that allows you to have a cluttered-free and minimalistic desktop. If you have too many opened documents, then you can head over to another fresh desktop without closing any documents.
But, even though Spaces work great, you may still want to disable spaces on mac because having multiple desktops opened can take up a lot of resources. So, in this guide, we will talk you through how you can disable Spaces on Mac, and how you can move across multiple spaces.
Completely Disable Spaces On Mac
Apple usually doesn’t give its users the option to enable/disable different features. However, it is fairly simple to disable Spaces on Mac. Just follow these easy steps:
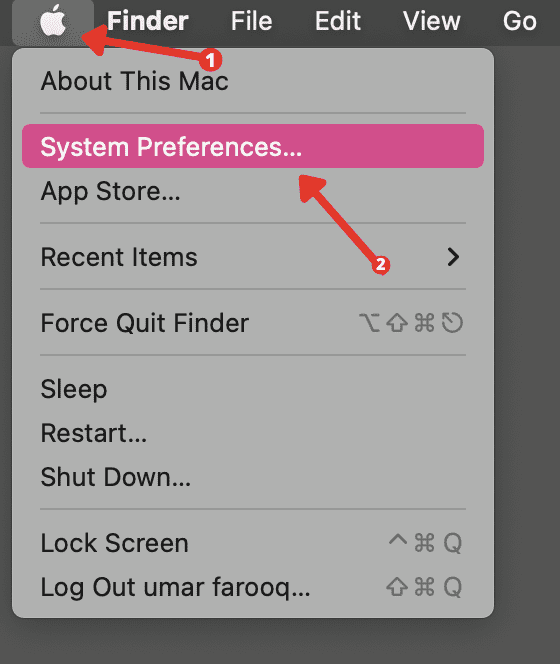
- On your Mac, at the top-left corner, click on the Apple icon.
- In the drop-down menu, select System Preferences.
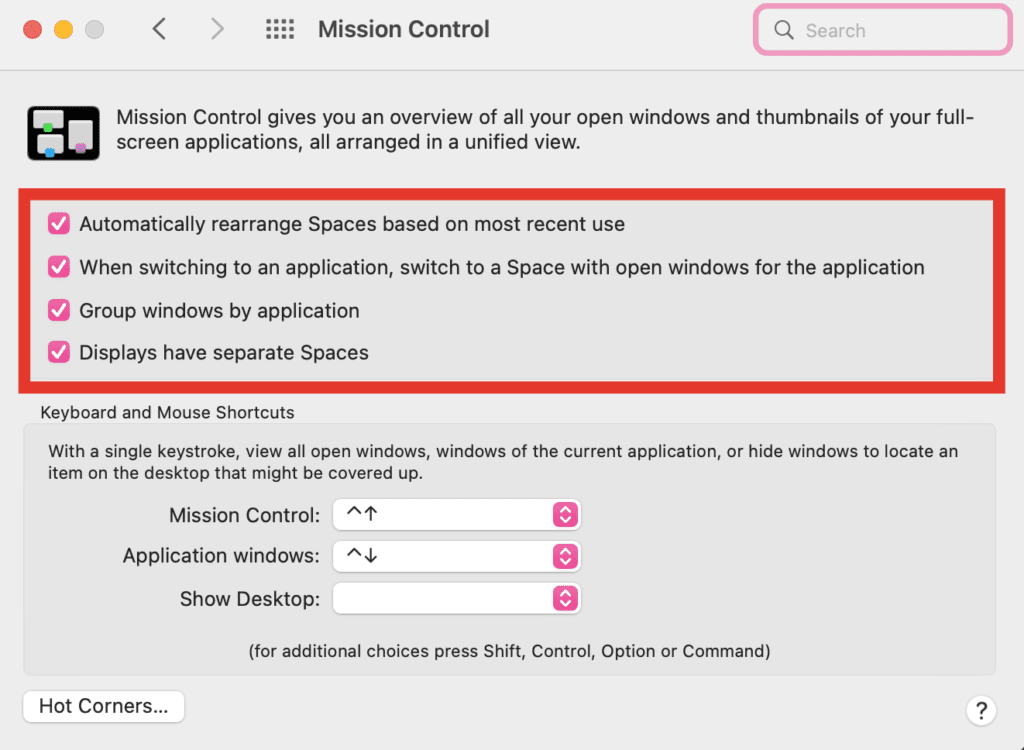
- Look for Mission Control and click on it.

- In the Mission Control window, Uncheck all four of the checkboxes that pertain to Spaces.
After following these steps, you won’t have Spaces anymore. But just to be on the safe side, you can also disable the Mission Control gestures. Just follow these steps:
- On your Mac, at the top-left corner, click on the Apple icon.
- In the drop-down menu, select System Preferences.
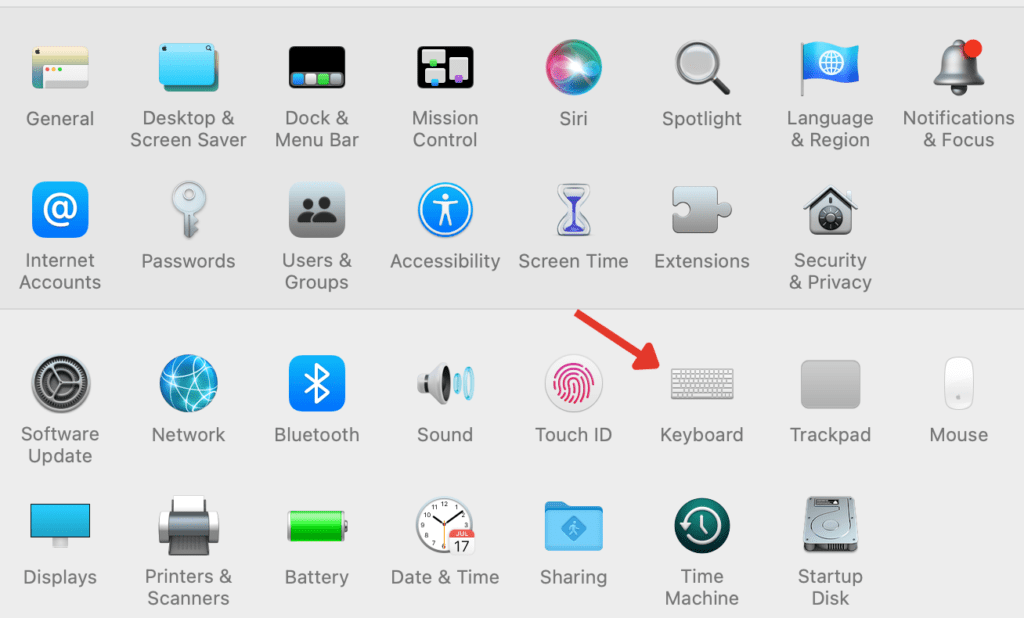
- Look for Keyboard and click on it.
- In the Keyboard window, click on the Shortcuts tab.
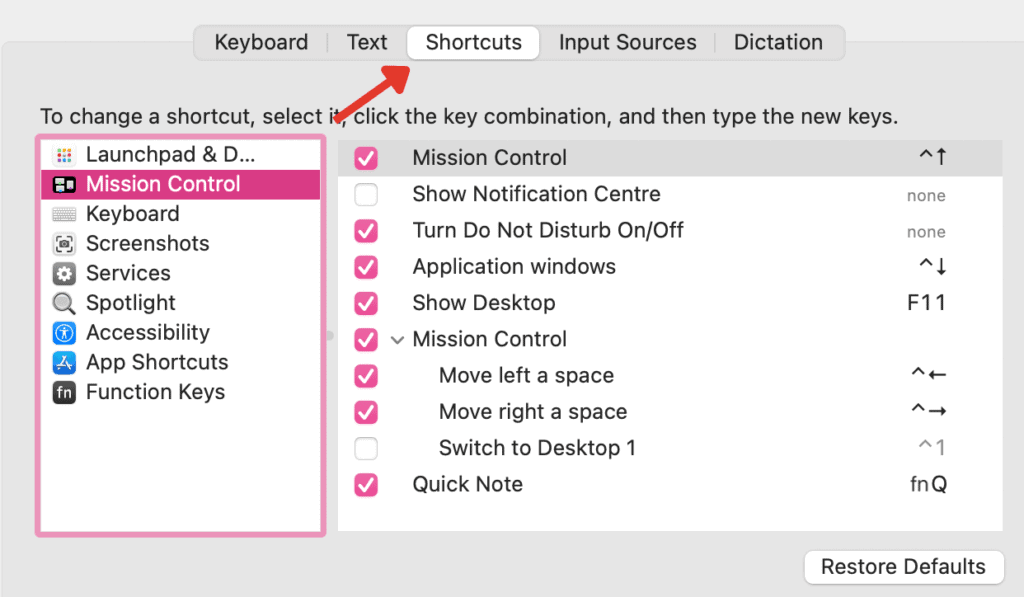
- On the left-side, click on Mission Control.
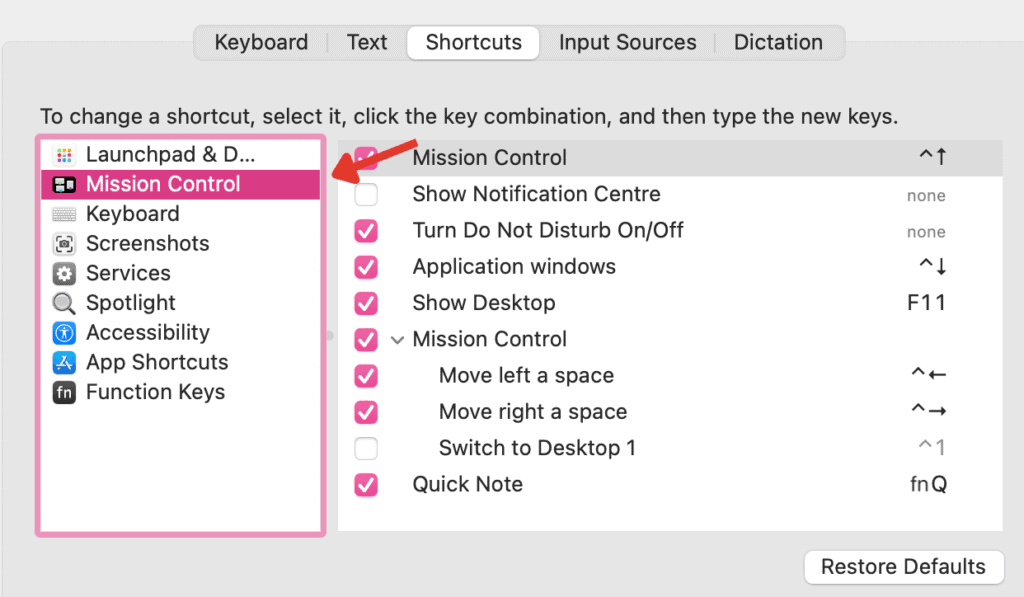
- Finally, look for any unwanted keyboard shortcuts on the right, and uncheck them.
Now, you have successfully disable Spaces on Mac, and there will be no accidental gesture triggers anymore. Since we mentioned Mission Control, let’s talk about how you can configure it as well.
Related:
How to Run Steam Games as Administrator on Windows 10
How to Configure Mission Control
If there is something in particular that annoys you about Spaces, then you can configure Mission Control to your liking and enjoy multiple desktops. You can open Mission Control configurations in three simple steps:
- On your Mac, at the top-left corner, click on the Apple icon.
- In the drop-down menu, select System Preferences.
- Look for Mission Control and click on it.
Now, you are have many options to configure Mission Control, let’s talk about a few of them:
- “Automatically rearrange Spaces based on most recent use” will automatically organize your Spaces based on what it thinks you want. Most users don’t like this feature as it can be quite confusing and annoying sometimes.
- “When switching to an application, switch to a Space with open windows for the application” makes sure you are switched to an active window even if the window is on another desktop by pressing Command+Tab.
- “Group windows by application” works really well to make sure that all the windows of the same application are next to each other in Mission Control.
- “Displays have separate Spaces” is a great feature for users with multiple monitors. With this option checked, each of your displays will have its own set of desktops.
- Next up on the list is Dashboard. It is quite annoying as it stays on your face when you press F3 to bring up Mission Control. So you can turn it off from here.
- At the very end there is an option to set custom mouse and keyboard shortcuts for launching Mission Control.
So, after going through each of these options, you should have an idea of how you can customize your Spaces to benefit from the app fully.
How to Create a Space
To create a Space, you need to enter Mission Control. So first, do any of the following:
- From a keyboard: Press Control-Up Arrow, or press the Mission Control key (or use the Control Strip). You can head over to the Mission Control preferences to change the keyboard shortcuts.
- From a trackpad: Swipe Up using three fingers. You can also swipe down to leave Mission Control. Head over to the Trackpad preferences to change or turn off the trackpad gestures.
Once you have entered Mission Control, click the Add button in the Spaces bar to create a Space. You can create up to 16 spaces.
Related:
How to Turn Off Overclocking in Windows 10
How to Move Between Spaces
You can move between spaces via multiple options. Simply do any of the following:
- From a keyboard: Press the Control key with the Right or Left arrow key.
- From a trackpad: Swipe Right or Left with three or fingers.
- From a Magic Mouse: Swipe Right or Left with two fingers.
- From Mission Control: Move the pointer to the top of the screen, and click a space in the Spaces bar.
If you have a Mac with a Touch Bar, then just tap a space in the Touch Bar to move between spaces. Now that you can move between spaces, let’s talk about how you can move app windows from one space to another.
Move App Windows From One Space to Another
To move app windows from one space to another, do any of the following:
- Enter Mission Control, then drag the app window up to the space you want it moved into.
- Drag the app window to the edge of the screen. The window will move to the next space after a moment.
In the Spaces bar, if you drag the app window onto a full screen app, you can enter Split View and use the two apps side by side.
To exit Split View, simply move the pointer to the thumbnail in the Space bar, then click the Exit button.
Related:
How to Delete Screenshots on Mac
How to Delete a Space
Deleting a space is just as simple as creating a space. Just move the pointer to the space you want to delete in the spaces bar, and click the Delete button. The opened windows will be moved to another space once it is deleted.