One of the best things about using macOS is that it provides you with top-of-the-line features and functionalities and offers you a vast arsenal of powerful tools that can monitor your activities and execute your tasks efficiently.
Although these tools are helpful, some maintain a history of your past actions and tasks, which can sometimes be annoying. In this article, we will discuss one such tool and see how to clear Terminal screen on Mac.
But before getting into that, we will first discuss what the Terminal app is and how it functions. Let’s get started.
What Is the Terminal
Like the Command Prompt available on Windows, Mac’s Terminal also serves the same purpose. It allows users to execute a task on their Mac using the command line interface (CLI) instead of the graphical user interface (GUI).
It allows users to have specific and even administrative access to many features and applications available on the Mac. Users can also search for different functions, find manual pages, and even perform various integrations with the Spotlight app.
Besides its usual features, the Terminal is also referred by professionals as a UNIX shell and an emulator.
How to Clear Terminal Screen on Mac
If you have been using the Terminal for a while, you must have noticed how your screen becomes cluttered after executing a few commands. Luckily, there are ways that you can use to clear the Terminal screen on your Mac. Let’s go through them one by one:
1. Using a Command
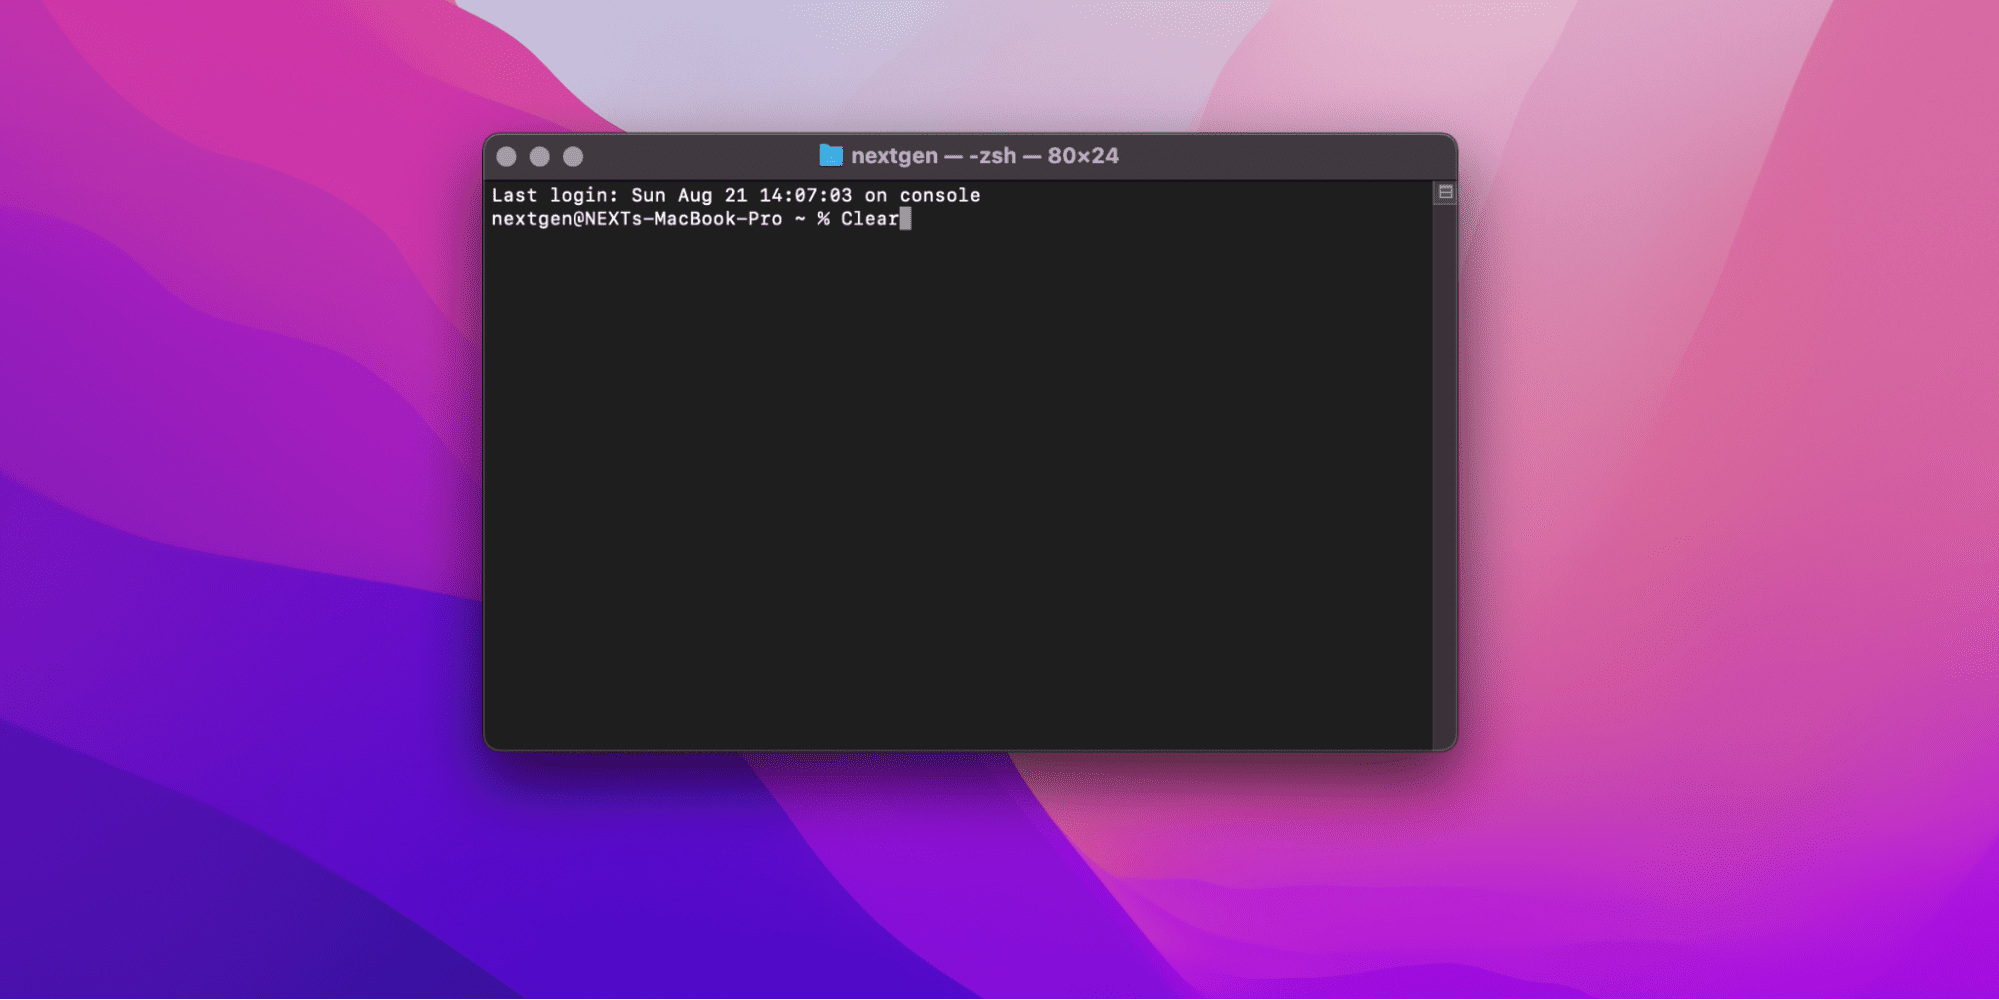
The first and most straightforward method on our list to clear Terminal screen on mac is through a command. You only require two steps to execute it, and here’s how it’s done:

- Type Clear into your Terminal.
- Hit the Return Key.
That’s it, now your Terminal screen should be clear.
Related:
How to Change Date and Time on Mac Using Terminal
2. Using a Keyboard Shortcut
In case you are too tired to type a command, you can also get the same results by using a keyboard shortcut. Simply hit Command + Option + K on your keyboard, and it will also clear Terminal screen on Mac.
3. Using the Menu
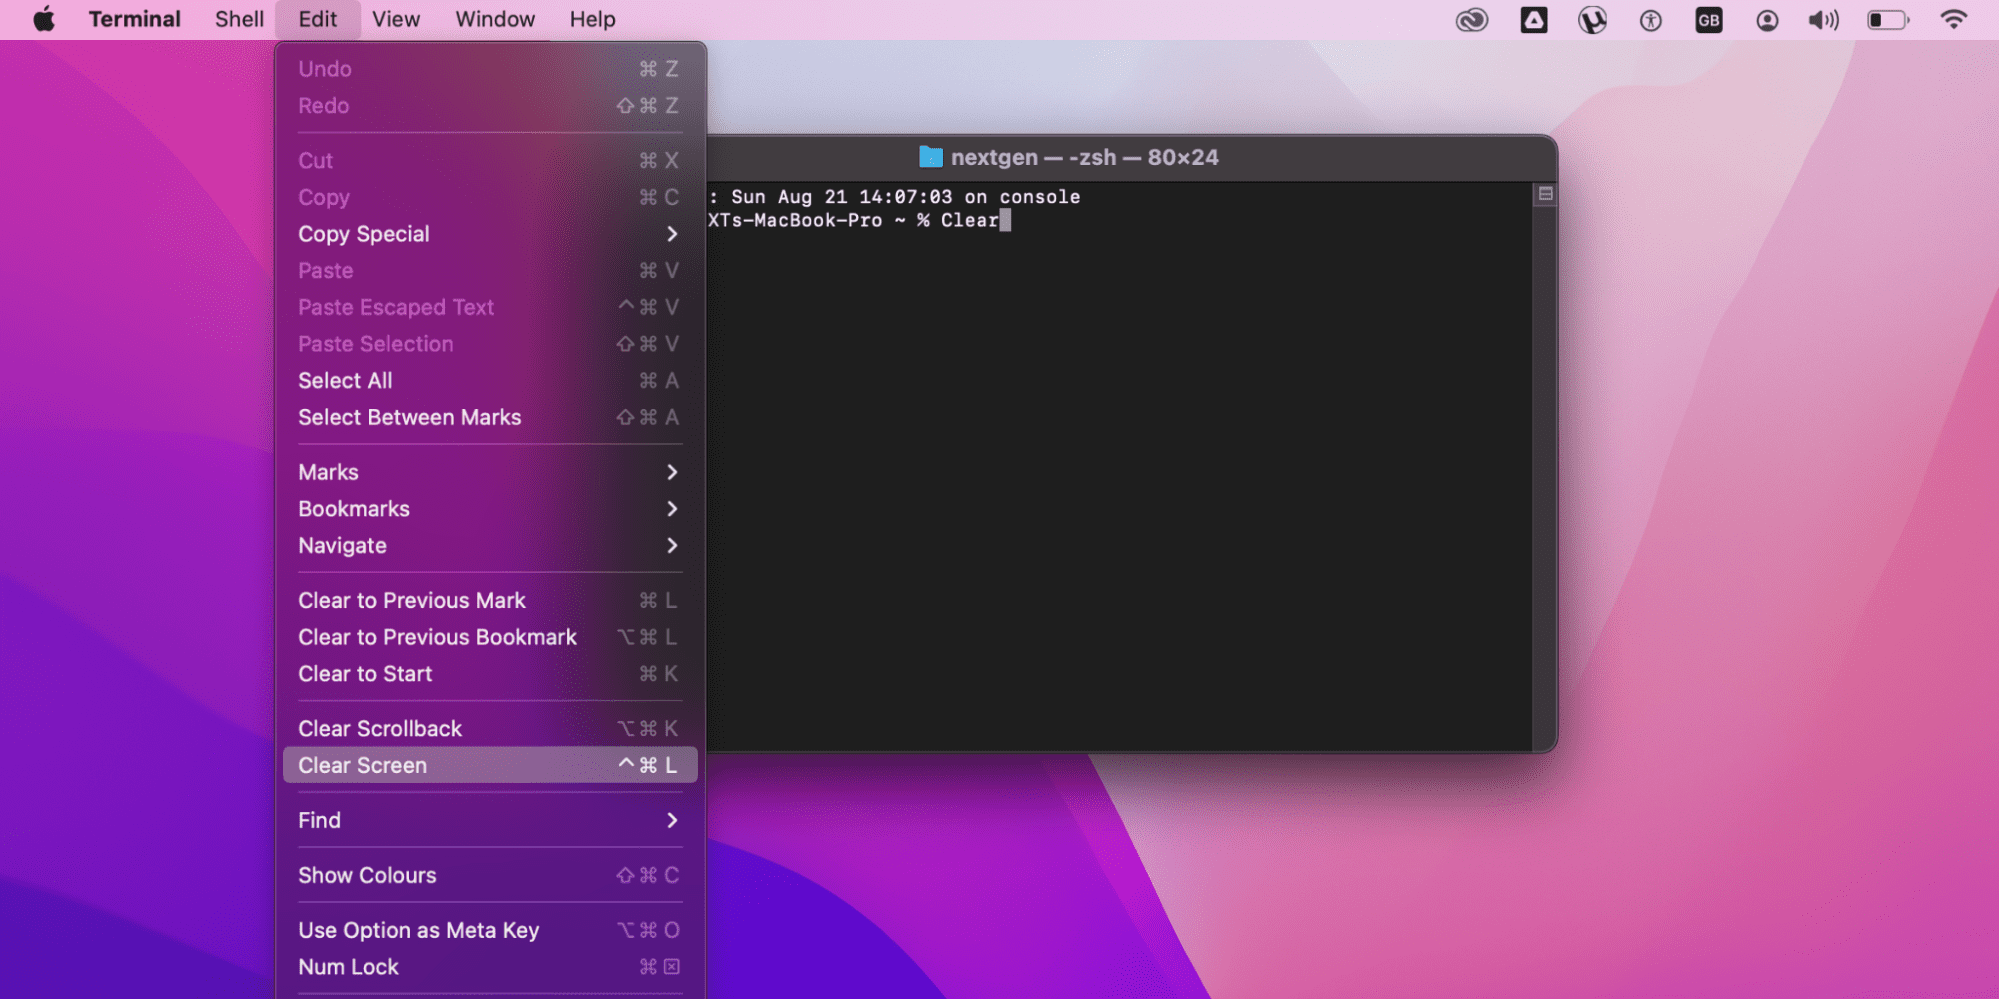
Another method to do this is by using the menu bar on your Terminal. Here are the steps to execute it:

- Click the Edit tab present on top of the screen.
- Now click Clear Screen.
That’s it, now you have successfully cleared your Terminal screen.
4. Using the Scrollback
Now when using the above three methods, you might have noticed that even though each of them clears your Terminal screen, when you scroll back up, all of your previous commands are still visible on the Terminal.
So, all a clearing command does is add new lines to your Terminal until all the previous entries aren’t visible on the screen anymore. Although it technically completes the job, you still can’t call it perfect.
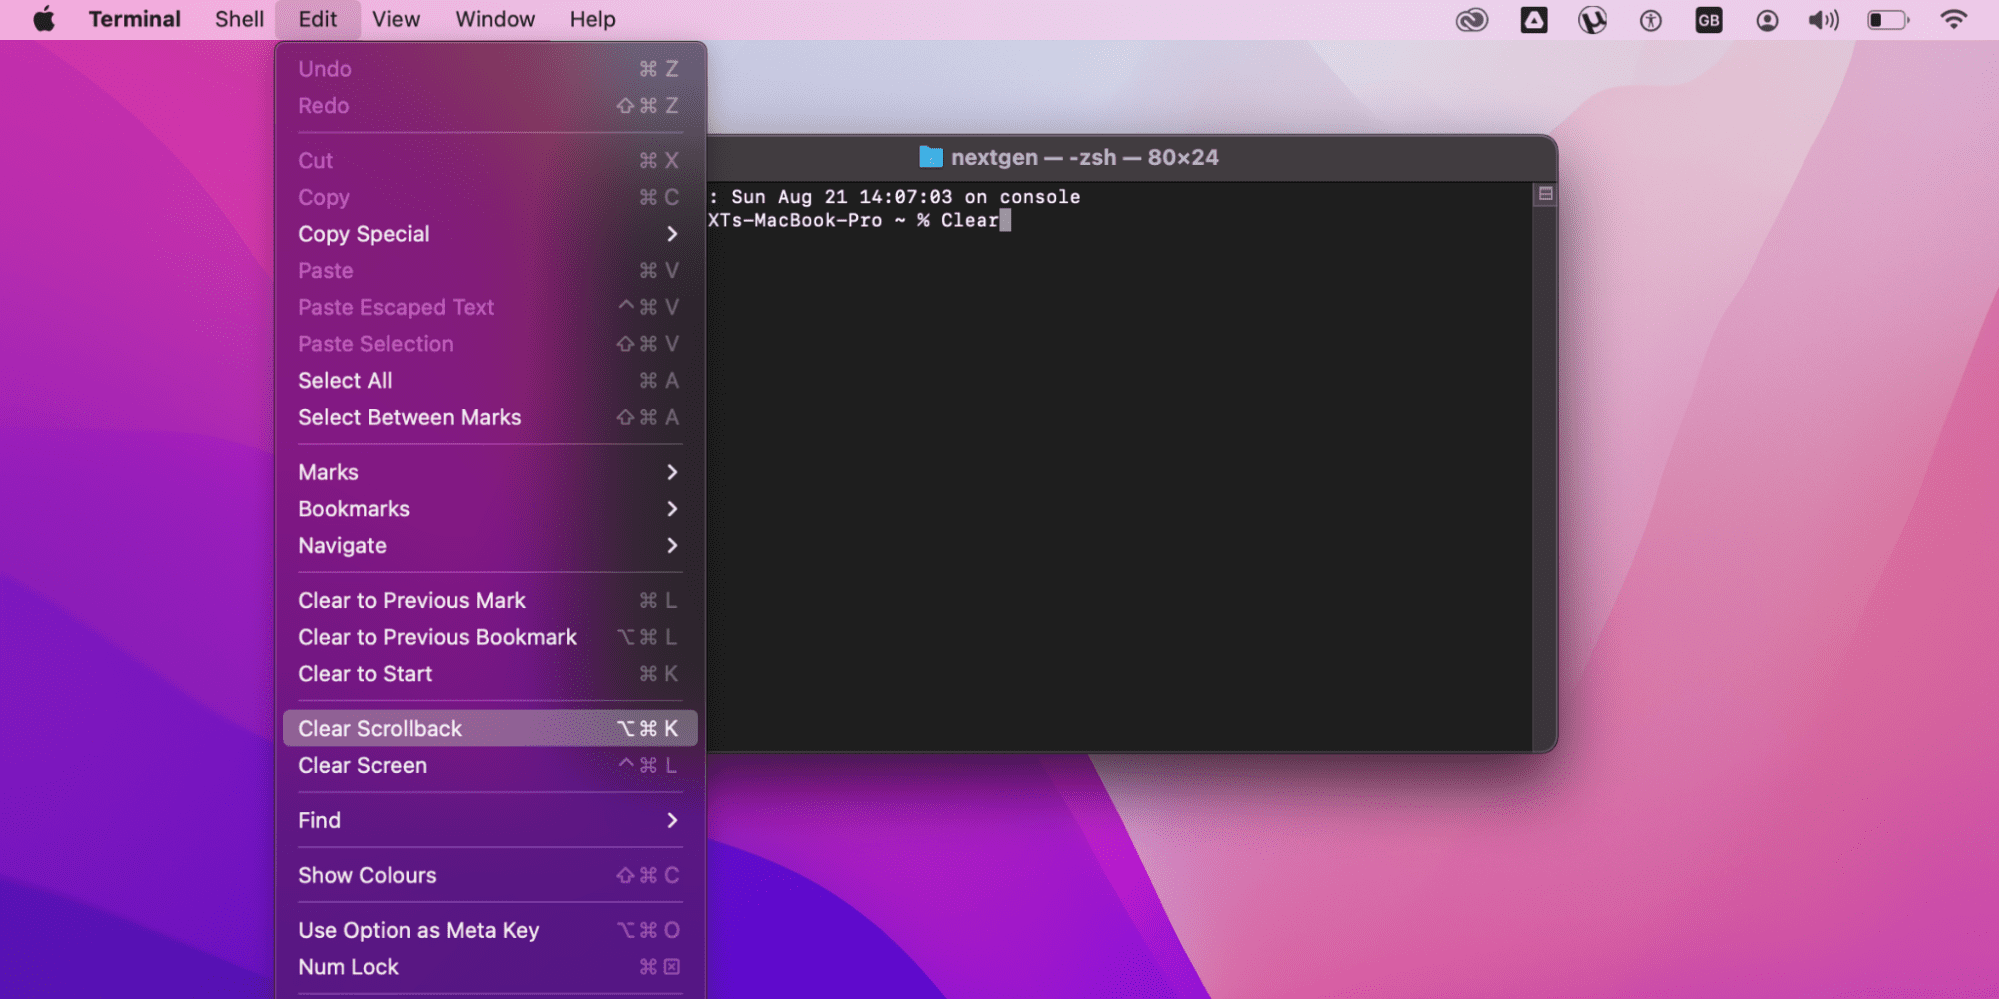
Well, on the bright side, there is still a method available to clear your Terminal screen along with all your past commands. You can either do this by pressing Command + Option + K or use the alternate method. Here are the steps to execute it:

- Click the Edit from the menu bar of your Terminal screen.
- Navigate to Clear Scrollback and click on it.
Effective immediately, you have successfully cleared your Terminal screen and all the past entries.
How to Clear Cache on Mac
Like all other operating systems, Macs also like to store caches on their storage to improve their overall performance and efficiency. Most of the time, these caches are stored temporarily, and your system does a fine job ensuring it doesn’t overeat your storage or hinder your productivity.
Now just like the system cache, your browsers and applications also store caches for the same purpose, which is pretty helpful, but at times you will have to clear them so that you have enough storage available for your other needs.
Now let’s see how you can clear caches on Mac.
Related:
How to Reset Admin Password on Mac With Terminal
Browser Cache
Whenever you visit a new website, your browser stores a small amount of data on your storage, which it utilizes the next time you visit the same website to improve your browsing experience and save your bandwidth simultaneously.
Even though it can be pretty handy, you can still clear out your browser cache every now and then because it helps you with your storage. On top of that, it also protects your privacy by hiding your online activities. Here are the steps to clear your caches in Safari:

- Open the Safari browser and select Safari from the menu bar.
- Click Preferences and tap the Advanced tab.
- Now check the “Show Develop menu in menu bar” box and close the preference window.
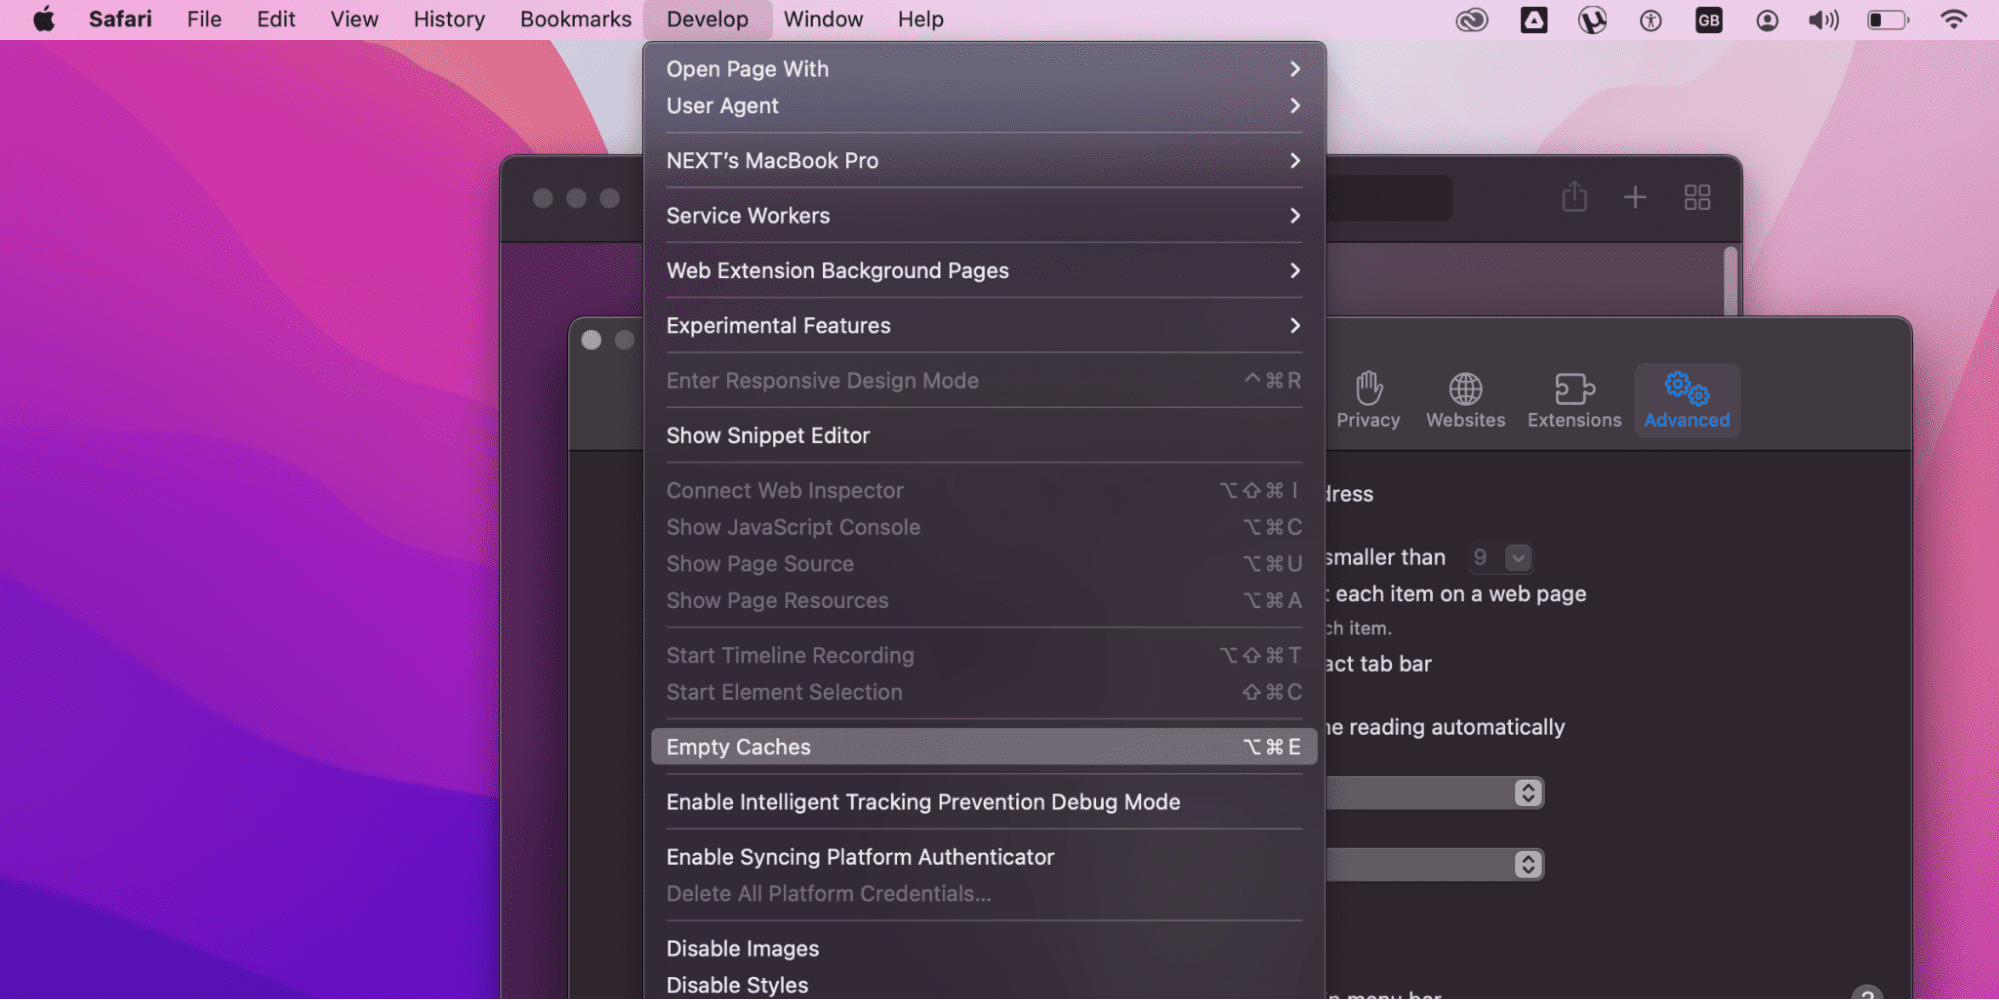
- Now navigate to the menu bar again and click on the Develop option.
- Finally, click Empty Caches.
Congrats, you have successfully cleared the caches on your Safari browser.
Application Cache
Like browsers, many individual apps also store temporary caches on your Mac as it allows them to do actions quickly. In addition, depending on the application, the size of the caches can also vary and potentially use a lot of your storage space.
Luckily they can be cleared, and here are the steps to execute it:
- Navigate to Finder, click Go and then Go to Finder.
- Now type ~/Library/Caches into the text bar and press Go.
- After this, select all the files related to the respective application cache you want to delete.
- Finally, drag them to the Trash and empty it.
That’s it, now you have cleared all the relevant application cache on your Mac.
System Cache
At last but not least, let’s check out how you can clear the system cache on your mac:
- Open your Finder and click Go.
- Now select Go to Finder and enter the following ~/Library/Caches coordinates.
- After this, click Go, which will open up the cache folder.
- Finally, drag all the files from the cache folder to the Trash and empty it.
Congratulations, you have successfully cleared the system cache from your Mac.
Bonus Method: Using the Mac Cache Cleaner
Although all the methods mentioned above are pretty simple and require minimal effort, it can still take your time to complete them separately. In addition, there’s always a chance that you might end up deleting something from your Mac that can cause more harm than good.
To tackle this, Mac comes with dedicated software that allows users to clean their caches without harming the system. Let’s see how you can clean your Mac using the MacKeeper and a few clicks:Open the MacKeeper app and click Safe Cleanup.
- Now select Start Scan and wait for the process to complete.
- Once it finishes, click the Caches folder to check all your caches.
- Select all the caches that you want to be deleted from your Mac.
- Finally, click Clean Junk Files.
Let the deletion process finish, and you will receive a pop-up message that all of the respective caches have been deleted from your Mac.
How to Clear Clipboard on Mac
The clipboard is one of the most used tools available on Mac, as it allows users to hold anything they copy and then paste it to another location. Although it makes many tasks convenient, it also increases the risk of leaking your confidential information like log-in credentials.
The good news is that you can quickly clear it without any issues. Let’s check out the two methods that can be used to clear the clipboard on Mac.
Using Cut or Copy
Since a clipboard can only hold one thing at a time, the easiest method to clear it is simply using the cut or copy function. Here’s how you can do it:
- Select any text on your Mac.
- Now either press Command + X or Command + C to cut or copy the respective text.
Once done, you can easily confirm this by using the Command + V to confirm whether your clipboard is cleared or not.
Using Terminal
Another method to clear your clipboard is via the Terminal app. Here are the steps to do it:
- Open your Finder, and click the Edit option from the menu bar.
- Now select Show Clipboard from the list of options.
- Afterward, head to Utilities and open the Terminal app in the Applications folder.
- Paste the following commands “pbcopy < /dev/null” into the Terminal app and hit Enter.
Congrats, you have successfully cleared your clipboard via the Terminal app.
How to Clear Recent Items on Mac
If you use a Mac daily, you should know how easily it can get cluttered with different applications, folders, and files. Here’s how you can clear recent items on different apps on Mac:
Via Apple Menu
- Click the Apple logo on the top left corner of your screen.
- After this, press Recent Items from the drop-down menu and press Clear Menu.
You have cleared the recent folders from your Mac.
Via Finder
- Navigate to the Finder, and click Go on the menu bar.
- Now head to Recent Folders on the drop-down menu and click Clear Menu.
You have cleared the recent folders from your Mac via the Finder.
