
The Notes app on Apple devices is a great way to note information, maintain lists, store text, photos, and many other things. It works really well as a day-to-day utility app.
Maybe you just want to keep notes safe, or maybe you want to send them to a non-Apple user as a PDF. Whatever your reason might be, there are several ways to backup notes on mac.
So, in this guide, we will walk you through how you can backup notes on mac. So follow along:
3 Ways to Backup Notes on Mac
The best and most simple way to backup notes on mac is to sync them with your iCloud. Most of the apple users use this method to backup their notes on mac. Another big reason to use iCloud for backups is that your notes will be synced across all your apple devices.
Also, Time Machine and iCloud automatically takes backup of all data including notes but to saving notes locally contains a manual procedure. Let’s discuss all the methods.
Method 1: Using iCloud
To backup Notes on mac using iCloud, follow these simple steps:
- On your Mac, at the top-left corner, click on the Apple icon.
- In the drop-down menu, select System Preferences.
- Click on Apple ID.

- Now, look for iCloud in left panel and click on it.
- In the iCloud settings, check the box next to Notes.

Now, let’s say for example you’re taking notes on your Mac, then you pick up your iPhone and with iCloud backup enabled, you can continue to note information on your Notes app there. This seamless integration of different apps across apple devices is what keeps users in the Apple ecosystem, and it works like a charm.
Related:
How to Run Steam Games as Administrator on Windows 10
Method 2: Create Local Backup of Notes as PDF
If you want to create a local backup of notes on mac, then the most recommended way is to export your notes individually as PDF files. It does not save you notes locally but also allows you to share your notes to with other people easily.
So to take backup notes on mac as a PDF, follow these steps:
- Launch the Notes app from your Dock or Finder.
- Open the note you want to locally backup as a pdf.
- On the top-left corner, click File.
- In the drop-down menu, click Export as PDF.
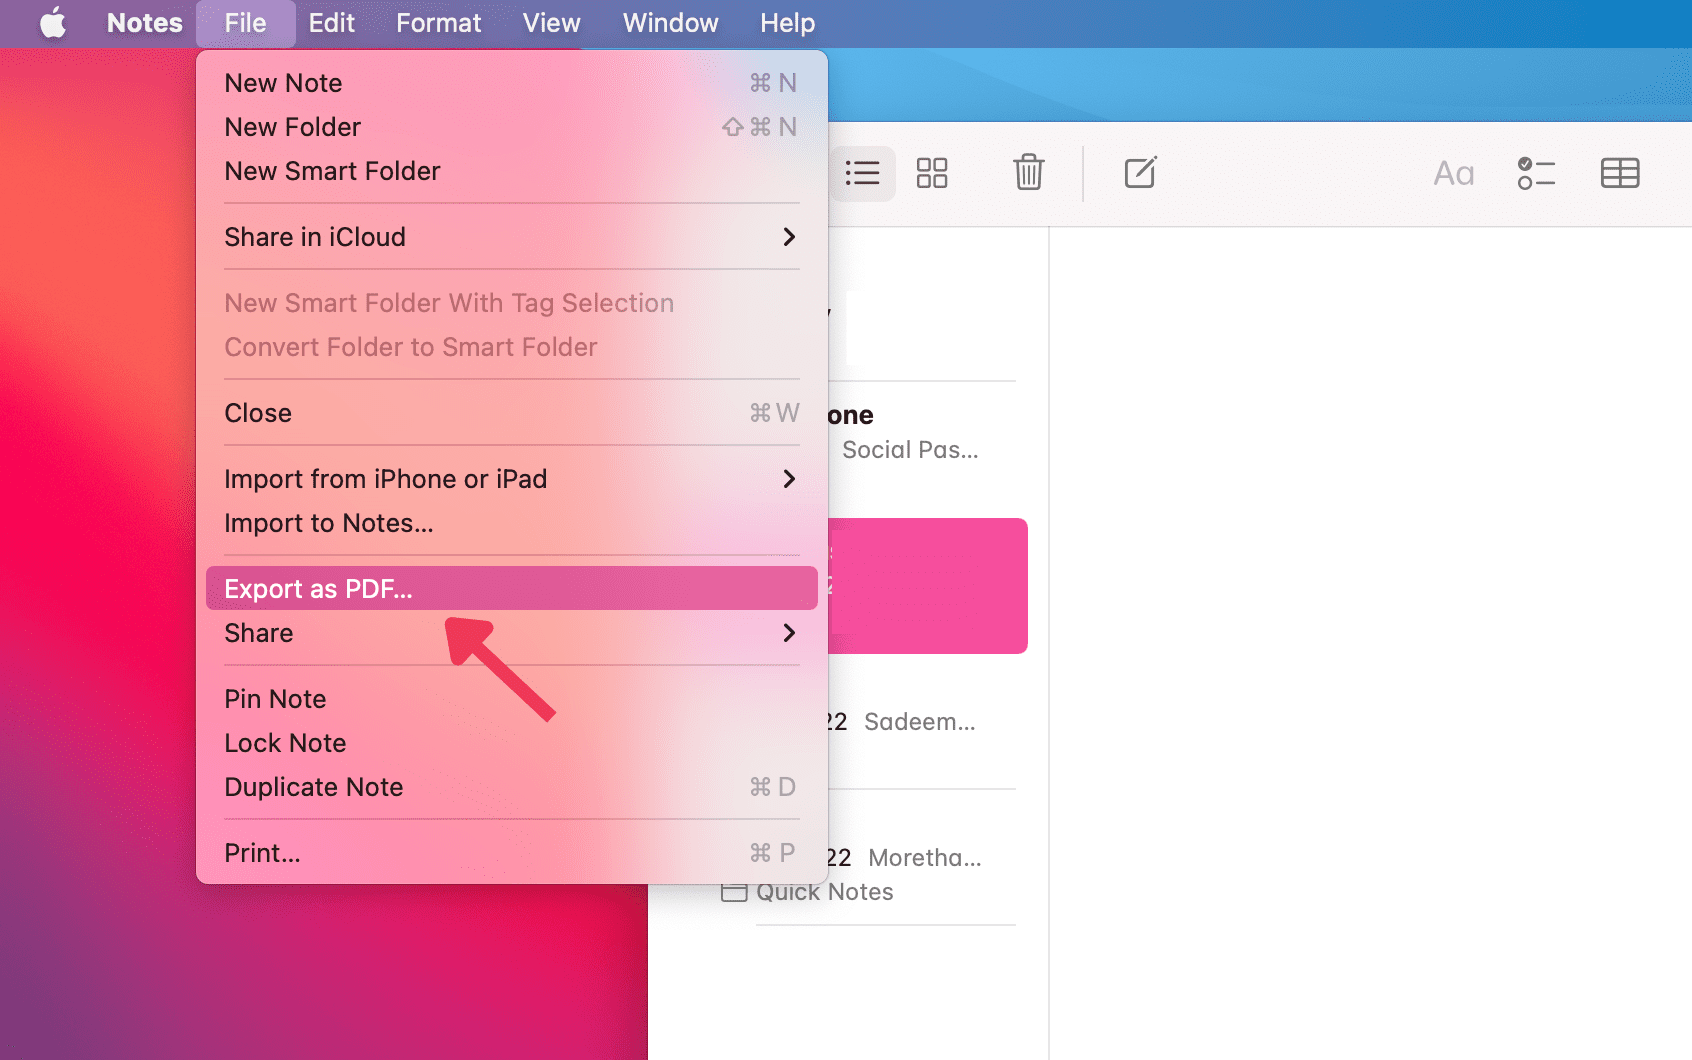
- Write down the name of the note file, and select a backup destination.
- Click Save to export the note as a PDF file.
Once you’ve followed the mentioned steps properly, you will have a PDF file saved in the backup destination that contains all the information of your selected note.
Method 3: Copy Notes into RTF Document
Even though this method is a bit of a chore, you can go for it to maintain the editability of your notes. Follow these steps:
- Open the note you want to save from the notes app.
- Copy all content of that note & launch TextEdit from Applications folder.
- In TextEdit, click on File at the top of your screen.
- In the drop-down menu, click on New to open a new document.
- Paste your note contents on the new document.
- Again click on File at the top of your screen.
- Click on Save to save your document.
- Enter the name of the document, and select a location.
- Click on Save.
TextEdit uses .RTF file format as default so you don’t have to change that. However, we must give you a heads up, this method can get quite tedious as you have to follow these steps for each document.
Related:
How to Uninstall Cinema 4D on Mac
Method 4: Backup Notes Library Dictionary
Maybe you don’t know but notes app keep all the data safe in a hidden folder on your mac. The file is actually a SQLite Database where all the notes are stored. We cannot open that file simply nor we can copy the whole directory to somewhere else.
This method looks like a bit difficult but it is not as it is the most effective method to backup notes on mac. Just follow the steps below to perform this method.
- Launch Finder on your Mac
- From the top bar of mac, click on Go and select Go to Folder
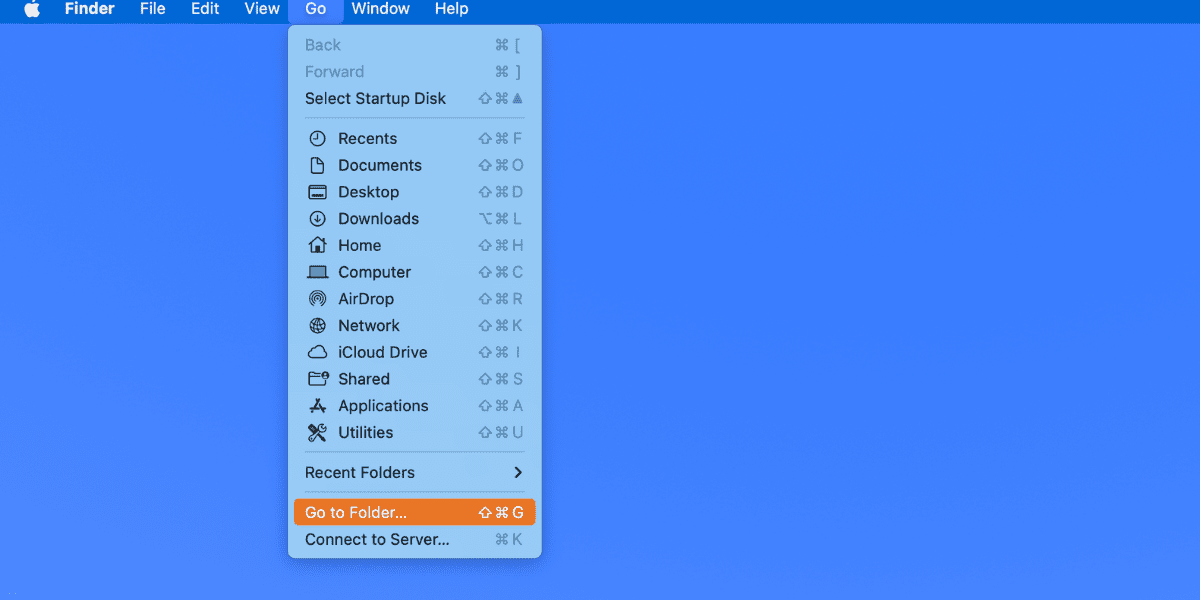
- Paste this address ~/Library/Group Containers/group.com.apple.notes/ and Press Enter.
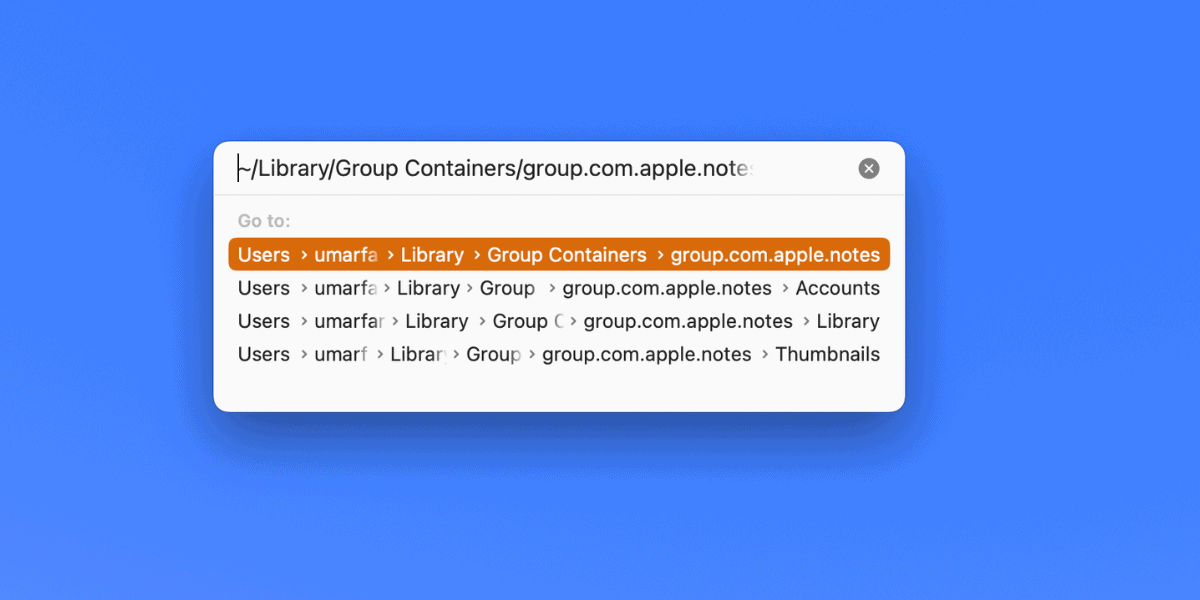
- This Folder contains all the backup of your notes whether it is stored locally on your mac or on iCloud. Copy this entire folder to somewhere else and safe it. This will backup notes on mac.
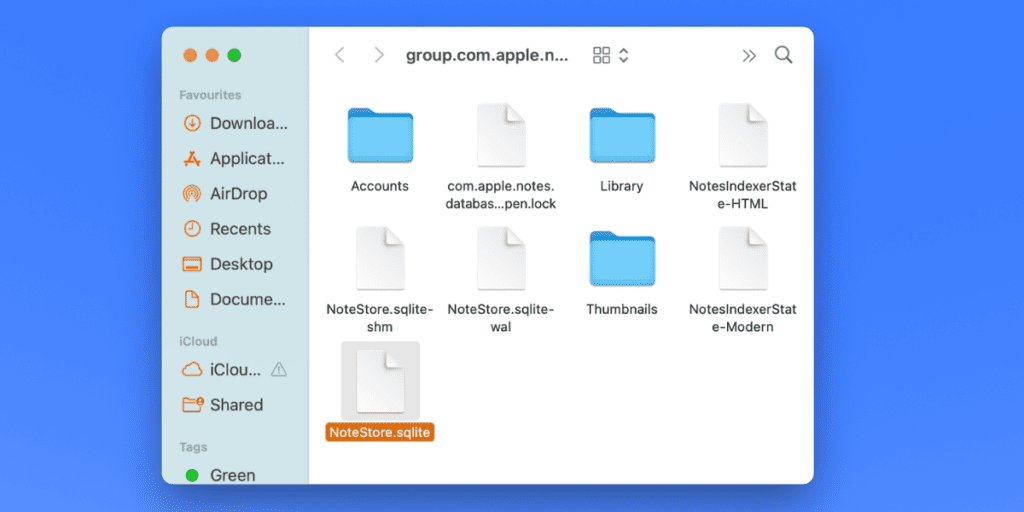
Your actual notes are stored in the notestore.SQLite file which we can’t open on the mac. The other folders such as Library contains the Media stores in the notes. If you backup the whole folder, you will be assured to backup the whole notes safely.
Import Notes On Mac
When it comes to text file formats, you can import four types of text files into Notes. These file formats are:
- .RTF
- .TXT
- .RTFD
- .HTML
You can also import Evernote Export files (.ENEX files) into your Notes app. A single .ENEX file can have one or multiple notes, so each of those is converted to a new note in the Notes app after importing.
Now to import text files into your Notes app, follow these steps:
- Launch the Notes app from your Dock or Finder.
- In the sidebar, Click on a folder in the account (iCloud or On My Mac) that you want to import files into.
- Head over to the menu bar on the top of your screen, and click on File.
- Select Import to Notes from the drop-down menu.
- Select one or more files, or if you want to import a folder with all the text files in it, then select that folder.
- Remember to click “Preserve folder structure on import” while importing a folder to keep the notes organized the way they were in the folder.
- Click Import.
You can open your new (imported) notes under the Imported Notes folder in the Notes app. From there you can rename or organize your notes into any folder you want.
Related:
How to Uninstall NetBeans on Mac