
Have you ever been stuck in a problem where you’re trying to print something and your printer just can’t get to work for some reason? From low ink levels to a straight-up paper jam, no matter how much you try, your printer just keeps throwing up issues.
Well in such a case, the first thing you should do is to print test page. It can include a text, image, or graphics which is used to gauge your printer’s performance and identify many issues.
In this guide, we will walk you through step-by-step on how to print test page on Mac, then we will also talk about the problems a test page can highlight.
Let’s get started.
How to Print Test Page on Mac
Printing a test page is quite simple. However, before you do so, make sure:
- Your printer’s LEDs are not displaying red or amber lights, or an error message.
- Your printer is connected to the computer.
- Your printer is powered on.
After that, follow these steps to print test page on Mac:
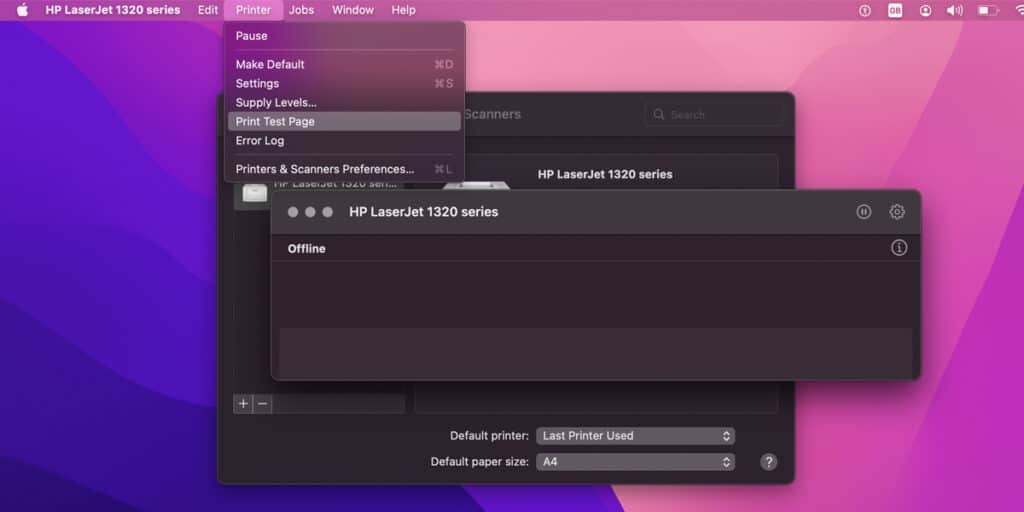
- First, click on the Apple icon and select System Preferences from the drop-down menu.
- In the System Preferences window, click Printers & Scanners.
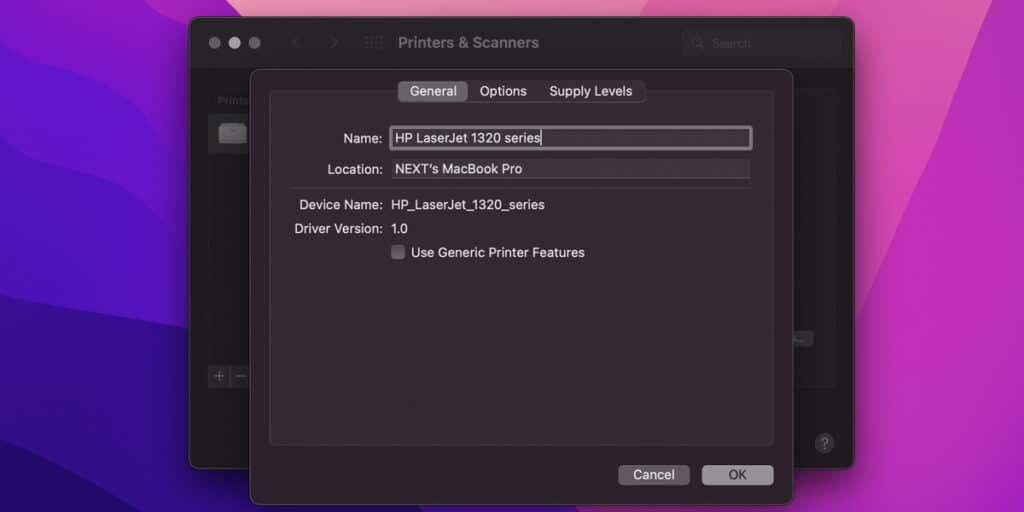
- In the Printers window, you will see the name of your printer. Click on it.
- Make sure the printer queue is clear.
- Select Options and Supplies.
- In the new window, head over to the Utility tab.
- Now, add a sheet of A4 paper into the paper cassette of your printer.
- Click on Print Test Page.
After following these steps, your printer will print out a test page.
Related:
How to Change Printer Settings on Mac
Issues that a Printer Test Page can Highlight
Once you have printed a test page, now you can analyze it to look for issues. Some of the main issues that a test page can identify are:
- Clogged Printhead: A printhead is used in transferring ink to the page. If you don’t use your printer frequently, then the dried ink may clog the printhead which can cause negative print performance. So if the test page has breaks in text or colors, or light or spotty printing, it means your printer has a clogged printhead.
- Alignment Problems: If you have placed the cartridges unevenly or if some mechanical component of your printer has been damaged, then the test page will most likely be distorted or skewed as compared to the electronic picture.
- Uneven Ink Flow: If the cartridge is low or faulty, then it can cause inconsistent ink flow where one part of your test page has more ink while other has less. It can basically affect both the color composition of your printer and the line strength.
- Printer Status: If you print a test page and your printer prints it perfectly, however, it still cannot print other documents, then it means that there is a communication or a system issue instead of a printer malfunction.
Look for any of these signs in the test page to figure out your printer’s issue.
How to Solve Printer Issues
So far we have discussed how to print test page on Mac, and what issues can a test page highlight. However, you may be wondering, once you’ve figured out the problem, how do you fix it? So let’s talk about that.
1. Clogged Printhead
If your printer has a clogged printhead, then you can fix it by performing a printhead cleaning cycle.
- First, click on the Apple icon and select System Preferences from the drop-down menu.
- In the System Preferences window, click Printers & Scanners.
- In the Printers window, you will see the name of your printer. Click on it.
- Make sure the printer queue is clear.
- Select Options and Supplies.
- In the new window, head over to the Utility tab.
- Now click on Open Printer Utility.
- Depending on your printer, you will be given a few choices, select Cleaning from the drop-down menu.
- In the next window, select which colors you want to clean, and click OK. It is recommended to clean all colors.
After following these steps, your printer will print out a few pages to clean the printhead. The process takes a few minutes so sit tight. Once the process has finished, you can print a test page again to check for improvements.
If Cleaning does not work, then you can also try Deep Cleaning which can unclog nozzles that regular cleaning cannot clear. You also have the option to go for Bottom Plate Cleaning which prevents paper smudges and Roller Cleaning which cleans print roller making it smoother to feed paper.
2. Alignment Problems
As we have talked about earlier, a distorted print is mostly because the ink cartridges are placed unevenly. So, to fix alignment problems, you should try reinstalling the ink cartridges and make sure they fit correctly this time.
If you don’t know how to remove the ink cartridges from your printer, follow these steps:
- First of all, make sure your printer is disconnected and turned off.
- Next, open the ink cartridges compartment. Its placement can vary from printer to printer, look for a flap on the front or a lid on the top that opens. There should be a grip area or a release button around the lid or flap to open it.
- The ink cartridges are stored in a carriage which should slide into the access area once you open the compartment. Don’t try to move the carriage by force, if it has not slided into the access area, then look for a Ink Change or Stop button on the front panel of the printer.
- Now remove the cartridges by pressing a release clip. A squeeze or a push should do the job. Pull the cartridge at an angle while lifting the flap that holds the cartridge.
- Don’t touch print nozzles or the copper connectors as they can cause bad electrical connections and ink clots. Also, don’t remove any tabs or strips from the cartridges.
- Re-install the cartridges into the printer. Make sure you place them at the right angle, and they are not uneven like before. Gently press them into the slots and they will automatically lock into place.
- Close the flaps.
Once the ink cartridges have been placed properly, print test page again to check if the issue has resolved.
Related:
How to Print in Black and White on mac
3. Uneven Ink Flow
If your printer is printing with an uneven flow of ink, then it means your ink cartridges are running low. You need to replace them with new ink cartridges.
- Write down your printer’s model number and brand so you can purchase the correct ink cartridges.
- Write down the cartridges color, model number, and manufacture.
- Purchase the new cartridges by using the information you wrote down earlier.
- Remove the ink cartridges by following the steps we have discussed above.
- Replace with new cartridges. Make sure to remove the protective sticker or adhesive tape or piece of plastic over the dispenser that must be removed before you install the cartridge.
Once you have replaced the cartridges, print test page to check the results.
4. Printer Status
If your printer is printing the test page correctly, but it does not work with other documents, then you should try tweaking around your Mac for solutions. Try updating the drivers or reinstalling them.
You can also attach your printer to a different Mac and see if that works out or not. However, if there is something wrong with the physical components of the printer, and the above three methods have not worked out, then you should take your printer to a trained professional.
How to Update a Printer’s Software on Mac
When you first connect your printer to a Mac, macOS automatically downloads the printer’s driver or uses AirPrint to connect to it. However, if you are facing some printing issues and you want to update the printer’s driver, then you should follow these steps:
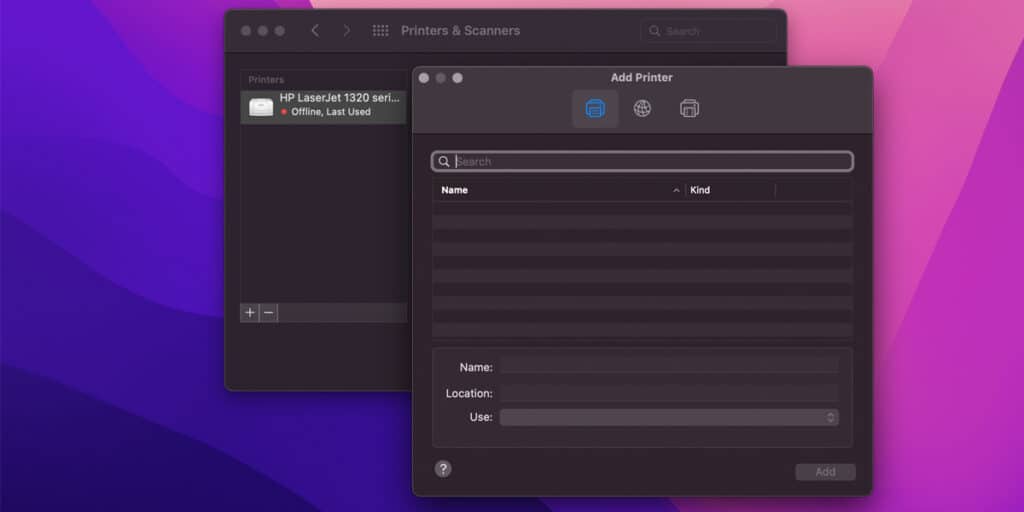
- First, click on the Apple icon and select System Preferences from the drop-down menu.
- In the System Preferences window, click Printers & Scanners.
- In the Printers window, you will see the name of your printer. Click on it.
- Once you have selected your printer, click on the “–” button on the bottom-left corner of the list to remove it.
- Now, click on the “+” button next to it to add a new printer.
- In the pop-up menu, select Add Printer or Scanner.
- A dialogue box will appear showing any printers on your local network. Wait a couple of minutes for your printer to be visible on the list.
- Once it is visible, select your printer, and click the Use pop-up menu to select AirPrint.
- If the pop-menu has no option to select Airprint, then choose Select Software to use the driver installed on your Mac. You can also choose Other in the Use pop-up menu, then select the printer driver from a file and click Add.
If there is no option to choose Airprint, then contact your printer’s manufacturer for more information. If your printer is not compatible with macOS, then try to replace it with a compatible one.